Phoenix Contact TP 6121-WXPS handleiding
Handleiding
Je bekijkt pagina 17 van 32
Installation
4109_en_E PHOENIX CONTACT 15/30
1. Connect the appropriate conductors to the supplied power connector.
2. Open the core.
3. Lay the three conductors in the core and wrap them around the outside so a second
strand is routed through the core. There must be between 3 and 5 cm of conductor be-
tween the core and connector.
4. Snap the core closed, taking care to not pinch the conductors.
3.2.4 Serial communication
The configurable D-SUB 9 port is a future enhancement. It is included in the document
for future reference when the capability is released.
The D-SUB 9 port can be configured to support RS-422, RS-485, or 5-wire RS-232 physical
layer signal levels. The serial port is configured in the Visu+ configuration environment as
either
When in Visu+ (Express), the user will select the communication driver (RealTimeDB), and
then configure the port within the station properties.
The function of the pins in the D-SUB 9 connector varies with the different configuration
settings.
Port 1 RS-232
Port 2 RS-422/485
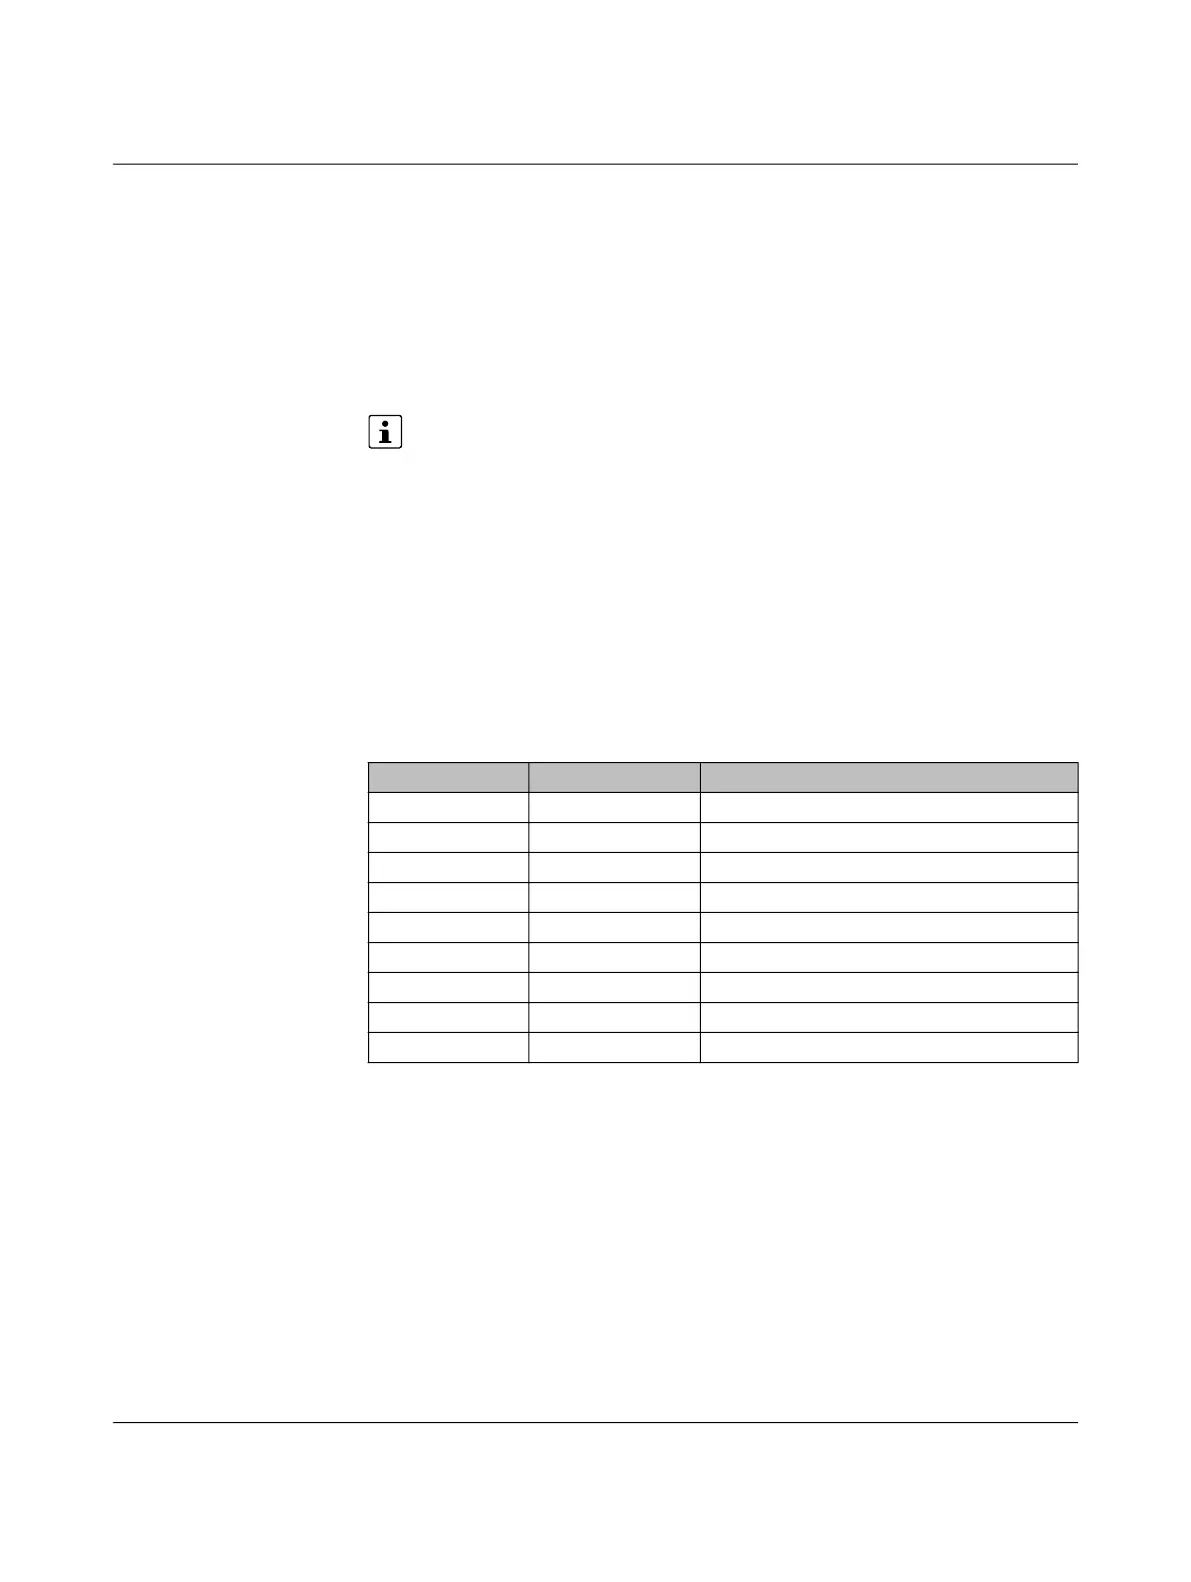
Table 3-2 D-SUB 9 pinout
D-SUB 9 pin Function
1 TX+ RS-485 transmitted data plus
2 TXD RS-232 transmitted data
3 RXD RS-232 received data
4 RX+ RS-485 received data plus
5 GND Ground
6 – Not used
7 – Not used
8 TX- RS-485 transmitted data minus
9 RX- RS-485 received data minus
Bekijk gratis de handleiding van Phoenix Contact TP 6121-WXPS, stel vragen en lees de antwoorden op veelvoorkomende problemen, of gebruik onze assistent om sneller informatie in de handleiding te vinden of uitleg te krijgen over specifieke functies.
Productinformatie
| Merk | Phoenix Contact |
| Model | TP 6121-WXPS |
| Categorie | Niet gecategoriseerd |
| Taal | Nederlands |
| Grootte | 2288 MB |


