Phoenix Contact ECM-UC-100A-UI handleiding
Handleiding
Je bekijkt pagina 40 van 80
ECM – multifunctional current measuring transducers
40 / 78 Phoenix Contact
111433_en_00
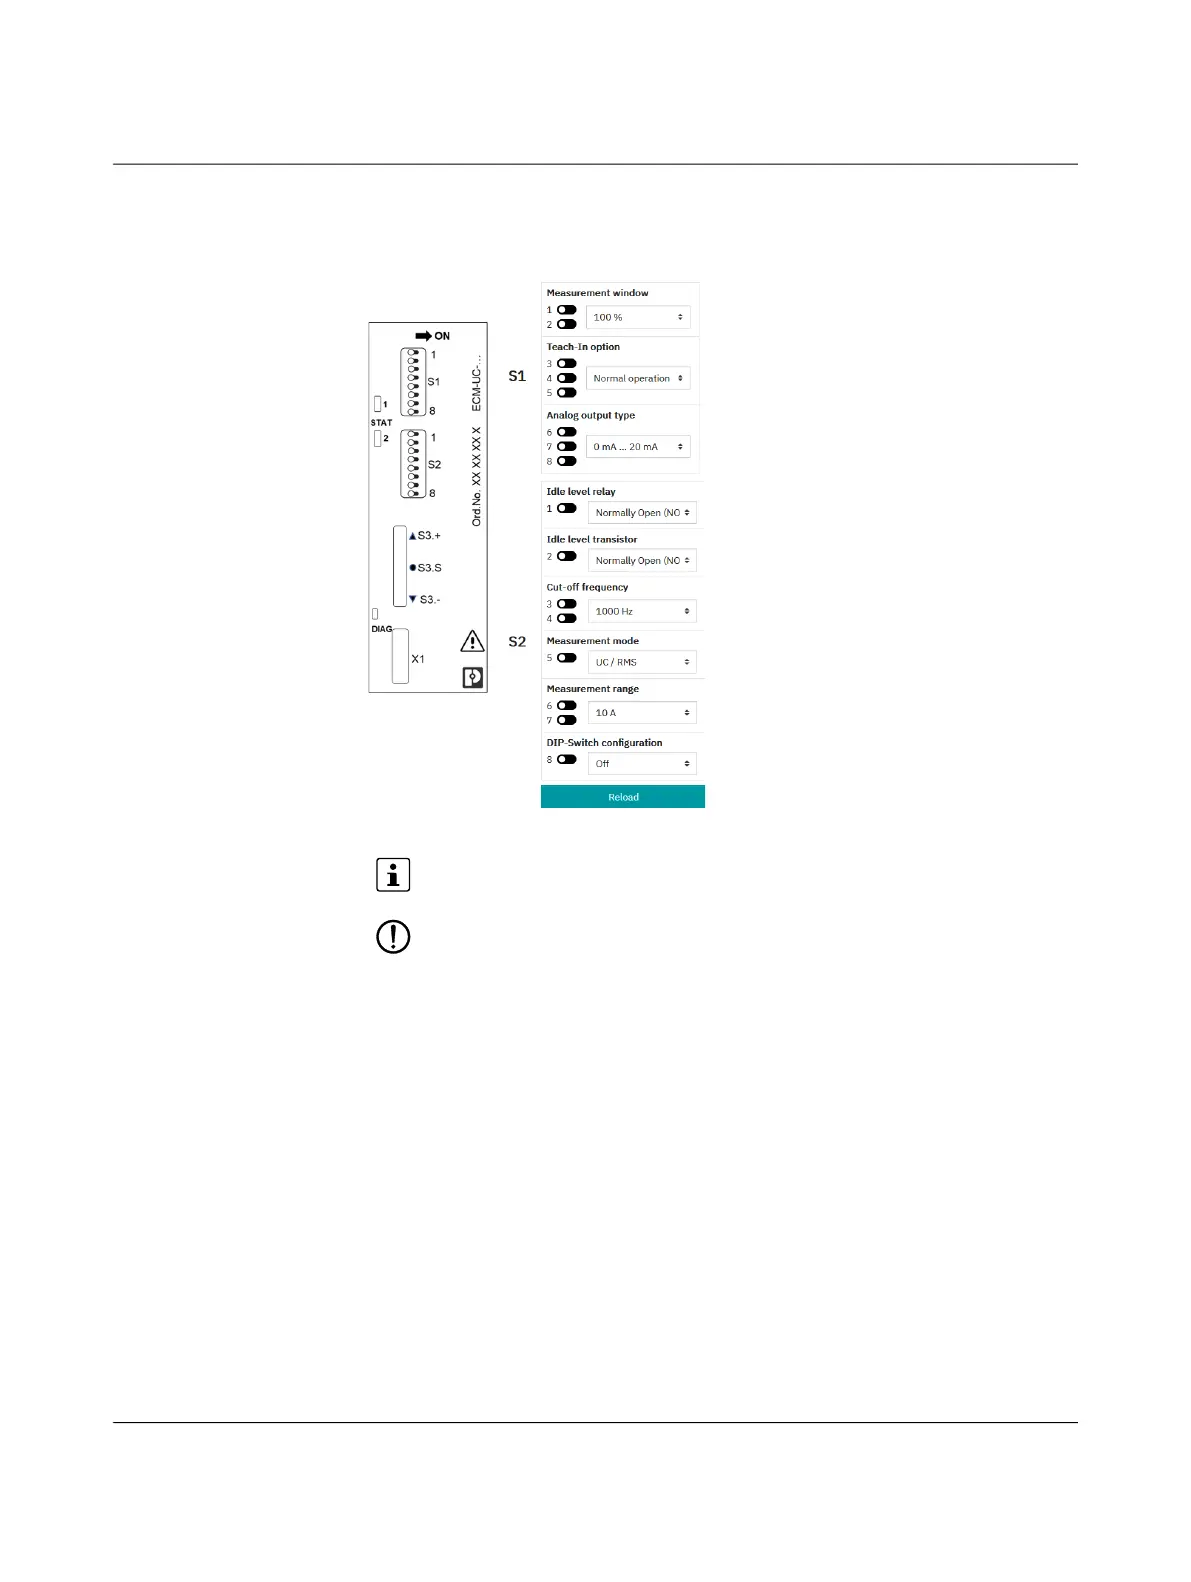
4.1.13 Setting the DIP switches (only for devices with analog out-
put)
Figure 4-20 DIP switch settings
Here you can see the current DIP settings of the device.
Specify which device settings you want to make. Once you have made a setting, the re-
quired DIP switch positions are displayed. Move the DIP switches on your devices to the
displayed positions to activate the settings.
Click on “Reload” to read and display the current DIP switch settings.
If you want to manually parameterize the device using the DIP switches, this is only
possible for the basic device settings. Use the WBM to make further settings.
You must activate the device configuration via DIP switches.
Move DIP switch S2.8 to the “ON” position.
Bekijk gratis de handleiding van Phoenix Contact ECM-UC-100A-UI, stel vragen en lees de antwoorden op veelvoorkomende problemen, of gebruik onze assistent om sneller informatie in de handleiding te vinden of uitleg te krijgen over specifieke functies.
Productinformatie
| Merk | Phoenix Contact |
| Model | ECM-UC-100A-UI |
| Categorie | Niet gecategoriseerd |
| Taal | Nederlands |
| Grootte | 6107 MB |


