Perfect Aire 2PHG5000 handleiding
Handleiding
Je bekijkt pagina 7 van 12
7
INSTALLATION INSTRUCTIONS
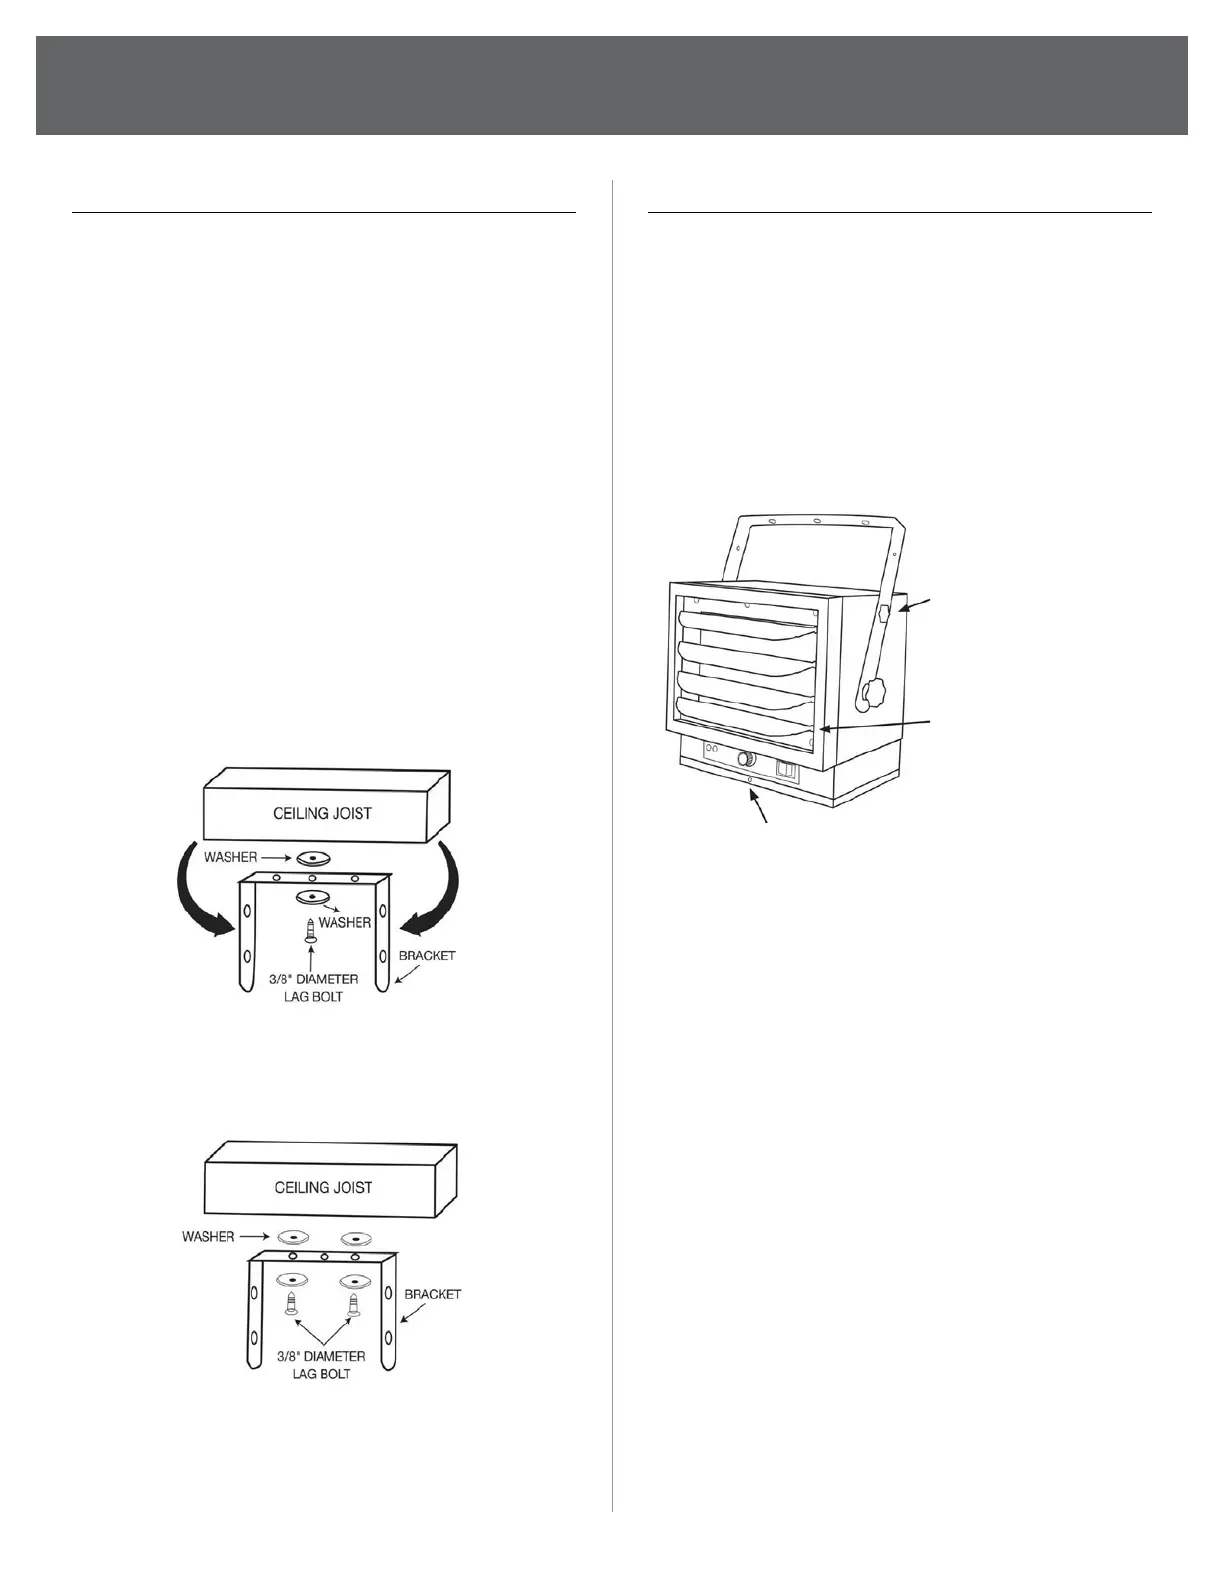
HANGING THE HEATER IN THE BRACKET
1. Lift the heater into the mounting bracket and
align the lower bracket holes with the threaded
holes nearest the heater’s center.
2. Thread a large knob-screw through the hole on
each side of the bracket.
3. Aim the heater horizontally or tilted by aligning
the upper bracket holes with the top threaded
holes on the heater and secure with the small
knob-screws and tighten all. See Figure 5.
Use top slots / hole
in bracket and small
knob-screws if heater
is to be tilted down.
Adjust louvers up or
down to control air ow.
MOUNTING BRACKET INSTALLATION
Refer to Figure 4a and 4b.
1. Locate a ceiling joist or other rm structural
element or support to mount the heater and
point at desired direction of air ow.
2. Drill a ¼” pilot hole in the ceiling joist for the
screw(s).
3. Place the screw(s) and washers as shown in
the Figures 4a or 4b.
Figure 4a:
Single-Screw Mounting, to Allow Swivel
(center bracket hole only).
(If you want to swivel the heater, a longer Lag
bolt may be required to properly secure the
heater, not included.)
Figure 4b:
Double-Screw Mounting, for Fixed Position
(both o-center holes are used).
4. Tighten the screws to secure the heater.
Figure 4a:
Single-Screw Mounting, to Allow Swivel
Remove screws from the panel to
access power block, see Figure 7.
Figure 5
Figure 4b:
Double-Screw Mounting, for Fixed Position
Bekijk gratis de handleiding van Perfect Aire 2PHG5000, stel vragen en lees de antwoorden op veelvoorkomende problemen, of gebruik onze assistent om sneller informatie in de handleiding te vinden of uitleg te krijgen over specifieke functies.
Productinformatie
| Merk | Perfect Aire |
| Model | 2PHG5000 |
| Categorie | Heater |
| Taal | Nederlands |
| Grootte | 1753 MB |


