Parkside PSHP 1 A1 handleiding
Handleiding
Je bekijkt pagina 13 van 37
13GB/IE/NI
Perform test procedure
You can use the test button
11
to check
whether the welding helmet's darkening
feature is working properly.
Hold a bright light source, such as for
example a lighter, in front of the arc
sensor
16
and ignite it. The bright light
will make a fi lter briefl y darken if it is
working properly.
Delay setting
You can adjust the delay setting
13
to
confi gure whether or not the auto-darkening
feature should be switched off immediately
after stopping welding work, depending
on the type of welding work. At the lowest
setting, auto-darkening is switched off
immediately. Turning the control dial further
clockwise towards the highest setting, means
that the darkening function will remain active
for longer after welding work. This feature is
very useful for handling afterglow.
Sensitivity setting
You can use the sensitivity setting
12
to
adjust the light sensitivity of the sensor.
With low incident light, the control can be
adjusted to the highest setting to ensure
that the auto-darkening feature is activated
even for a weak light source. Even with this
additional feature, you can also adjust the
light sensitivity of the sensor to suit your own
personal requirements.
Battery replacement
If the battery charge level is too low you can
replace the batteries. A low battery charge
level is indicated with a red warning light on
the battery display
10
.
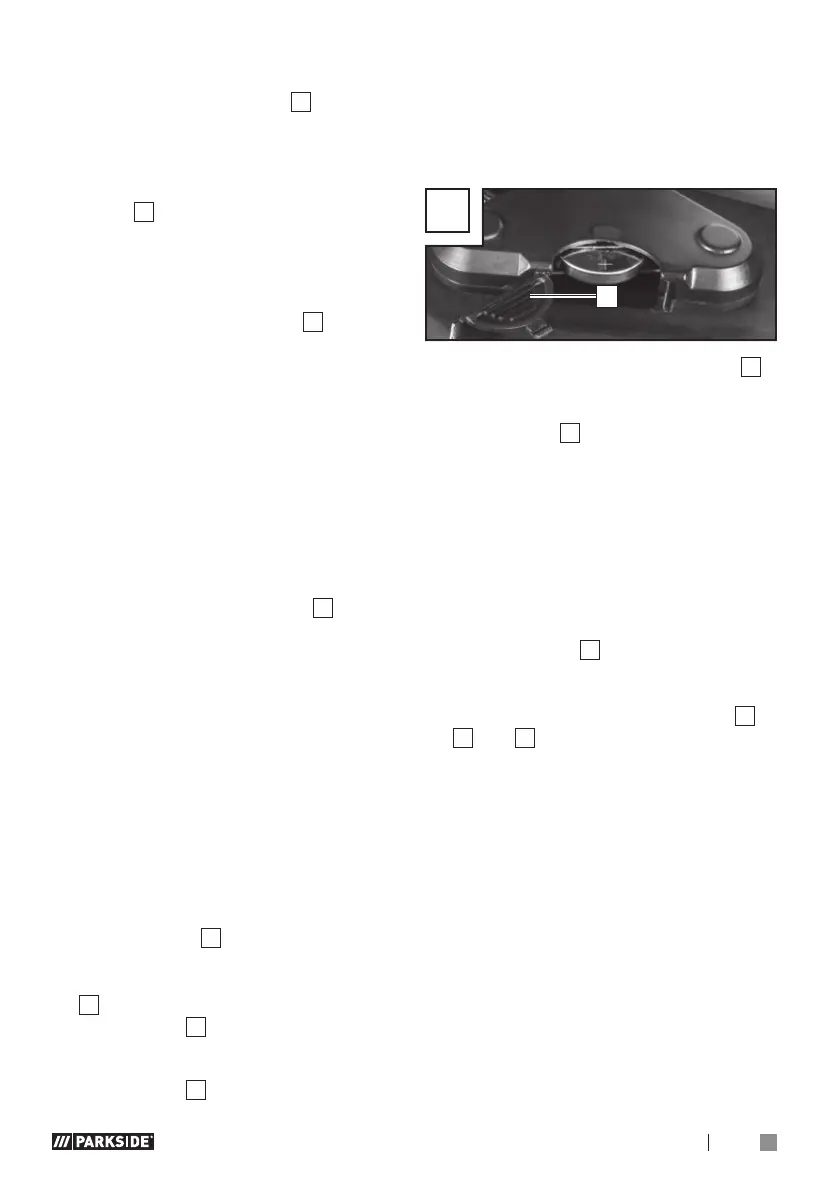
In order to open the battery compartment
14
, you must push the lid of the battery
compartment
14
forwards (see Fig. F).
You can replace the battery, once you
have opened the cover of the battery
compartment
14
.
Please insert the battery as shown in
Figure F with the “+” side facing
upwards.
Battery type: CR2450
Battery voltage: 3V
F
14
Then, close the battery compartment
14
.
In order to close the battery compartment,
you must push the lid of the battery
compartment
14
to the back until it clicks
into place.
Please note: The batteries are used for
the fi rst darkening of the fi lter at the start
of the welding procedure. After that the
power supply for the fi lter is supplied by the
integrated solar cell.
Replace UV fi lter
Press the sliders
15
together to replace
the UV fi lter/solar cell. (see Fig. D).
Subsequently you can remove the fi lter.
Then remove the darkening controls
9
,
11
and
12
on the outside of the welding
helmet by simply pulling them and then
releasing the nuts located below.
Once you have released the nuts from
the thread, you can completely remove
the fi lter from the welding helmet.
Bekijk gratis de handleiding van Parkside PSHP 1 A1, stel vragen en lees de antwoorden op veelvoorkomende problemen, of gebruik onze assistent om sneller informatie in de handleiding te vinden of uitleg te krijgen over specifieke functies.
Productinformatie
| Merk | Parkside |
| Model | PSHP 1 A1 |
| Categorie | Niet gecategoriseerd |
| Taal | Nederlands |
| Grootte | 3813 MB |


