Parkside PEH 30 D4 handleiding
Handleiding
Je bekijkt pagina 13 van 151
PEH 30 D4
GB
│
IE
│
9 ■
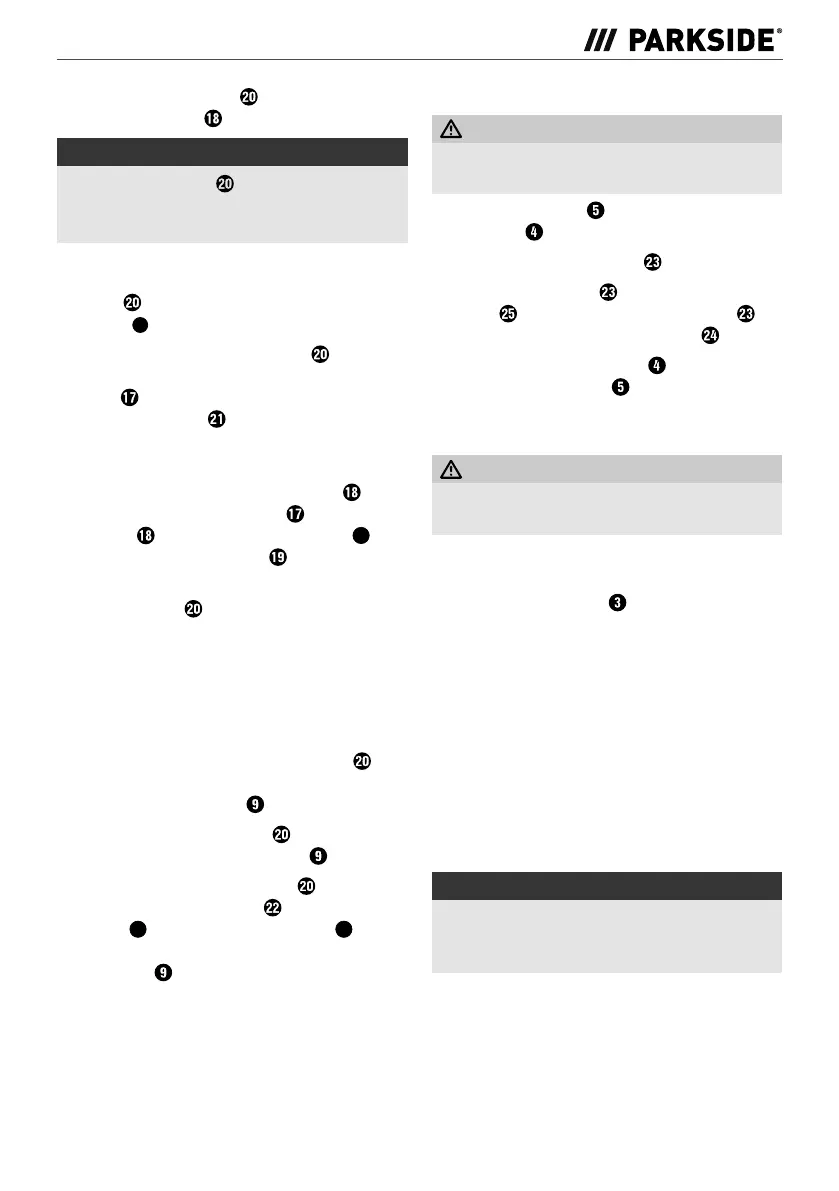
♦ Push the planing blade sideways out of the
clamping element (see fig. D)
NOTE
► The planing blade
may be factory-bonded
with protective lacquer. It is not necessary to
re-bond the blade.
♦ Fit either a new or turned blade in the reverse
order. Make sure that the notch on the planing
blade
slides into the tensioning plate
groove
20a
(see fig. E).
♦ Make sure that the planing blade
protrudes
a little way (approx. 1 mm) from the cutter
block in the direction of the movable lateral
cutter block guard . Carefully turn the cutter
block to check that the planing blade does not
touch anything.
♦ Also ensure that the clamping element
closes flush to the cutter block
. The clamping
element must contact the hex screws
18a
before the fastening screws can be tight-
ened.
♦ Planing blades
can be purchased exclusively
from the address given below (see section
“Service”). Do not use planing blades from
other manufacturers.
Setting the planing blade height
♦ Set the cutting depth to 0 mm.
♦ Check the position of the planing blade
at
both ends. Use a flat, straight object as a guide
strip over the plane sole .
♦ The tip of the planing blade
must be flush
with the surface of the plane sole .
♦ The height of the planing blade
can be
adjusted using the hex key
via the two hex
screws
18a
. Adjust the two hex screws
18a
so that
the tip of the planing blade is flush with the
plane sole on both sides.
Replacing the drive belt (see fig. F)
WARNING! RISK OF INJURY!
► Always remove the plug from the power
socket before working on the appliance.
♦ Remove the screws
and detach the drive
belt cover .
♦ Remove the worn drive belt
.
♦ Fit the new drive belt
onto the small belt
wheel first and then turn the drive belt
and pull it onto the large belt wheel .
♦ Replace the drive belt cover
and fix it in
place using the screws .
Maintenance and cleaning
WARNING! RISK OF INJURY!
► Always remove the plug from the power
socket before working on the appliance.
♦ Keep the appliance and the ventilation slits
clean to ensure fault-free operation.
♦ Clean the chip ejector
regularly.
♦ To clean a blocked chip ejector, use a suitable
tool (e.g. a piece of wood, compressed air,
etc.).
♦ Use a dry cloth to clean the housing.
♦ Use a brush to remove any dust stuck to the
appliance.
♦ Never use sharp objects, petrol, solvents or
cleansers which can damage plastic. Do not
allow any liquids to get into the interior of the
appliance.
NOTE
► Spare parts which are not listed (e.g. carbon
brushes, planing blades) can be ordered
exclusively via our Service Hotline.
IB_471090_PEH30D4_LB8.indb 9IB_471090_PEH30D4_LB8.indb 9 09.01.2024 14:14:1709.01.2024 14:14:17
Bekijk gratis de handleiding van Parkside PEH 30 D4, stel vragen en lees de antwoorden op veelvoorkomende problemen, of gebruik onze assistent om sneller informatie in de handleiding te vinden of uitleg te krijgen over specifieke functies.
Productinformatie
| Merk | Parkside |
| Model | PEH 30 D4 |
| Categorie | Niet gecategoriseerd |
| Taal | Nederlands |
| Grootte | 15971 MB |


