Parkside 4V PAS D7 handleiding
Handleiding
Je bekijkt pagina 20 van 82
19GB/IE/NI
NOTE: These are approximate values for
reference only. Do not rely only on this data
when high accuracy is required.
Eccentric attachment
(Fig.H)
Use the eccentric attachment
[] for tightening
and loosening screws that are close to the
ceiling or an adjacent wall.
Angle attachment
(Fig.I)
Use the angle attachment
[] for tightening and
loosening screws at an angle of 90°.
Cutting attachment
(Fig.J)
The cutting attachment
[] is designed only for
cutting soft materials. Examples:
– Corrugated paper (max. thickness: 5mm)
– Drapery
– Leather (max. thickness: 3mm)
m
CAUTION!
u An arrow symbol is marked on the
blade guard to indicate the saw blade’s
rotational direction. Cutting operation
can only be processed by setting the
saw blade to this rotational direction.
Make sure the rotation direction switch
rotation
[5] is completely pushed down
from direction b before you start cutting
(Fig.C).
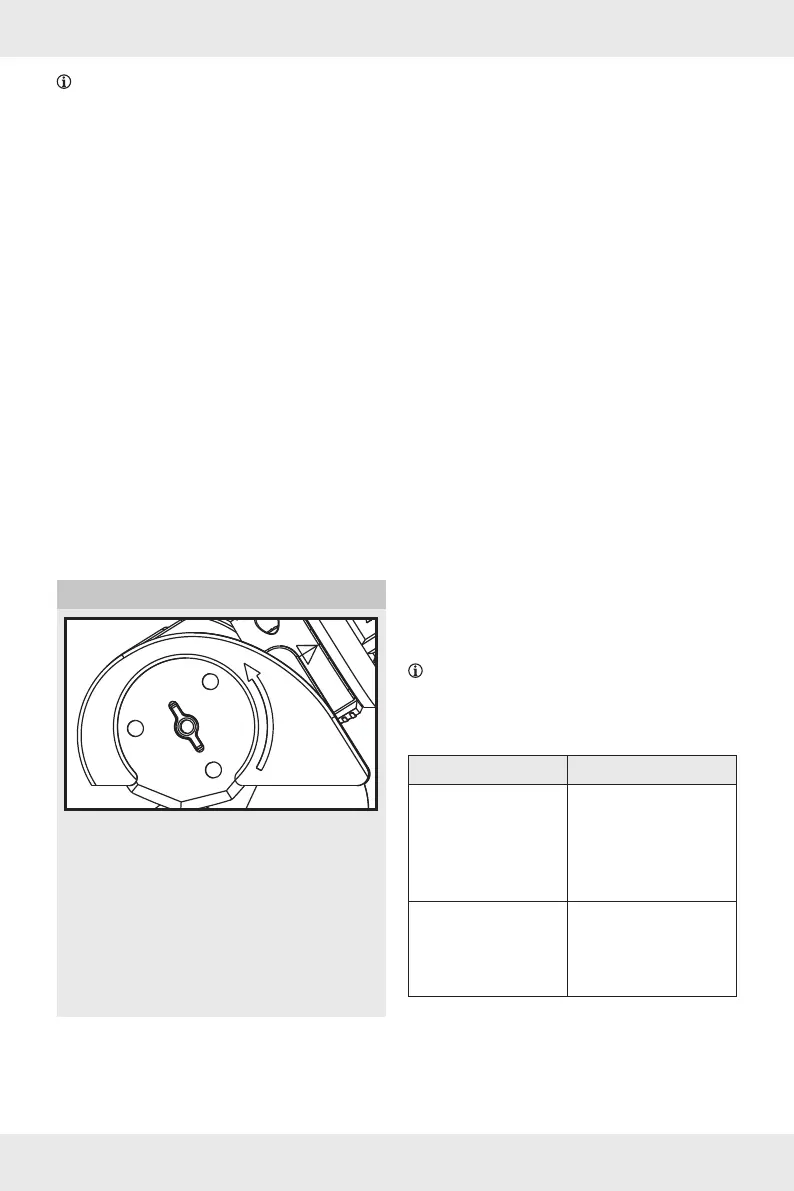
Replacing the cutting blade
(Fig.K)
m
CAUTION! When the saw blade[] is to
be removed from or inserted to the blade
guard, do not touch the sharp cutting edge.
To avoid injury, wearing suitable protective
gloves is required.
o Install the cutting attachment[] to the
product.
This prevents the spindle
[] from rotating
and allows the screw
[] to be removed.
o Loosen the screw[] in a counter-clockwise
direction by using a PH2 or SL6 screwdriver
(not included).
o Remove the screw[] from the spindle[].
o Hold the product in an upright position.
Swing it gently and allow the cutting
blade
[] to slide out slowly from the blade
guard (Fig.M).
o Insert a new cutting blade[] into the
cutting attachment
[] (Fig.N).
o Ensure the cutting blade[] is sitting tight in
the slot of the spindle
[] (Fig.L).
o Tighten the screw[] in a clockwise
direction.
o The attachment is ready for use again.
NOTE: Replacement cutting blades[] are
available from OWIM.
Switching on/off
Switching on/off Action
On Press the switch
trigger
[7] and hold it
in place.
The LED work light
[8]
lights up.
Off Release the switch
trigger
[7].
The LED work light
[8]
goes off.
Bekijk gratis de handleiding van Parkside 4V PAS D7, stel vragen en lees de antwoorden op veelvoorkomende problemen, of gebruik onze assistent om sneller informatie in de handleiding te vinden of uitleg te krijgen over specifieke functies.
Productinformatie
| Merk | Parkside |
| Model | 4V PAS D7 |
| Categorie | Niet gecategoriseerd |
| Taal | Nederlands |
| Grootte | 8840 MB |


