Panduit WME9WH handleiding
Handleiding
Je bekijkt pagina 4 van 16
INSTALLATION INSTRUCTIONS
© Panduit Corp. 2024
V00029TB_06INSTALLATION INSTRUCTIONS
For Technical Support: www.panduit.com
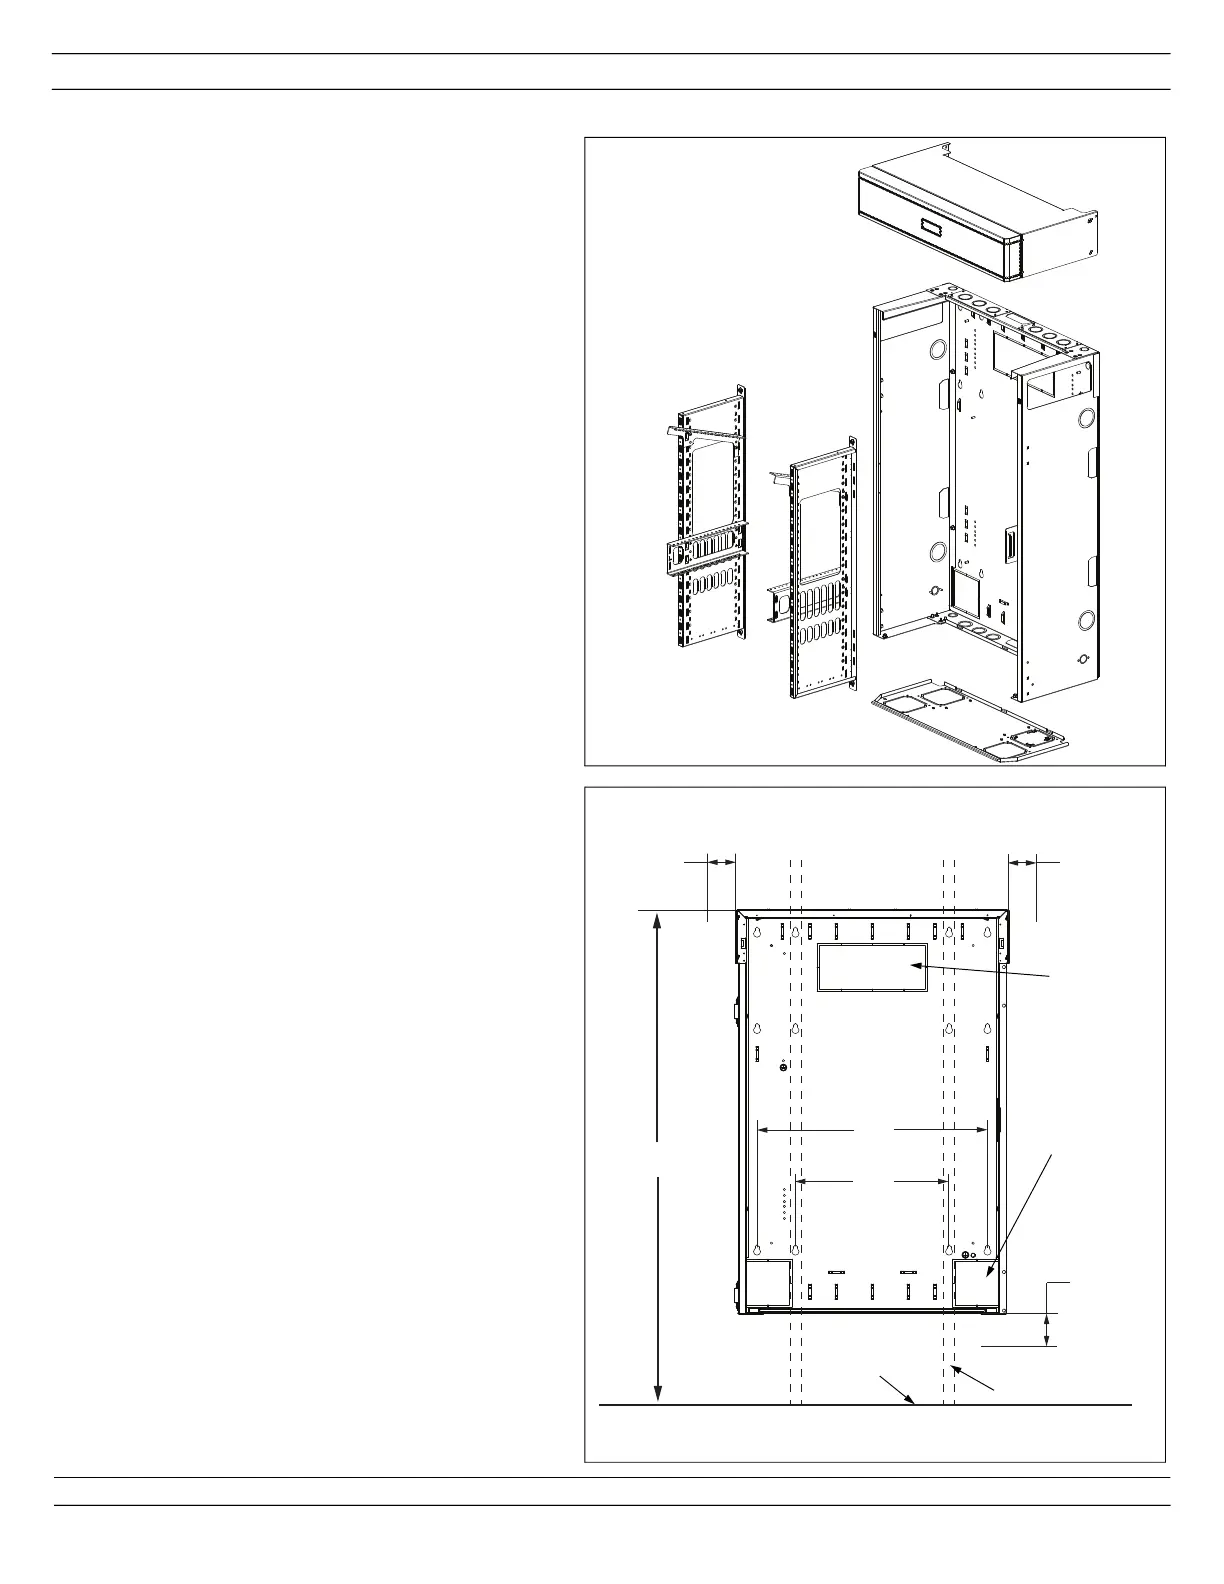
Mounting Enclosure to Wall / Electrical Box Installation
1. Inspect desired mounting wall before installation.
-Wall shall be flat to prevent distortion of the
enclosure when tightened to a wall. This could
prevent the door from aligning properly. If wall is
not flat, shims may be required.
-Wall structure shall have sufficient strength to
support both vertical and horizontal loads.
-Wall surface shall extend beyond the back panel
on every side. Do not install the enclosure with the
back panel extending beyond the edge of the wall.
2. Remove door, top lid, bottom plate, and both verti-
cal bracket assemblies for ease of installation.
3. Locate the wall studs (16" on center in most U.S.
cases).
4. PANDUIT recommends mounting the top of the
enclosure at 6’ from the floor (See View 1). Ensure
at least 4" clearance on left and right sides of
enclosure and 10" clearance from the bottom of the
enclosure. Obstructions to the airflow through per-
foration may prevent heat dissipation.
5. Mount to studs in six locations with 3/8" lag screws
and washers (not provided). Screws must pene-
trate wood studs at least 1.5" after accounting for
wall material thickness.
6. Reinstall vertical bracket assemblies and bottom
plate. Torque M6 nuts to 7.3 ± 0.6 N-m (65.0 ± 5.0
in-lbs).
6’
24”
16”
4” min.
clearance
4” min.
clearance
10” min.
clearance
View 1
Cable
knock-out
Electrical
knock-out
2 x 4 Stud
Floor
Page 4 of 16
Bekijk gratis de handleiding van Panduit WME9WH, stel vragen en lees de antwoorden op veelvoorkomende problemen, of gebruik onze assistent om sneller informatie in de handleiding te vinden of uitleg te krijgen over specifieke functies.
Productinformatie
| Merk | Panduit |
| Model | WME9WH |
| Categorie | Niet gecategoriseerd |
| Taal | Nederlands |
| Grootte | 2641 MB |


