Olimpia Splendid Sitali CX 400 handleiding
Handleiding
Je bekijkt pagina 36 van 60
36
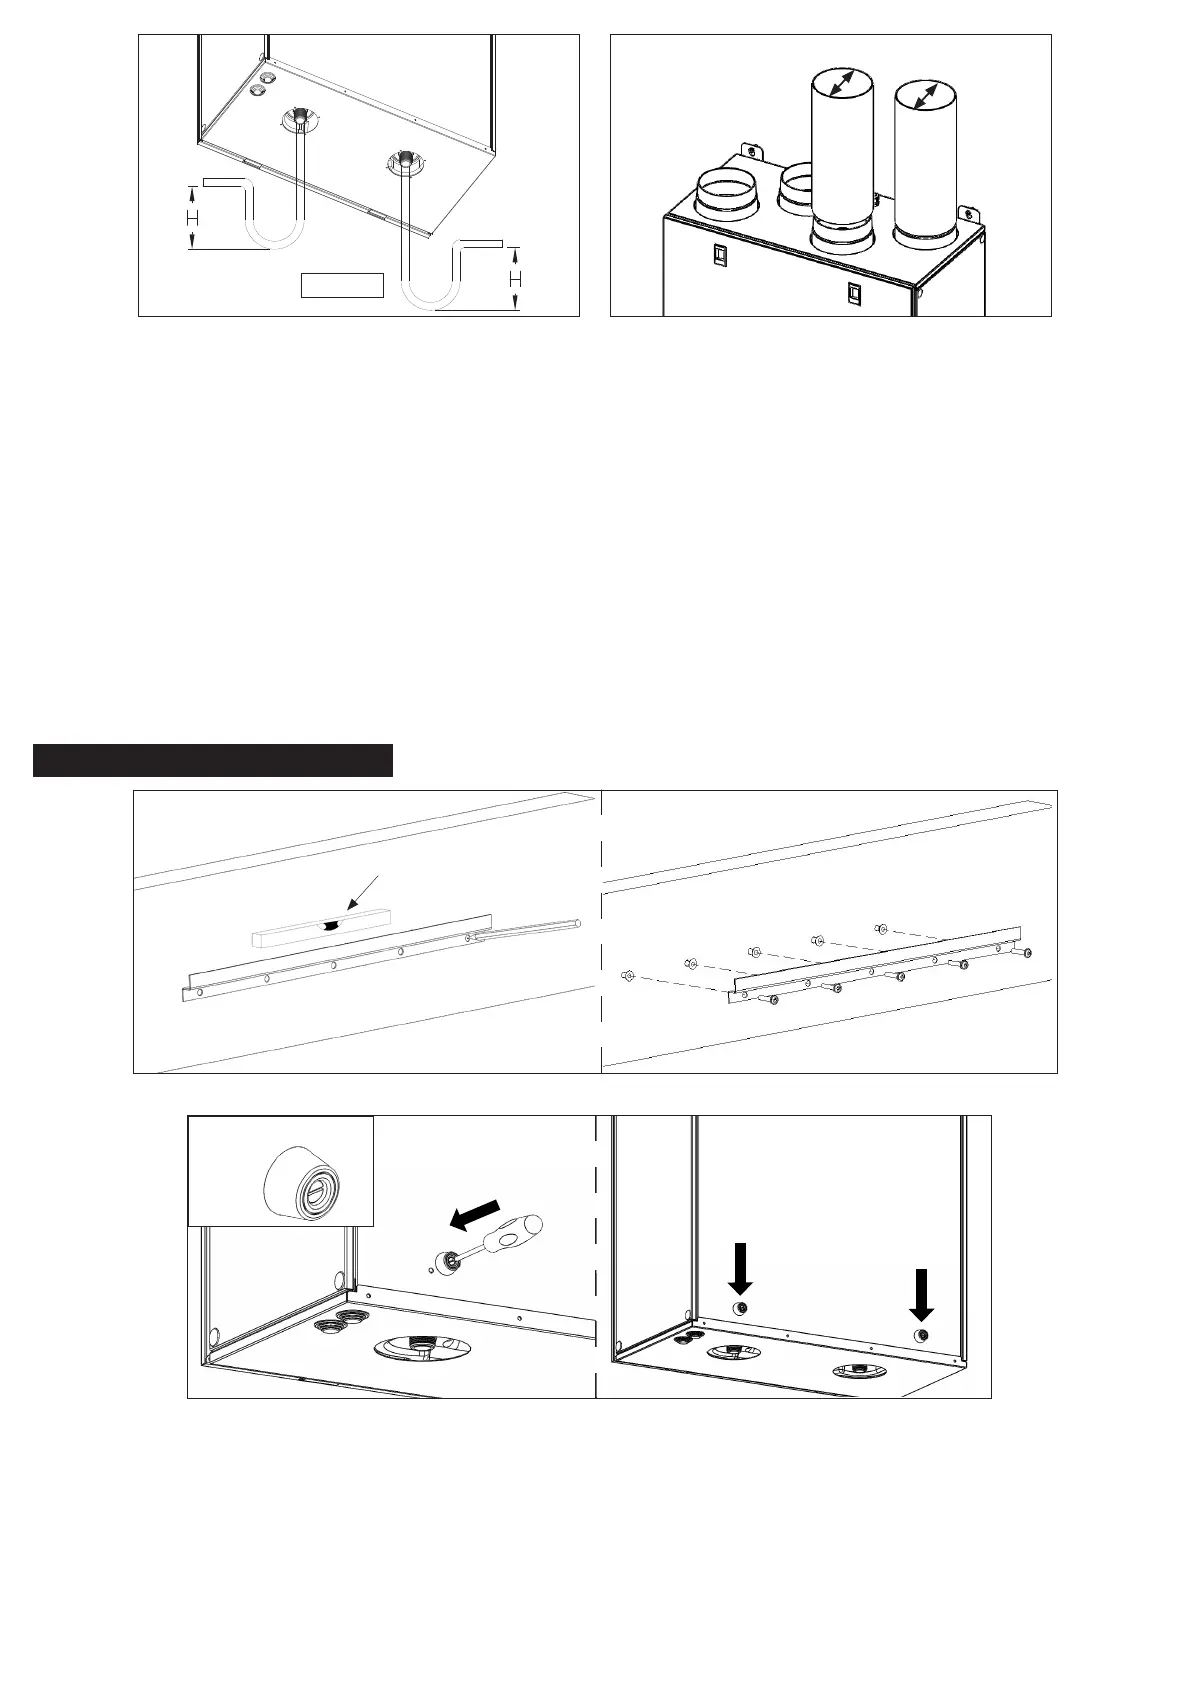
Fig. 5.j
Spirit level
Fig. 5.k
2x
Spacers
H=min. 60mm
Fig. 5.h Fig. 5.i
Ø125mm
Ø125mm
5.aPreparethesurfacewheretheunitistobemounted.Makesurethatthesurfaceisat,levelledandthatitsupportsthe
weight of the unit. Perform the installation in accordance with local rules and regulations.
5.b Drill the holes in the wall.
5.cUseappropriatewallplugsandscrews(notsupplied).
5.d Fix the 2 spacers on the back of the unit.
5.e Hang the unit to the wall by means of the fixing brackets.
5.f Screw safely.
5.g Make sure that the unit is at spirit level.
5.hConnectthecondensationdrain joints (G3/4”M) placed in the bottom side of theunit to a U-bend (orsimilar) on the
condensation drainage pipe. In case close the non-used joint by means of the supplied drain stopper. Make sure this
operation is well done in accordance to the best practice in order to assure water and air tightness.
5.i Connect the unit to the duct system. Make sure that all necessary accessories are used to create a functional ventilation
solution.
Connecttheunitelectricallyaccordingto§5.4.Checkthatitstartsupcorrectly.
SITALI CXVA 400 - SITALI CXVA 550
Bekijk gratis de handleiding van Olimpia Splendid Sitali CX 400, stel vragen en lees de antwoorden op veelvoorkomende problemen, of gebruik onze assistent om sneller informatie in de handleiding te vinden of uitleg te krijgen over specifieke functies.
Productinformatie
| Merk | Olimpia Splendid |
| Model | Sitali CX 400 |
| Categorie | Niet gecategoriseerd |
| Taal | Nederlands |
| Grootte | 10630 MB |


