Olimpia Splendid Sitali CX 120 handleiding
Handleiding
Je bekijkt pagina 20 van 32
20
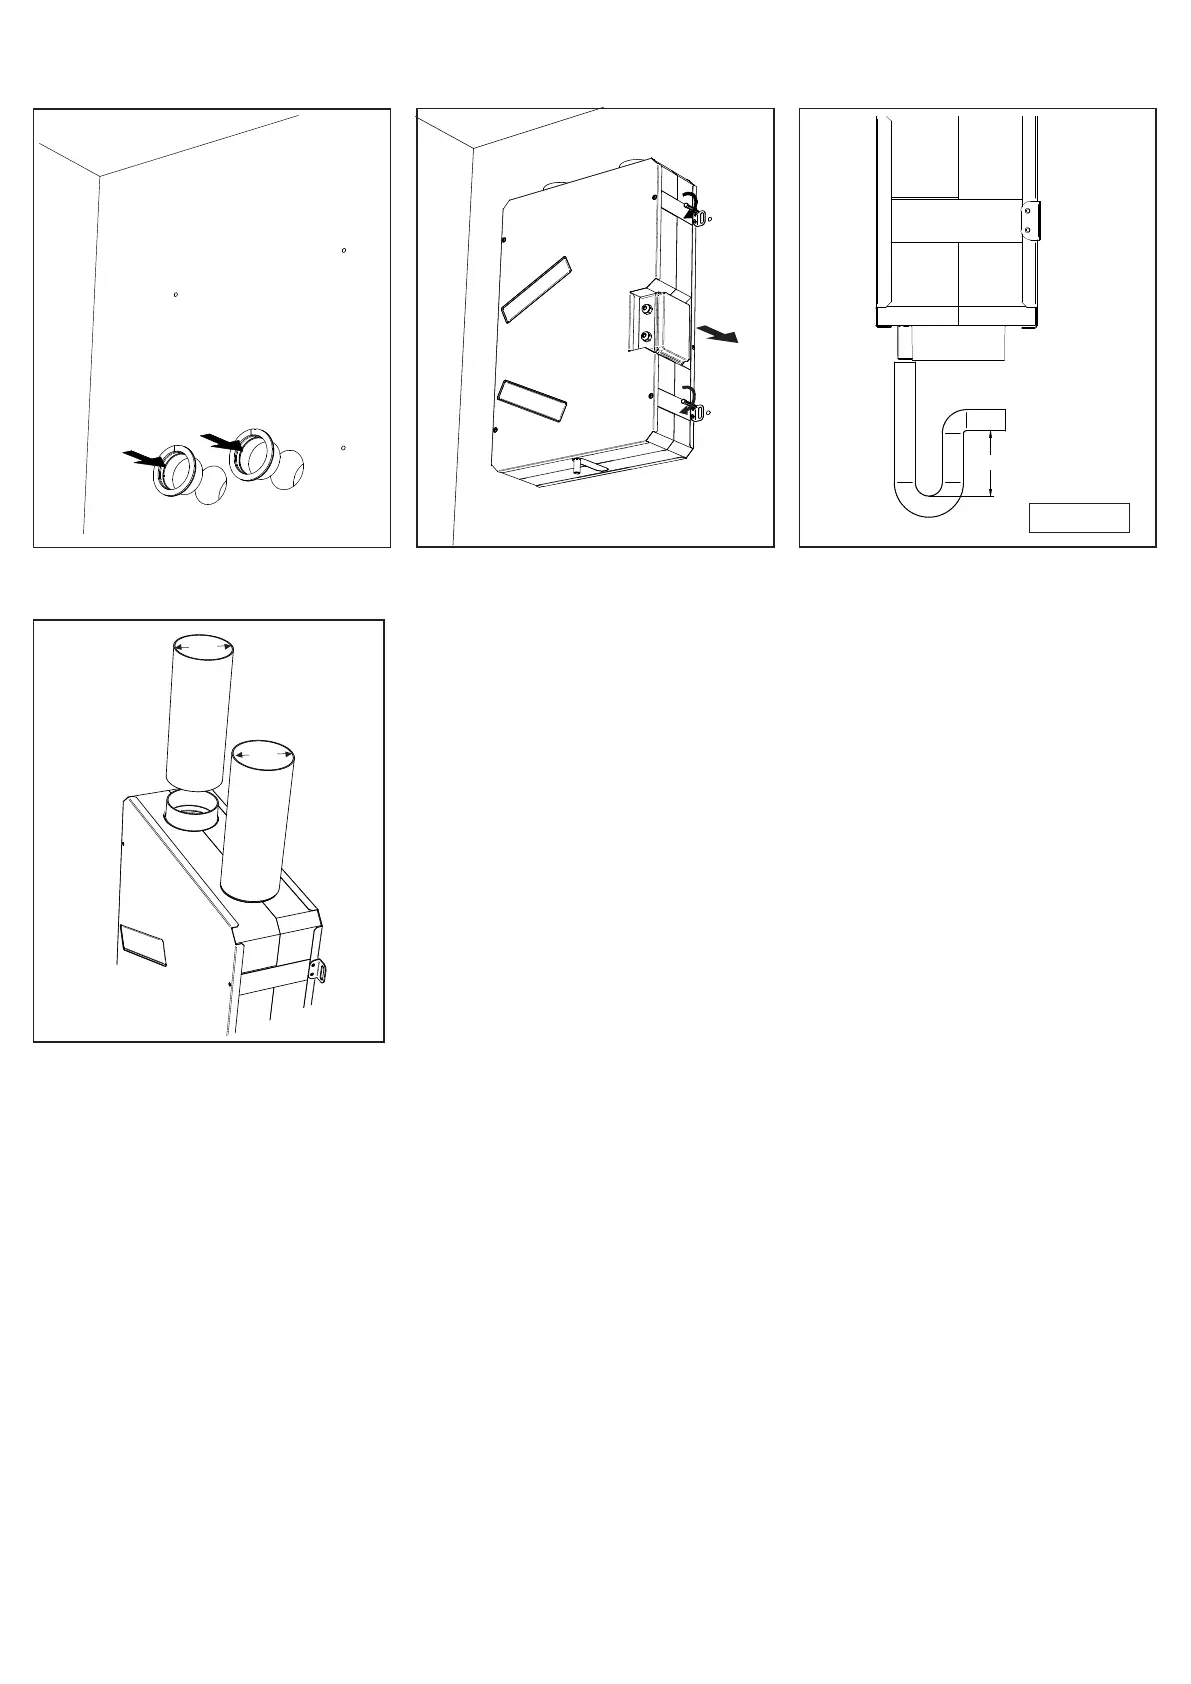
5.3.1 Wall installation
Theunitmustbeinstalledinthefollowingposition:
5.aPreparethesurfacewheretheunitistobemounted.Makesurethatthesurfaceisat,leveledandthatitsupportstheweight
of the unit. Perform the installation in accordance with local rules and regulations.
Drilltheholesintheexternalwall.Fixthespigotsinthewallsafely.
5.bFixthemainbodytothewallbymeansofscrews(notsupplied),makingsurethatthetwoholesontherearsideofthecasing
areinlinewiththespigotsxedatthewall.Useappropriateplugsandrodsorscrews(notsupplied)toxtheunittothe
ceiling. It is recommended to fit the unit with anti-vibration mounts (not supplied).
5.c Connect the drain connection to the drainage hole. Make sure of water and air tightness of all connections. It is recommended
touseaU-bend(orsimilar)inthecondensationdrainagepipe.
5.dConnecttheunittotheductsystem.Makesurethatallnecessaryaccessoriesareusedtocreateafunctionalventilation
solution.Connecttheunitelectricallyaccordingto§5.4.Checkthatitstartsupcorrectly.
min. 60 mm
Mattia , riesci ad inserire tu la dimensione "ø100" per l'interno del tubo come l'immagine sotto?
283min. mm
534
519
Fig. 5.d
Ø100
Ø100
Fig. 5.c
min. 60 mm
SCHEMI ELETTRICI
MESSA IN SERVIZIO
FUNZIONAMENTO
MANUTENZIONE ORDINARIA
534283min. mm
132 235 167
519
546
O
10
0
O
1
0
0
Fig. 5.a
Fig. 5.b
H=min. 60mm
H
Bekijk gratis de handleiding van Olimpia Splendid Sitali CX 120, stel vragen en lees de antwoorden op veelvoorkomende problemen, of gebruik onze assistent om sneller informatie in de handleiding te vinden of uitleg te krijgen over specifieke functies.
Productinformatie
| Merk | Olimpia Splendid |
| Model | Sitali CX 120 |
| Categorie | Niet gecategoriseerd |
| Taal | Nederlands |
| Grootte | 4152 MB |


