Nord Organ 3 handleiding
Handleiding
Je bekijkt pagina 11 van 40
3. GETTING STARTED | 11
EDIT A PROGRAM
Editing a program is as easy as turning a knob or pressing a button,
changing an existing setting to a new one:
1 Dial up program A:01 B3 Panel. Note that this program unlike
all other factory programs is stored with PROG MODE turned off,
meaning that Panel Mode is active.
ADJUST THE ROTARY SPEAKER
2 The selected program uses the Rotary Speaker, which contains
a number of options for fine tuning its character. Try pressing the
MIC POS button repeatedly and listen to how the character of the
rotating horn changes with each of the different settings.
l Apart from the on-panel settings for the Rotary Speaker, there is
a range of global settings in the Sound menu (Shift+Live 3) for
adjusting the slow and fast speeds, acceleration rates, rotor/horn
balance and more.
3 Now do the same thing with the DRIVE TYPE setting: Turn the Drive
Amount control up a little bit, and listen for how the character of the
overdrive changes as Drive Type is changed. Note that at the “0”
setting, the overdrive is turned completely Off.
i Changing any parameter on the panel causes an “E” to appear
next to the program number in the display. This indicates that the
program has been edited but not yet saved. If another program is
loaded before a Store operation is performed, any edits are lost
and the program will have its original settings the next time it is
loaded.
TURN OFF MEMORY PROTECTION
When the Nord Organ 3 is shipped from factory its memory is protected
to prevent accidental overwriting of original programs. Memory
protection can be turned off from the System menu:
1 Hold SHIFT and press the SYSTEM (Live 1) button at the left side of
display.
2 Memory Protect is the first setting of the System menu. If the
display shows a different setting, use the PROG/PAGE 3/4 and
5/6 (Prog/Live 1) buttons to navigate to the Memory Protect
setting.
3 Change this setting to Off by turning the PROGRAM dial.
4 Press EXIT (Shift button) to exit the System menu.
i This setting, like most other System settings, will be permanently
stored until it is changed again.
Read more about menus and their settings on page 29.
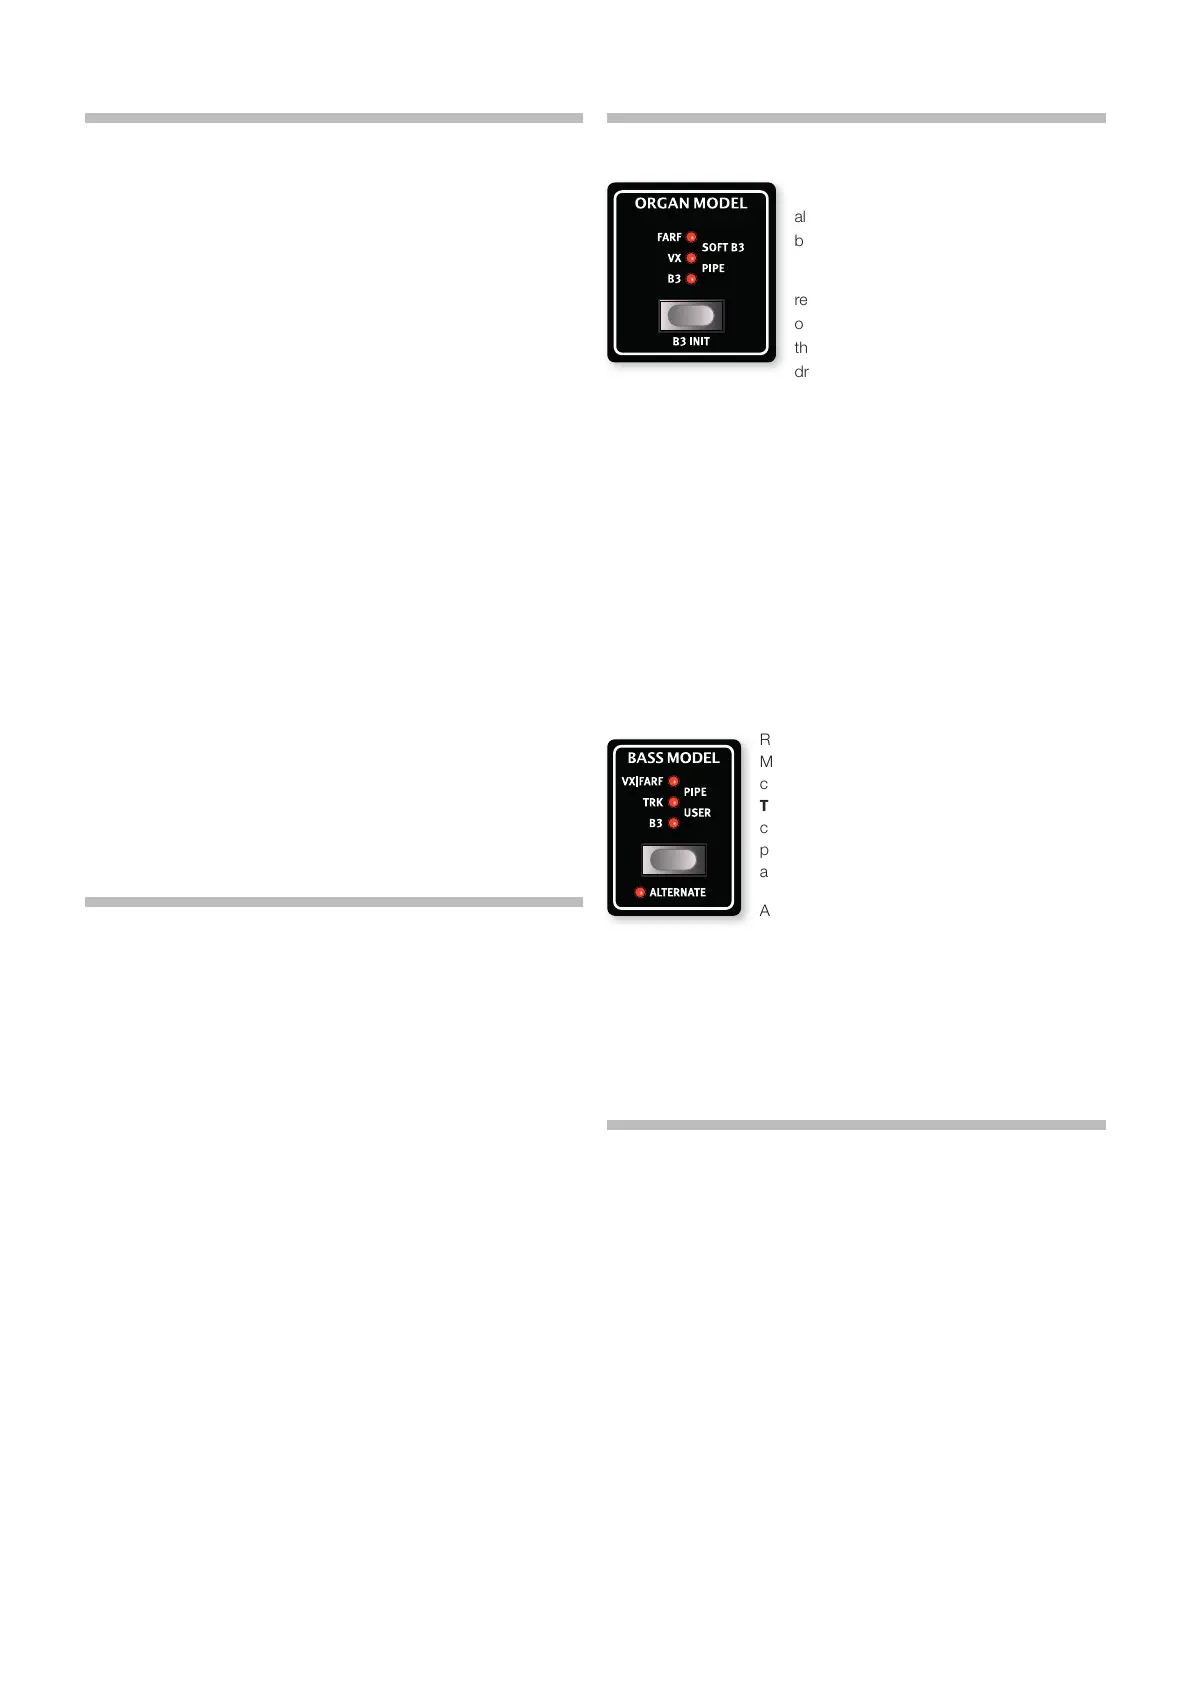
CHOOSE AN ORGAN MODEL
1 Select the B3 model, if it is not selected
already, using the ORGAN MODEL selector
button.
2 Make adjustments to the organ
registration, using the drawbars. Depending
on whether Program or Panel mode is active,
the central drawbar sections may have their
drawbars lit or not.
3 Now select the VX. This model also has continuous drawbars,
similar to the B3 model, but features a special way of adjusting
its timbre: The 9th drawbar provides a gradual transition from the
“soft” to the bright, “reed” timbre, with a 50/50 mix of these two
registers at the middle position of the drawbar. The 8th drawbar is
not used for the Vx model.
4 Now select the FARF model. With this organ model the drawbars
function in switch mode, with only two settings for each,
corresponding to the “rocker switches” of the original model.
5 Finally, select the organ model you want to keep using for now.
CHOOSE A BASS MODEL
Regardless of selected Organ Model, the Bass
Model used for the Bass Pedal registers can be
chosen freely among the available options - B3,
TRK, VX/FARF, PIPE and USER. This allows for
combining the Upper and Lower manuals of a
particular Organ Model with any other Bass Model
as desired.
Activating ALTERNATE (Shift+Bass Model) selects
an alternate Bass Model for the current position,
except when at the USER position where pressing Alternate displays a
list of available presets, also available from the Sound menu.
i When Prog Mode is active, the User Bass Model selection is stored
as part of the Program. In Panel Mode, the User selection persists
for all programs that are set to Panel Mode.
ACTIVATE EFFECTS
1 Turn on the Reverb, if it is not already, using the Reverb ON button.
2 Choose a Reverb type to your liking by pressing the selector button
repeatedly.
3 Adjust the dry/wet balance by turning the AMOUNT knob above the
Reverb On button.
4 Select the Reverb PRE-ROTARY option by pressing SHIFT and
the BRIGHT/DARK button simultanously and note the difference in
sound as the Reverb effect is now placed before, and routed into,
the Rotary Speaker.
i The Rotary Speaker/Amp Sim section should be turned On and set
to Rotary Speaker for the above step to have the intended effect.
5 Activate the Delay effect by pressing the DELAY ON button.
6 Try out the TEMPO, FEEDBACK and DRY/WET controls, to alter the
character and intensity of the Delay effect.
Bekijk gratis de handleiding van Nord Organ 3, stel vragen en lees de antwoorden op veelvoorkomende problemen, of gebruik onze assistent om sneller informatie in de handleiding te vinden of uitleg te krijgen over specifieke functies.
Productinformatie
| Merk | Nord |
| Model | Organ 3 |
| Categorie | Niet gecategoriseerd |
| Taal | Nederlands |
| Grootte | 4761 MB |


