Handleiding
Je bekijkt pagina 9 van 152
9
Rear I/O Panel Rear I/O Panel
Important
y
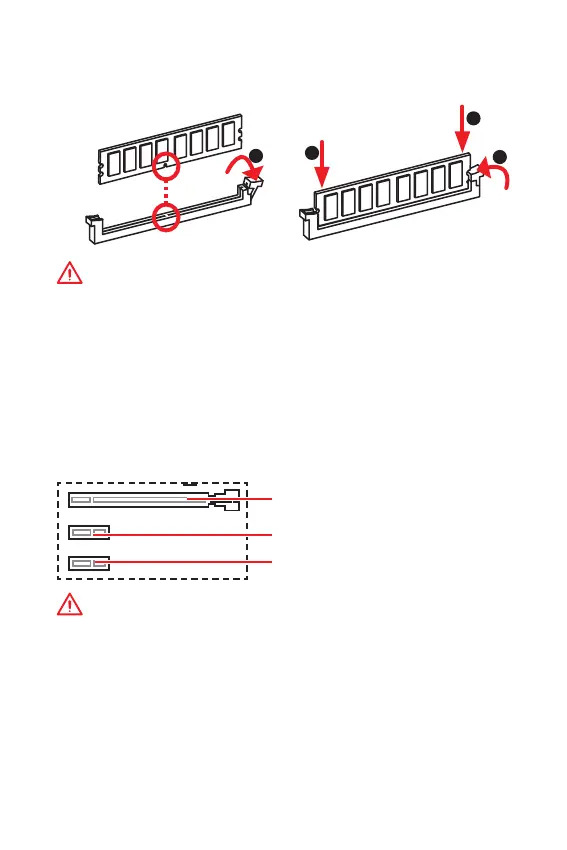
To boot up the system successfully, always insert the memory module into DIMMA1
first.
y
Due to chipset resource usage, the available capacity of memory will be a little less
than the amount of installed.
y
Please note that the maximum capacity of addressable memory is 4GB or
less for 32-bit Windows OS due to the memory address limitation. Therefore, we
recommended that you to install 64-bit Windows OS if you want to install more than
4GB memory on the motherboard.
PCI_E1~3: PCIe Expansion Slots
PCI_E1: PCIe 3.0 x16 slot (CPU lanes)
PCI_E3: PCIe 3.0 p9-x1 slot (PCH lanes)
PCI_E2: PCIe 3.0 p9-x1 slot (PCH lanes)
Important
y
If you install a large and heavy graphics card, you need to use a tool such as MSI
Gaming Series Graphics Card Bolster to support its weight to prevent deformation of
the slot.
y
For a single PCIe x16 expansion card installation with optimum performance, using
the PCI_E1 slot is recommended.
y
When adding or removing expansion cards, always turn off the power supply and
unplug the power supply power cable from the power outlet. Read the expansion
card’s documentation to check for any necessary additional hardware or software
changes.
DIMM Slots
Please install the memory module into the DIMM slot as shown below.
1
2
3
2
Bekijk gratis de handleiding van MSI B365M PRO-VH, stel vragen en lees de antwoorden op veelvoorkomende problemen, of gebruik onze assistent om sneller informatie in de handleiding te vinden of uitleg te krijgen over specifieke functies.
Productinformatie
| Merk | MSI |
| Model | B365M PRO-VH |
| Categorie | Lens |
| Taal | Nederlands |
| Grootte | 15053 MB |
Caratteristiche Prodotto
| Breedte | 226 mm |
| Diepte | 185 mm |
| Ethernet LAN | Ja |
| Maximum resolutie | 4096 x 2160 Pixels |
| Meegeleverde kabels | SATA |
