Handleiding
Je bekijkt pagina 3 van 5
5
4
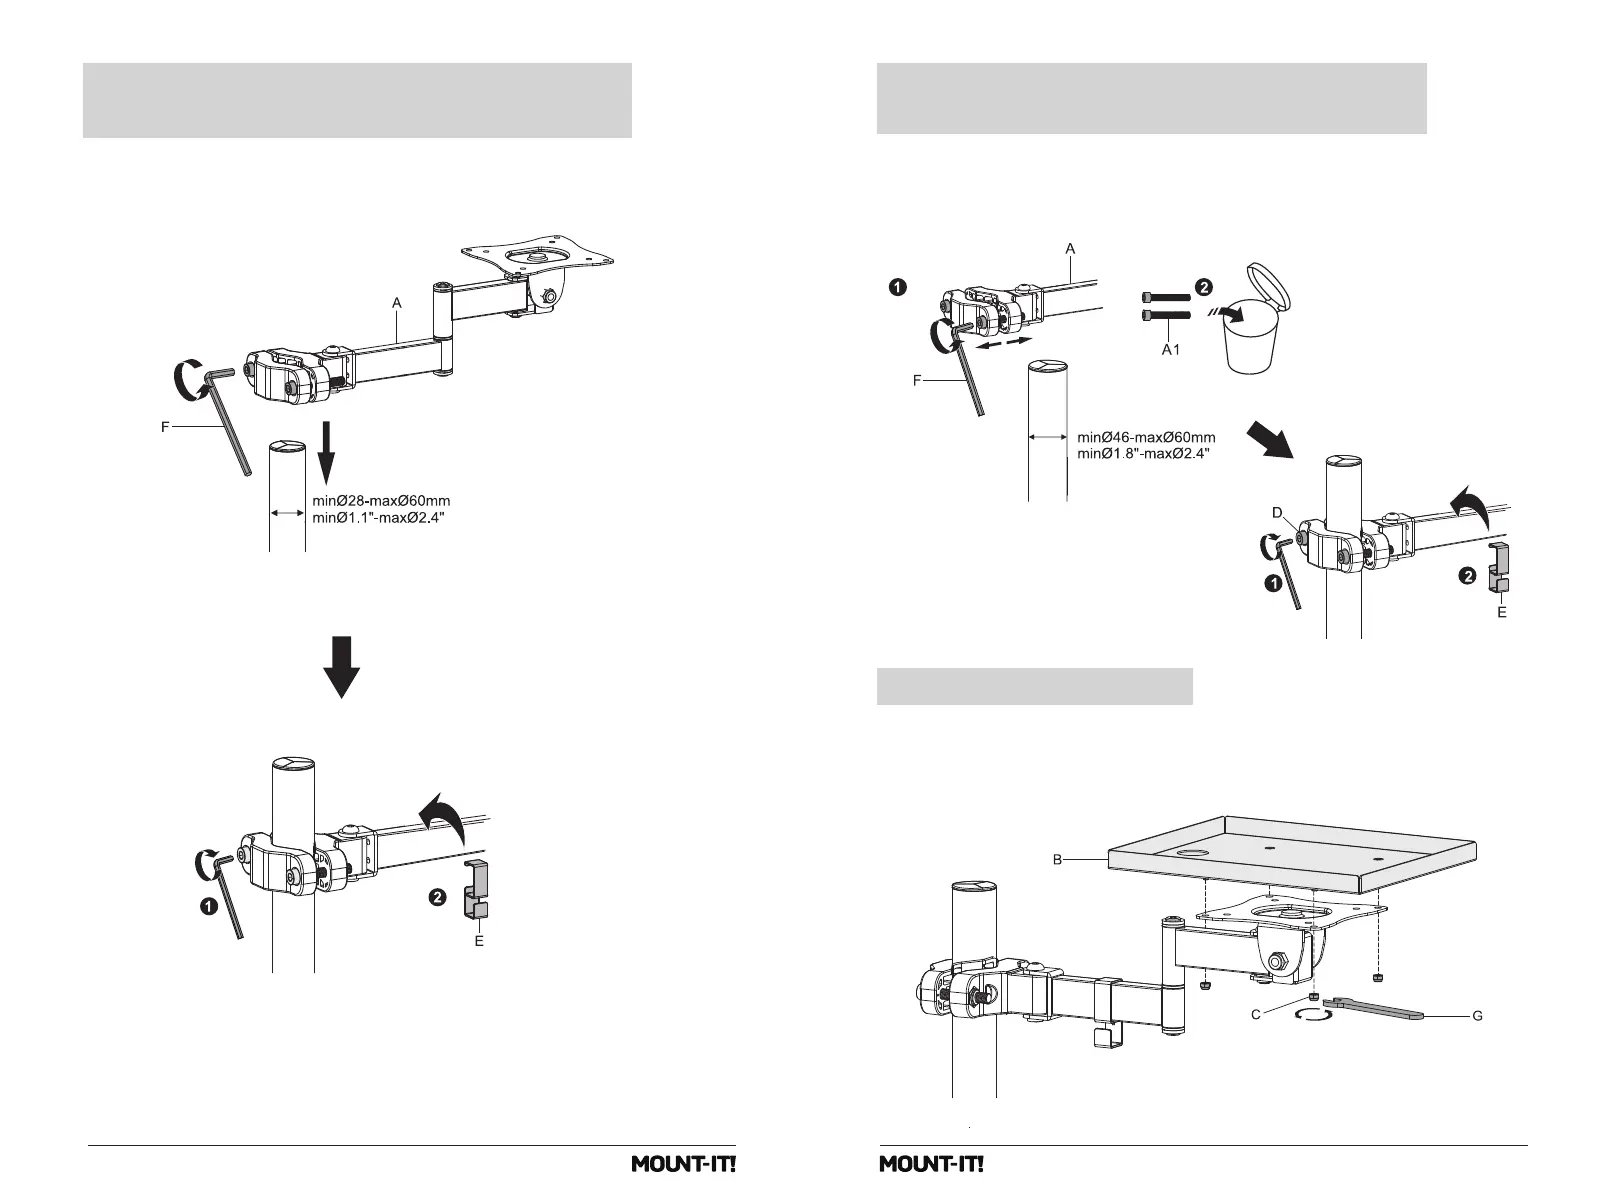
• Using Hex Wrench (#F) loosen the two bolts on the clamp end of the Mount Arm (#A) until the clamp
opens wide enough to slide onto the pole.
• Move the Mount Arm to the desired height and tighten the bolts back down until secure.
Attaching the Mount Arm (Pole Diameters
Between 1.1"-1.77")
Step 1a
• Using Hex Wrench (#F) remove the two bolts on the clamp end of the Mount Arm (#A) and replace
them with the Alternate Bolts (#D). After reinstalling the alternate bolts, adjust the width of the clamp to
be slightly larger than the pole.
• Move the Mount Arm to the desired height and tighten the bolts back down until secure.
Attaching the Mount Arm (Pole Diameters
Between 1.81"-2.36")
Step 1b
• Align the four screws under the Printer Tray (#B) with the four holes on the Mount Arm (#A). Secure the
Printer Tray (#B) by connecting the 4 x Tray Mounting Bolts (#C) using the Wrench(#G).
Attaching Printer Tray
Step 2
Bekijk gratis de handleiding van Mount-It! MI-3799, stel vragen en lees de antwoorden op veelvoorkomende problemen, of gebruik onze assistent om sneller informatie in de handleiding te vinden of uitleg te krijgen over specifieke functies.
Productinformatie
| Merk | Mount-It! |
| Model | MI-3799 |
| Categorie | Printer |
| Taal | Nederlands |
| Grootte | 531 MB |