Minolta DiMAGE Scan Elite II handleiding
Handleiding
Je bekijkt pagina 15 van 100
15
GETTING STARTED
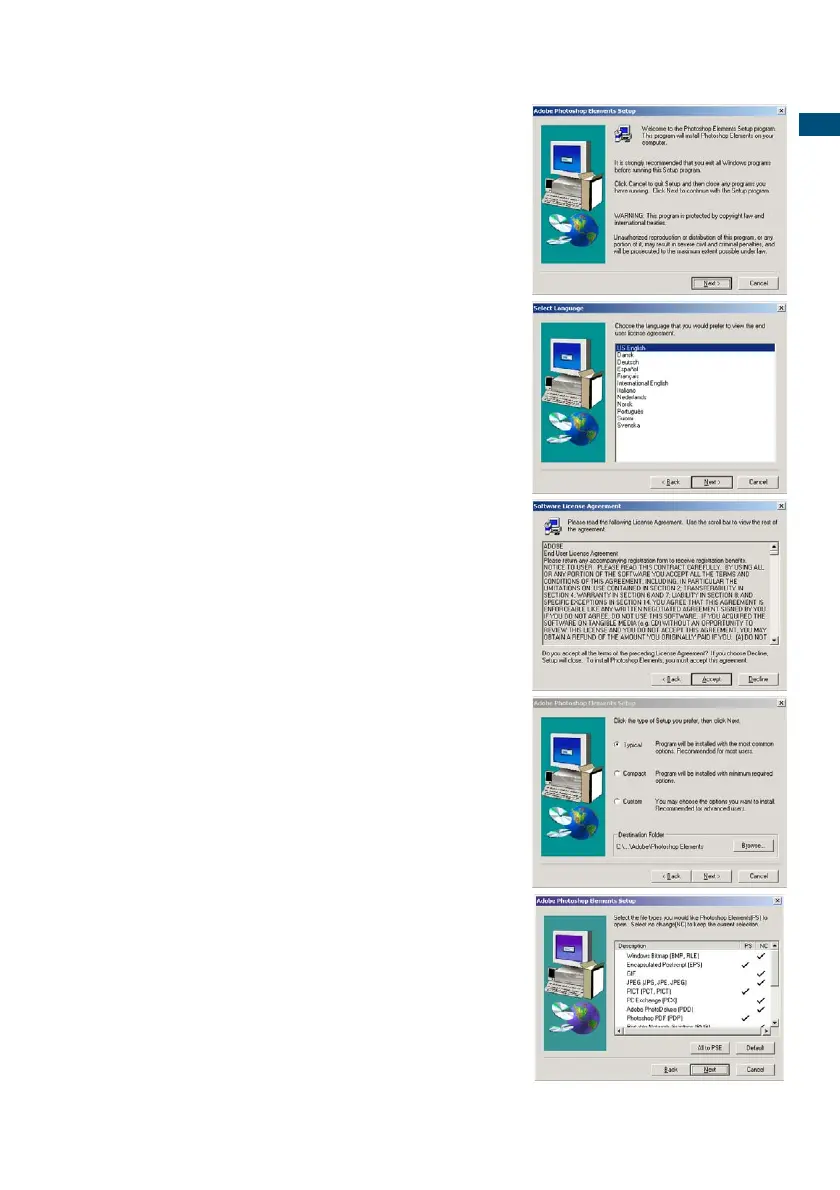
6 Read the cautions on the setup screen. If
no other applications are running, click
“Next”.
• Click “Cancel” to exit the setup routine to stop any appli-
cations that may be running. To start the installation
routine again, double click on the elements icon in My
Computer. The routine will start from step 2.
7 Click on the preferred language and click
“Next” to continue.
8 The end-user license agreement will
appear. If you accept the terms of the
agreement, click “Accept” to continue the
installation routine.
• Read the entire agreement carefully before continuing
the setup. If you do not agree to the terms, click
“Decline” to exit the setup program.
9 Choose the type of installation; typical is
recommended. The software will be
installed in the default folder: C:\Program
Files\Adobe Photoshop Elements. Click
“Next”.
• To install the software in another folder, click “Browse...”
to display folders in the computer. Specify the folder,
then click “OK”.
10 Select the file types that you wish to open
in Photoshop Elements. Click “Next>”.
Bekijk gratis de handleiding van Minolta DiMAGE Scan Elite II, stel vragen en lees de antwoorden op veelvoorkomende problemen, of gebruik onze assistent om sneller informatie in de handleiding te vinden of uitleg te krijgen over specifieke functies.
Productinformatie
| Merk | Minolta |
| Model | DiMAGE Scan Elite II |
| Categorie | Niet gecategoriseerd |
| Taal | Nederlands |
| Grootte | 21689 MB |


