Minolta Dimage G400 handleiding
Handleiding
Je bekijkt pagina 38 van 92
38
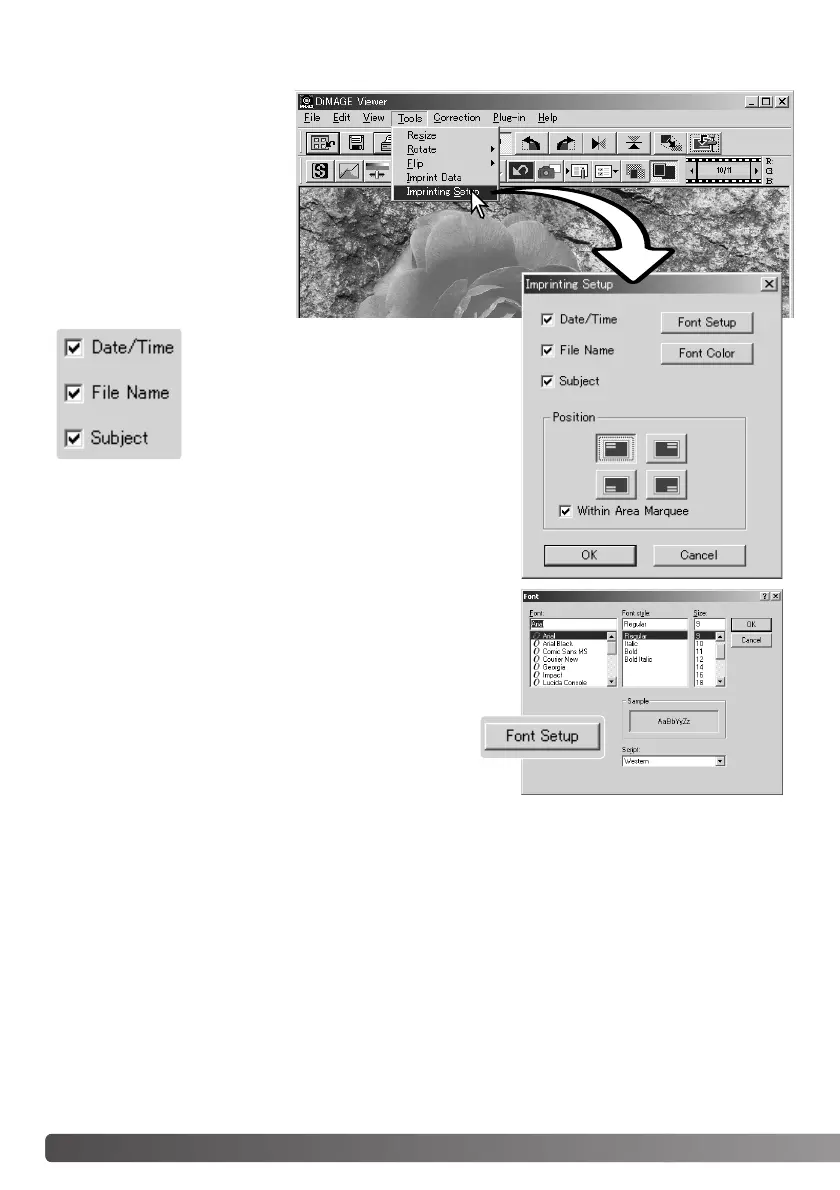
DATA IMPRINTING
The date and time of record-
ing, file name, and the subject
line can be imprinted into the
image. To add a subject line to
an image, see page 25.
Select the imprinting-setup
option from the tool menu to
open the setup dialog box.
Select the information to be imprinted by
checking the appropriate boxes.
Click the appropriate button to select the corner to imprint the
data. If the within-area-marquee check box is selected, the
data will appear inside the area marquee in the position select-
ed. For more about the area marquee, see page 64.
The font, font style, and point size can be specified.
Simply click the font-setup button to open the font dialog
box. The sample area will reflect the settings. The script
can be selected from the drop-down menu at the bottom
of the window. The fonts and scripts available vary with
the computer system.
BASIC IMAGE PROCESSING
Bekijk gratis de handleiding van Minolta Dimage G400, stel vragen en lees de antwoorden op veelvoorkomende problemen, of gebruik onze assistent om sneller informatie in de handleiding te vinden of uitleg te krijgen over specifieke functies.
Productinformatie
| Merk | Minolta |
| Model | Dimage G400 |
| Categorie | Niet gecategoriseerd |
| Taal | Nederlands |
| Grootte | 14086 MB |


