Handleiding
Je bekijkt pagina 13 van 18
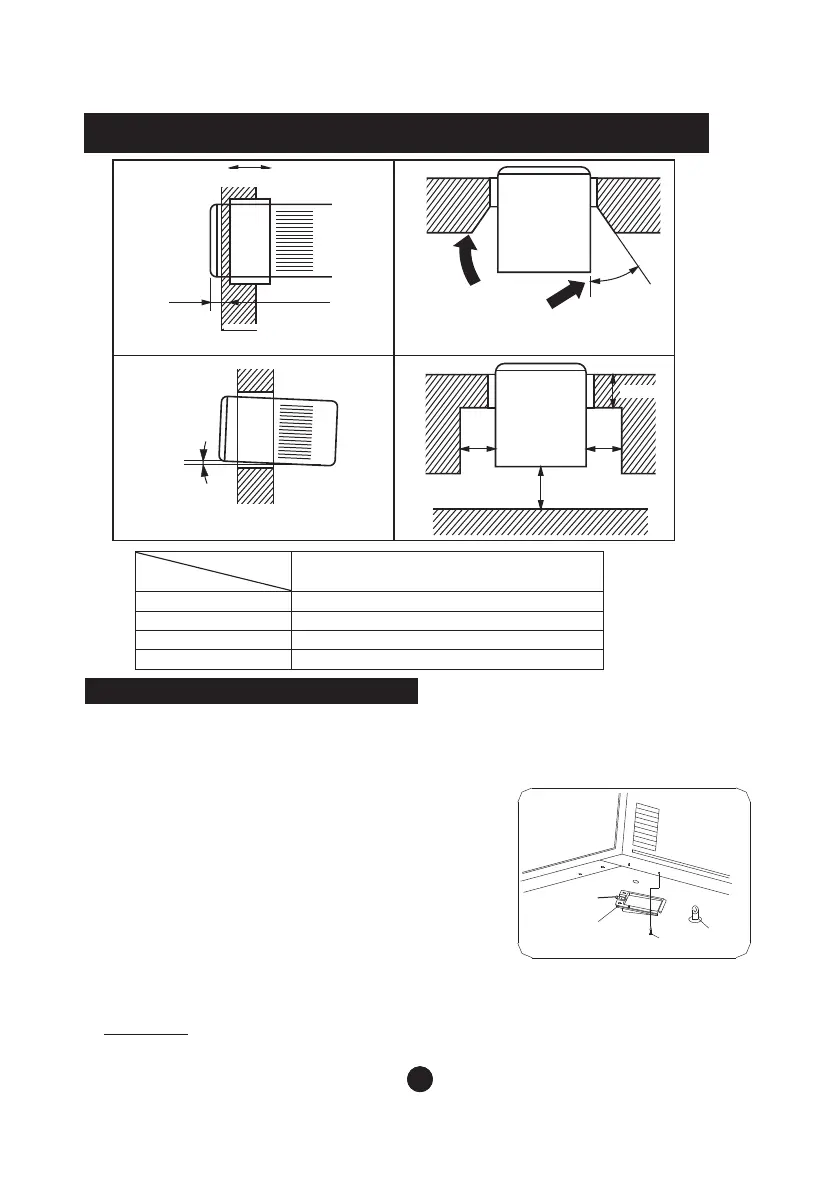
INSTALLATION(CONTINUED)
1010
O
45
Scrape
O
3~4
Less than C
more than D
More thanA
More than B
Less than
more thanA
Wall thickness is less than C
If the wall thickness is more than
scrape the wall as shown above.
Make rear side lower so that water will drain
out smoothly.
C
C
Size(mm)
A
B
C
D
400
500
210
60
The Treatment of Condensed Water
To meet different requirement of different type of air conditioner,t herea re tw o k inds o f m ethods
for your choice to treat the condensed water.
1. Remove the rubber plug from the bottom of the cabinet and
attach to the back drain hole (on some models the rubber
plug provided with your air conditioner accessory). For the
units without the bottom rubber plug and the back drain hole,
just install the drain tray.
2. Take out the drain tray and screws (which provided with
your air conditioner accessory).
3. Install the drain tray at the bottom of the unit and secure with
screws provided.
4. Connect the drain hose to the outlet located at one side of the
drain tray. You can purchase the drain hose or tubing locally to
satisfy your particular needs (Drain hose is not supplied).
Suggestion: To ensure the condensed water drain off smoothly, always keep the drain oulet of the
the drain tray downward when install the drain tray.
You can choose bottom drainage ,See the following procedures
to perform bottom drainage:
RUBBER
PLUG
SCREW
DRAIN PAN
DRAIN
OUTLET
Bekijk gratis de handleiding van Midea MWF-25CMN1, stel vragen en lees de antwoorden op veelvoorkomende problemen, of gebruik onze assistent om sneller informatie in de handleiding te vinden of uitleg te krijgen over specifieke functies.
Productinformatie
| Merk | Midea |
| Model | MWF-25CMN1 |
| Categorie | Airco |
| Taal | Nederlands |
| Grootte | 1690 MB |


