Metra 99-7612A handleiding
Handleiding
Je bekijkt pagina 3 van 16
99-7612
®
Dash Disassembly Kit Assembly
(Figure B)
(Figure A)
(Figure C)
(Figure G)
(Figure H)
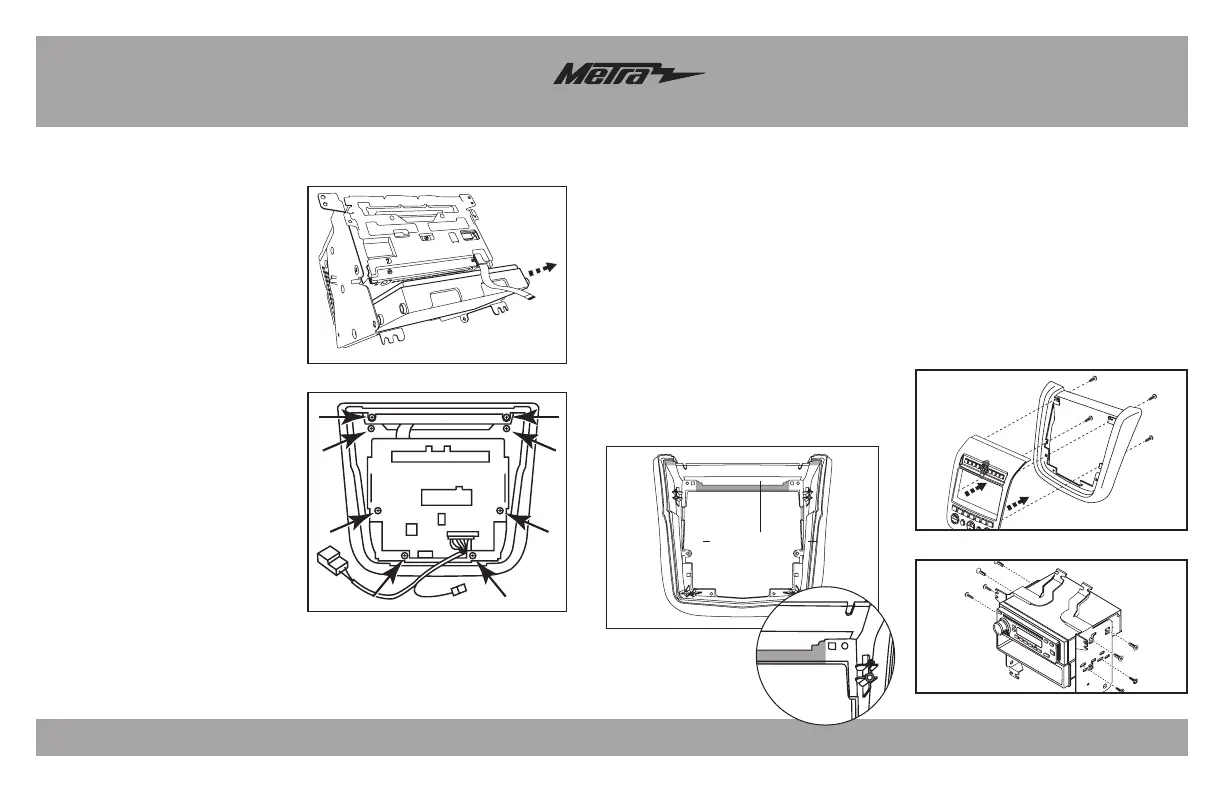
ISO DIN radio provision with pocket
1. Trim the shaded areas from the
factory radio trim panel. (Figure A)
Do not cut the locator and screw hole
off as they will be necessary to mount
the 99-7612 radio housing.
(See detail)
2. Attach the 99-7612 radio housing to
the radio trim panel using (4) supplied
3/8” Phillips screws. (Figure B)
3. Mount the radio housing brackets to
the aftermarket radio with the screws
supplied with the radio. (Figure C)
4. Mount the pocket to the radio/
bracket assembly using (4) 3/8”
Phillips screws supplied with the kit.
(Figure C)
Continued on next page
3
8. Remove the climate module
from radio chassis assembly.
(Figure G)
Note: The climate module will
be reused in kit assembly.
9. Remove (1) Phillip screw,
securing the white flat 16-pin
connector to the switch panel,
then remove the connector.
Note: This connector will be
reused in kit assembly.
10. Remove (8) Phillips screws
securing the switch panel to
the radio trim panel. (Figure H)
Note: The radio trim panel will
be reused in kit assembly.
Continue to kit assembly
Trim shaded areas
Detail
Bekijk gratis de handleiding van Metra 99-7612A, stel vragen en lees de antwoorden op veelvoorkomende problemen, of gebruik onze assistent om sneller informatie in de handleiding te vinden of uitleg te krijgen over specifieke functies.
Productinformatie
| Merk | Metra |
| Model | 99-7612A |
| Categorie | Niet gecategoriseerd |
| Taal | Nederlands |
| Grootte | 1912 MB |
Caratteristiche Prodotto
| Kleur van het product | Zwart, zilver |
| Compatibele producten | Nissan Murano |


