Metra 99-5840CH handleiding
Handleiding
Je bekijkt pagina 10 van 16
10
386.257.1187
|
MetraOnline.com
10
I N STALL ATI O N
It is highly advisable to read the following steps beforehand, to ensure a clear understanding of
what is to be expected. The following steps must be done in the order that they are numbered.
With the vehicle completely off:
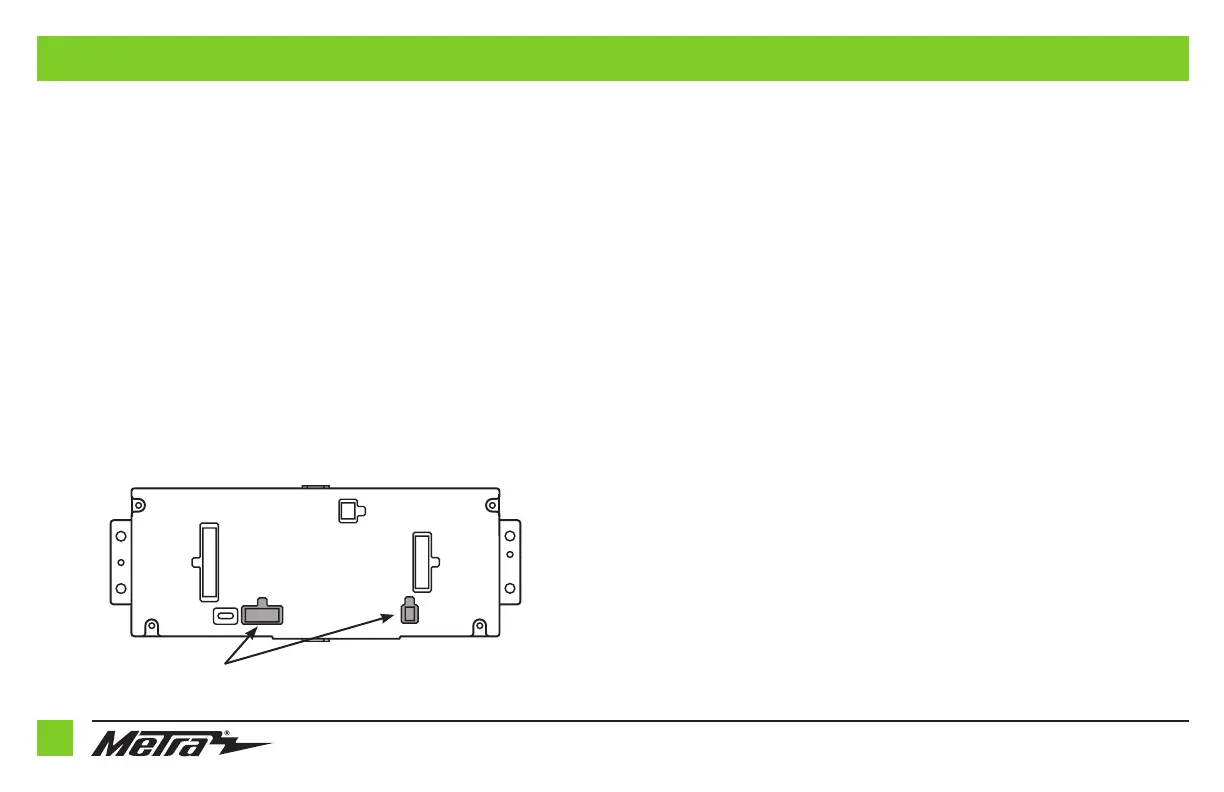
Touchscreen display
1. Connect the 16-pin harness with stripped leads into port “B” in the touchscreen display.
2. Connect the 5840 harness to the wiring harnesses in the vehicle. These harnesses are the
ones removed in step 13 of dash disassembly. Then insert the 5840 harness into port “A”
in the touchscreen display. But do not install this harness until exactly before step 1 of
Programming section. This is a timed process.
3. Connect the 4-pin harness with yellow RCA jacks into port “C” in the touchscreen display.
4. Disregard ports “D” and “E”, they will not be used in this application.
5. Port “F” is an update port for future firmware upgrades.
HVAC interface
6. Connect the HVAC interface harness into the HVAC interface, and then to the
wiring harnesses in the vehicle. These harnesses are the ones removed in step 11
of dash disassembly.
a. Then connect the
10-pin harness into the engine start/stop circuit board assembly.
Attention: There are (2) 10-pin connectors, one in the engine start/stop circuit board
assembly, and one in the touchscreen display. Use only the appropriate connector and
disregard the other one. If the incorrect port is accidentally used, the vehicle will need to be
reset by removing the battery for a couple minutes.
Note: Disregard the 4-pin flat to 4-pin stacked harness, it will not be used in this application.
7. Connect the 6-pin harness from the 5840 harness to the HVAC interface.
8. Connect the female connector of the 54-pin backup camera harness, to the wiring harness
in the vehicle. This connector is located behind the factory display screen, which was
removed in step 12 of dash disassembly.
Note: Disregard the male connector, it will not be used in this application.
9. Locate the factory antenna connector in the dash and complete all necessary connections to
the radio. Use the antenna adapter provided to adapt the factory antenna connector to the
aftermarket radio.
A
B
C
E
F
D
Note: DO NOT CONNECT!
Bekijk gratis de handleiding van Metra 99-5840CH, stel vragen en lees de antwoorden op veelvoorkomende problemen, of gebruik onze assistent om sneller informatie in de handleiding te vinden of uitleg te krijgen over specifieke functies.
Productinformatie
| Merk | Metra |
| Model | 99-5840CH |
| Categorie | Niet gecategoriseerd |
| Taal | Nederlands |
| Grootte | 2040 MB |


