Maytag MTW5605RU handleiding
Handleiding
Je bekijkt pagina 1 van 2
W11758489B
QUICK START GUIDE MAYTAG
®
TOP LOADING WASHING MACHINE
PRODUCT REGISTRATION & OWNER INFORMATION
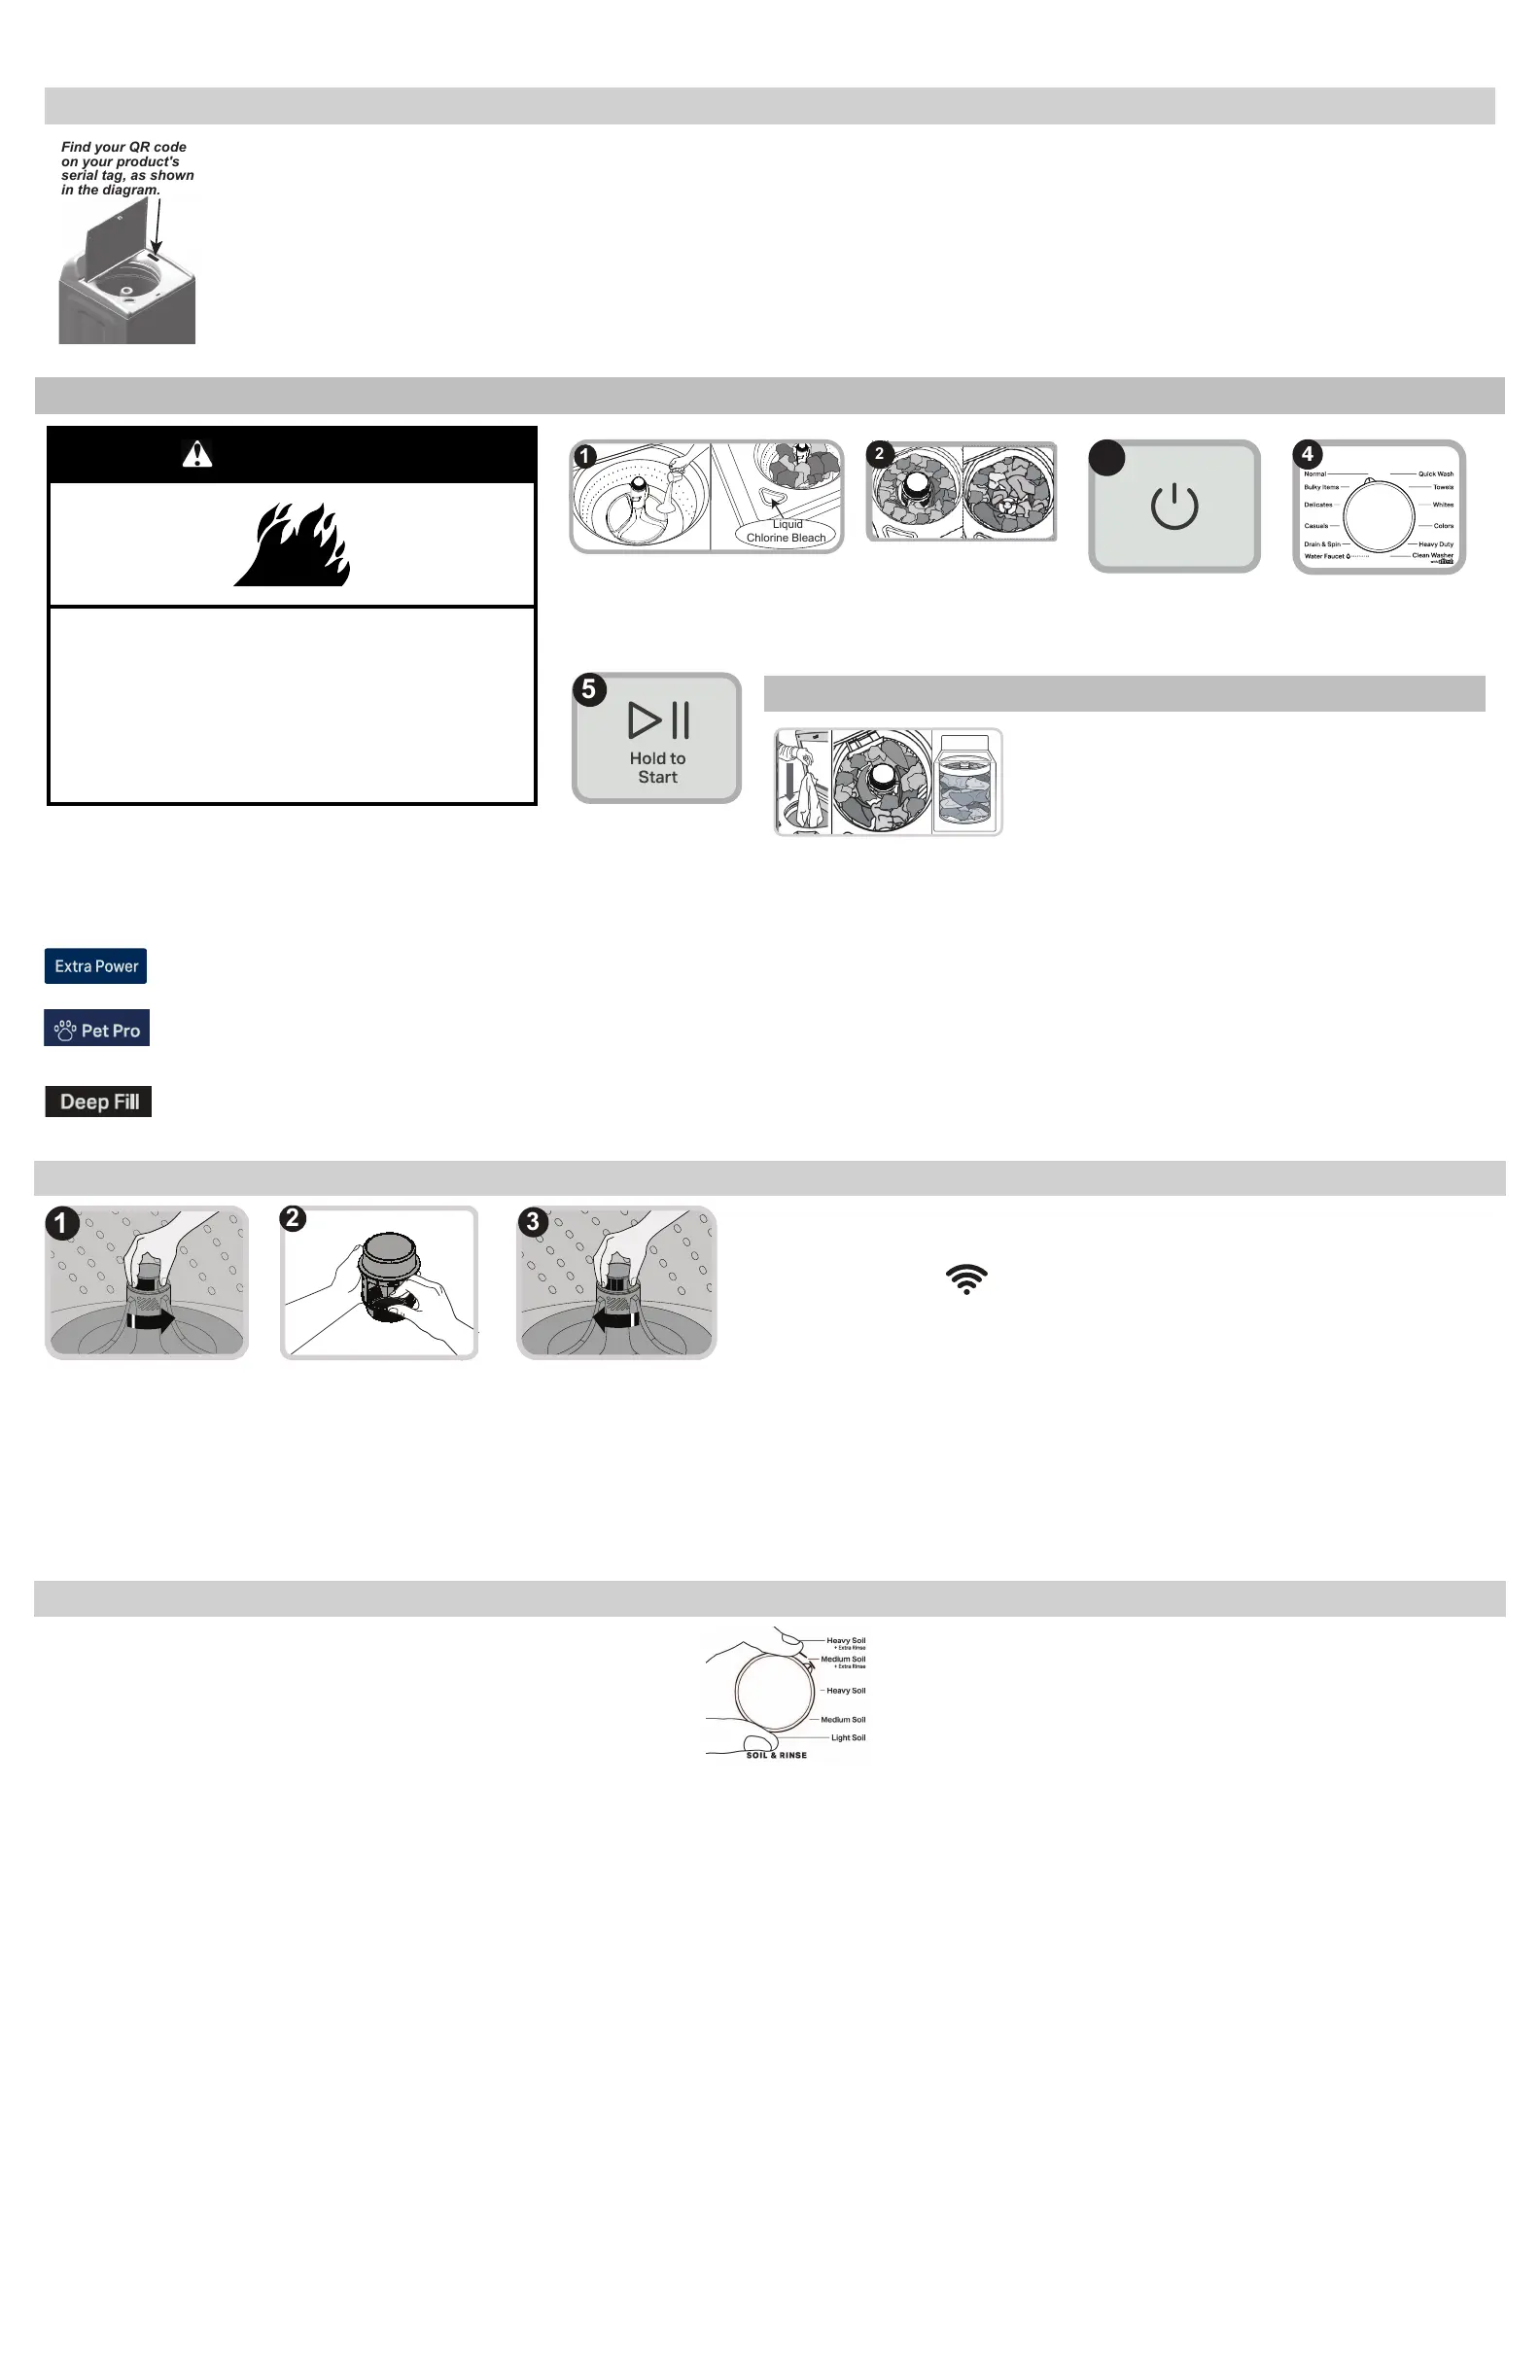
Find your QR code
on your product's
serial tag, as shown
in the diagram.
YOUR QR CODE UNLOCKS… product registration and warranty information, installation instructions, product guide, cycle guide, how-to videos, and additional accessories to
get the most out of your product. If you purchased a smart appliance, your QR code will provide instructions on how to download the app and connect. You can access the full
Installation, User Maintenance and Operating Instructions, Warranty details, and more by visiting our website at www.maytag.com/owners or www.maytag.ca/owners. This
may save you the cost of a service call. To receive a free printed copy of the information online, call us at 1-800-344-1274 (U.S.A.)/1-800-807-6777 (Canada) or write to us at:
Maytag Brand Appliances
Customer eXperience Center Unit
200-6750 Century Ave.
Mississauga, Ontario L5N 0B7
Register to access warranty information and receive important notifications related to your product. Scan the Photo Registration Card or QR code to register your product.
WARNING: To reduce the risk of fire, electric shock, or injury to person, read the Important Safety Instructions located in the Safety and Installation Instructions provided before
installing or operating this appliance.
OPERATING INSTRUCTIONS
WARNING
Fire Hazard
Never place items in the washer that are dampened
with gasoline or other flammable fluids.
No washer can completely remove oil.
Do not dry anything that has ever had any type of oil on
it (including cooking oils).
Doing so can result in death, explosion, or fire.
WARNING: Do not wash water resistant or water repellent type clothing.
Failure to closely follow these instructions may result in an abnormal
vibrating and out-of-balance condition that could result in physical injury,
property damage and/or appliance damage.
Liquid
Chlorine Bleach
1
Add HE Detergent into the basket. Add
bleach (if desired) to the labeled
dispenser.
2
Sort & Load Laundry then
close the lid.
4
Select Cycle and Adjust
Options.
5
Touch and Hold Start/
Pause to Begin Cycle.
CHOOSING THE RIGHT CYCLE & HOW TO LOAD
For best performance, load items by dropping them in loose heaps
evenly around the basket wall. Do not lay items lengthwise.
NOTE: Normal cycle with Warm water is recommended for
cottons, linens and mixed garment loads.
NOTE: If the washer detects an out-of-balance condition, it will
attempt to resolve the issue by redistributing the load. During this
process, the Sense and Rinse/Spin status indicators will both
briefly illuminate and automatically resume the cycle once
completed.
The Extra Power option boosts stain fighting with an intense pre-wash and extra agitation, so you can walk away while stains wash away. Activate this option by pressing the Extra Power button
(located on the central knob or console, depending on your the model).
The Pet Pro option unleashes additional water and a deep rinse to assist the Pet Pro Filter, which lifts and captures pet hair from clothes. Once removed, pet hair is caught in the built-in Pet Pro
Filter for a clean you can see. See below for more information on cleaning the Pet Pro Filter.
NOTE: Do not put pets in the washer.
The Deep Fill option gives you more water when you want it with Medium, High, or Max Fill options. The extra water works with robust wash action to saturate loads, loosen stains and help soak
away tough messes.
NOTE: Not all cycles, settings or options are available with all models.
CLEANING THE PET PRO FILTER CONNECT YOUR SMART APPLIANCE
1
Impeller: Press the button to
unlock the filter and turn it
counterclockwise to remove it
from the base.
Agitator: Turn the filter
counterclockwise to remove it
from the base.
2
Remove pet hair from the
outside and inside of filter. Filter
is intended to be cleaned after
each cycle. If the filter is not
cleaned, remaining hair can
reduce the filter’s effectiveness.
3
Impeller: To reinstall the filter, place it in the base, push
down, and rotate clockwise until it locks. Ensure the filter is
securely locked before starting a cycle. A properly locked
impeller filter will produce a snapping sound when securely
engaged, while the agitator filter will be unable to rotate
counterclockwise.
Agitator: To reinstall the filter, place it in the base and rotate
clockwise until it locks. Ensure the filter is securely locked
before starting a cycle. A locked agitator filter will be unable
to rotate counterclockwise, while the impeller filter will snap
when engaged.
GET THE MAYTAG™ APP to stay in control and efficiently manage laundry
from anywhere.*
Stay on top of laundry with end of cycle notifications on your
smart device to ensure finished loads aren’t left behind. Get step-
by-step pretreating instructions in the Stain Guide to take on
everyday tough stains and maximize the power of your Maytag
®
appliances.
*Appliance must be set to remote start. WiFi & App Required. Features subject
to change. Once installed, launch the app and you will be guided through the
steps to create your user account to connect to your appliance. You can get
connectivity instructions, terms of use, and privacy policy information at
www.maytag.com/connect or in Canada at www.maytag.ca/connect. If you
have any problems or questions, call Maytag
®
Connected Appliances at
1-866-333-4591.
ADDING LIQUID FABRIC SOFTENER ADDING LIQUID FABRIC SOFTENER MANUALLY
Follow manufacturer’s directions for correct amount of fabric softener based on your load size.
NOTE: When using fabric softener, always use the Soil & Rinse knob to select a setting with
‘+Extra Rinse.’ This will ensure that no fabric softener remains on clothing after the cycle is
finished.
IMPORTANT: Select the Fabric Softener option on the control panel before
starting a cycle. During the final rinse, wait until the washer has completed filling,
press the Start/Pause button to pause the washer. Lift the lid and add the
recommended amount of liquid fabric softener. Close the lid, press and hold the
Start/Pause button to resume the cycle.
3
Touch Power
Maytag Customer Service
PO Box #8
St. Joseph, MI 49085
Bekijk gratis de handleiding van Maytag MTW5605RU, stel vragen en lees de antwoorden op veelvoorkomende problemen, of gebruik onze assistent om sneller informatie in de handleiding te vinden of uitleg te krijgen over specifieke functies.
Productinformatie
| Merk | Maytag |
| Model | MTW5605RU |
| Categorie | Wasmachine |
| Taal | Nederlands |
| Grootte | 916 MB |


