Master-Bilt QS2 handleiding
Handleiding
Je bekijkt pagina 22 van 104
22
8/22 Rev. R 132617 ©2022 Refrigerated Solutions Group. All rights reserved.
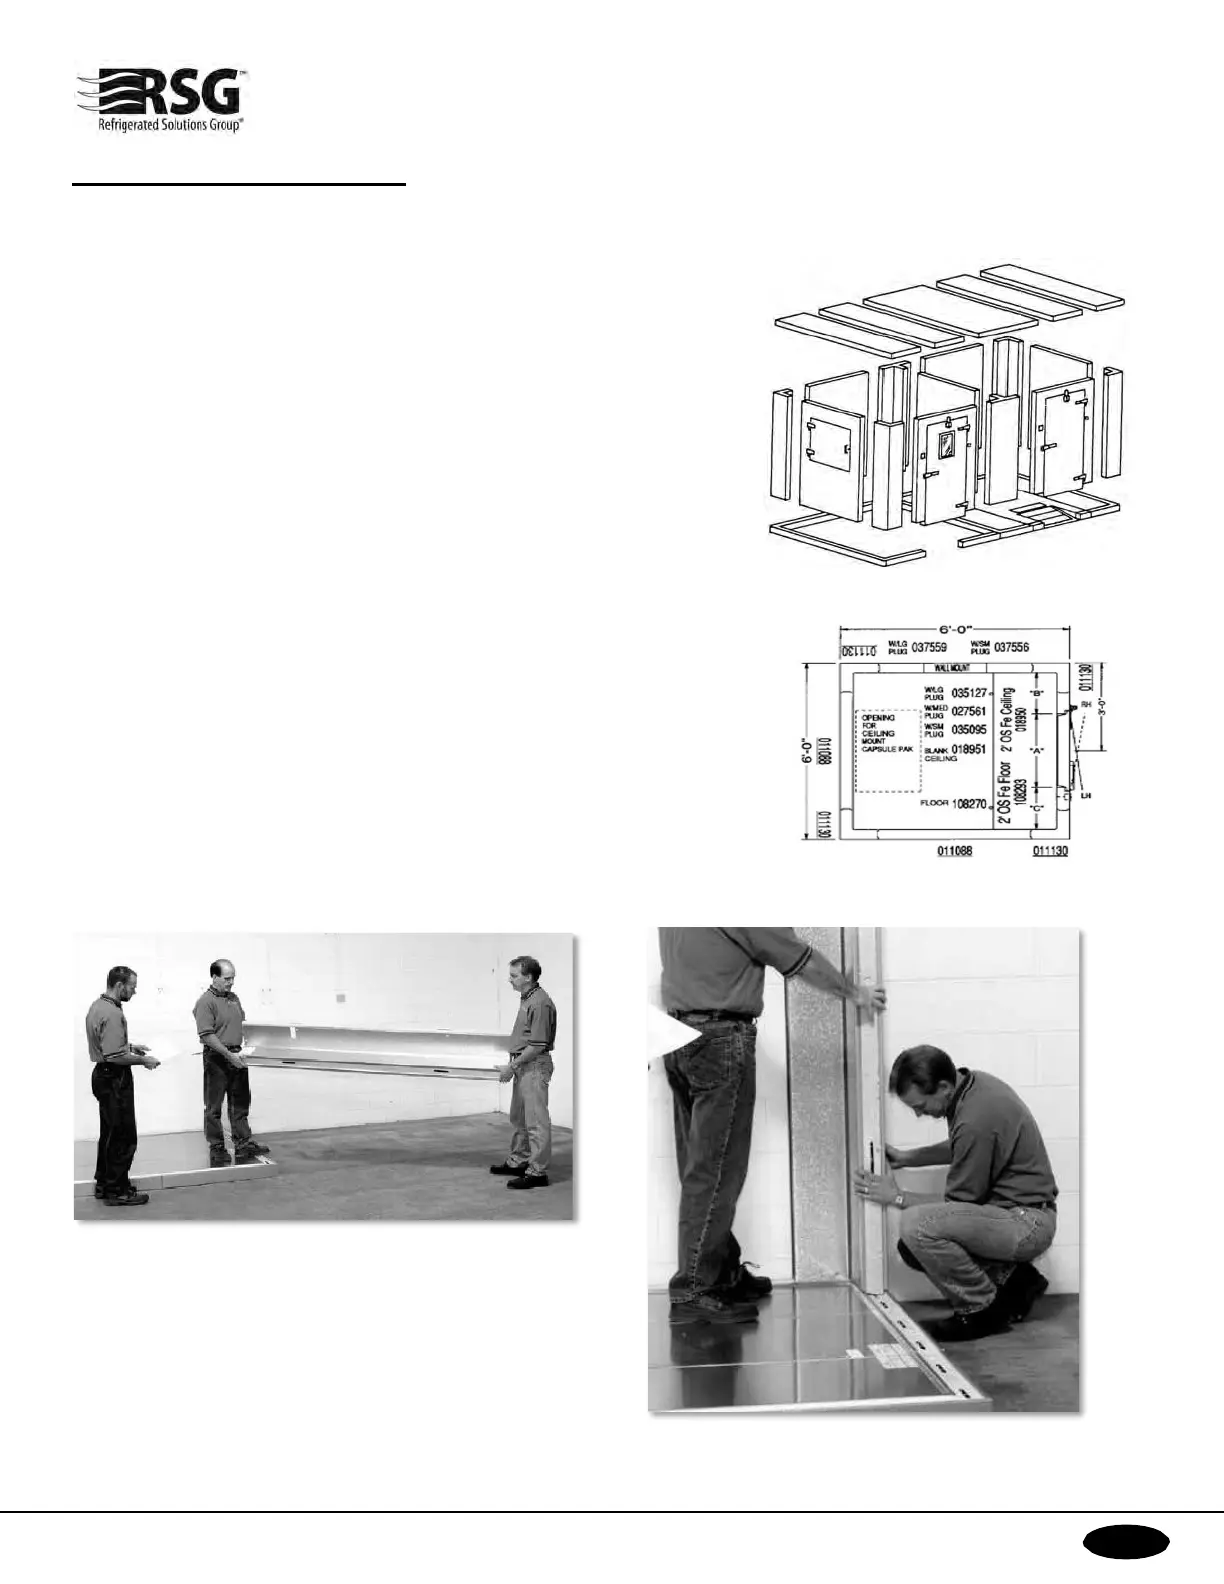
WALK-IN INSTALLATION
WALK-IN INSTALLATION
WALL AND CEILING PANEL CONSTRUCTION
The installation instructions that follow apply to any walk-in cooler or
freezer where the wall panels are supported either by foamed walk-in
floor panels or by a floor sealer (screed) assembly which has been
accurately located and properly leveled. NOTE: The procedure for
constructing wall and ceiling panels will be identical in all cases. NOTE:
The walls do not lock to vinyl sealers but will lock to foam sealers when
used.
To aid in the construction process, the floor plan furnished with your
walk-in has part numbers listed for each wall, corner, ceiling and floor
section. Match the part number on the floor plan to the label on the
interior of each panel to determine the current placement for each panel.
Notice, also, that the section latch access holes on the vertical edge of
the panel are always on the interior of the panel.
Select the first panel to be installed, typically beginning with a CORNER
PANEL. Notice that the panel is labeled "Top" along with a part number
indicating that when the panel is in its proper position, the labeled end will
be up.
Position the corner panel in the proper location on the walk-in floor or vinyl
screed assembly and, IF THE WALK-IN HAS A FLOOR, flush the corner
panel with the corner of the floor panel in both directions and lock it
securely to the floor panel.
Bekijk gratis de handleiding van Master-Bilt QS2, stel vragen en lees de antwoorden op veelvoorkomende problemen, of gebruik onze assistent om sneller informatie in de handleiding te vinden of uitleg te krijgen over specifieke functies.
Productinformatie
| Merk | Master-Bilt |
| Model | QS2 |
| Categorie | Koelkast |
| Taal | Nederlands |
| Grootte | 40845 MB |