Lincoln Electric RealWeld handleiding
Handleiding
Je bekijkt pagina 36 van 52
B-20
OPERATION (TRAINEE MODE)REALWELD
®
TRAINER
WELDING PROCEDURE SPECIFICATIONS
(WPS)
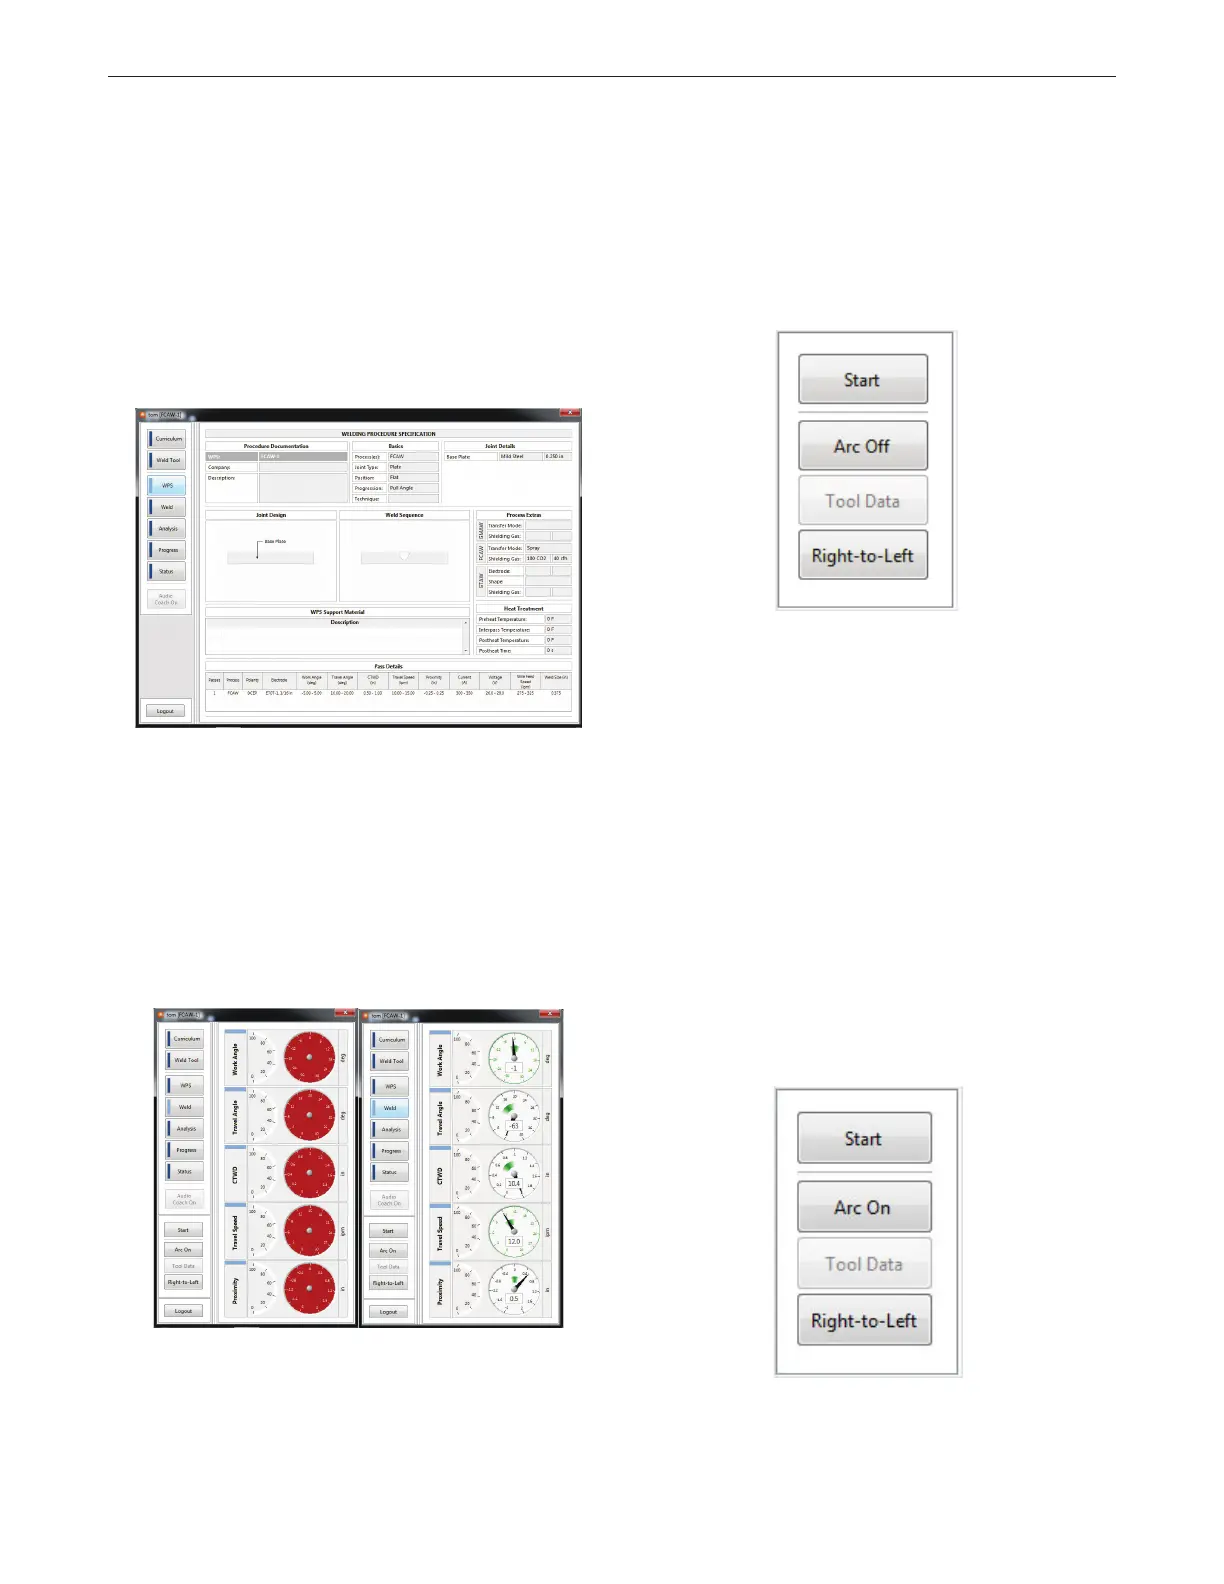
When the compatibility check window shows that the WPS and the
weld tool are a match, select the ‘OK’ icon and then select the ‘WPS’
icon on the left side of the screen. This will bring up the selected
WPS and all of its details. It is important for the trainee to note the
five critical torch motion variables listed as Pass Details. These
include Work Angle, Travel Angle, CTWD, Travel Speed and Proximity.
The trainee’s ability to stay within the acceptable range for each of
these variables during Arc Off and Arc On mode will determine their
score. See Figure B.81.
NOTE: Make certain the welder is set according to the proper
parameters for the selected WPS to avoid injury or damage.
WELD MODE
When the trainee has selected a WPS, select the ‘Weld’ icon to enter
weld mode. Once the ‘Weld’ icon is selected, five motion gages
will be displayed. If the torch is not within the field of view of the
cameras, the gages will be red in color. The system will not record
any data if the gages are red. Move the torch until the gages turn
white. This indicates that the torch is within the camera’s field of
view. See Figure B.82.
There are two different modes of operation – ‘Arc On’ and ‘Arc Off’.
When in Arc Off mode, the trainee can practice moving the torch
along the weld joint without actually creating a weld. The program
will record their movements and display them on the screen. In Arc
On mode, the trainee can create an actual weld and the program will
record their movements and display them on the screen.
ARC OFF MODE
When in the weld screen, select the ‘Arc On/Off’ icon until it displays
“Arc Off”. This will indicate that the arc is off. At this point, the
trainee should put on the appropriate welding gear and safety
equipment. In Arc Off mode the trainee will not be making an actual
weld, but should be wearing all the typical gear so they can simulate
the actual welding conditions. See Figure B.83.
When ready, simply pull the trigger. The program will start recording
data. The trainee can now start moving along the joint. Make sure
the gages are not red prior to or during Arc Off welding. If the trainee
is leaning over the torch and happens to cover the target, the gages
will turn red and data will not be saved.
The trainee can just let go of the trigger of their torch to stop
recording their weld just like they would when they are welding with
arc on.
When welding in Arc OFF mode with SMAW, the ‘Start’ icon must be
selected for the system to begin collecting data.
ARC ON MODE
When in the weld screen, select the ‘Arc On/Off’ icon until it displays
“Arc On”. This indicates that the arc is on. At this point, the trainee
should put on the appropriate welding gear and safety equipment.
In Arc On mode, the trainee will be making an actual weld, so all
standard welding safety procedures must be followed. See Figure
B.84.
Figure B.81 – WPS details
Figure B.82 – Weld mode
Figure B.83 – Operation
Figure B.84 – Arc on
Bekijk gratis de handleiding van Lincoln Electric RealWeld, stel vragen en lees de antwoorden op veelvoorkomende problemen, of gebruik onze assistent om sneller informatie in de handleiding te vinden of uitleg te krijgen over specifieke functies.
Productinformatie
| Merk | Lincoln Electric |
| Model | RealWeld |
| Categorie | Niet gecategoriseerd |
| Taal | Nederlands |
| Grootte | 13902 MB |


