Handleiding
Je bekijkt pagina 10 van 58
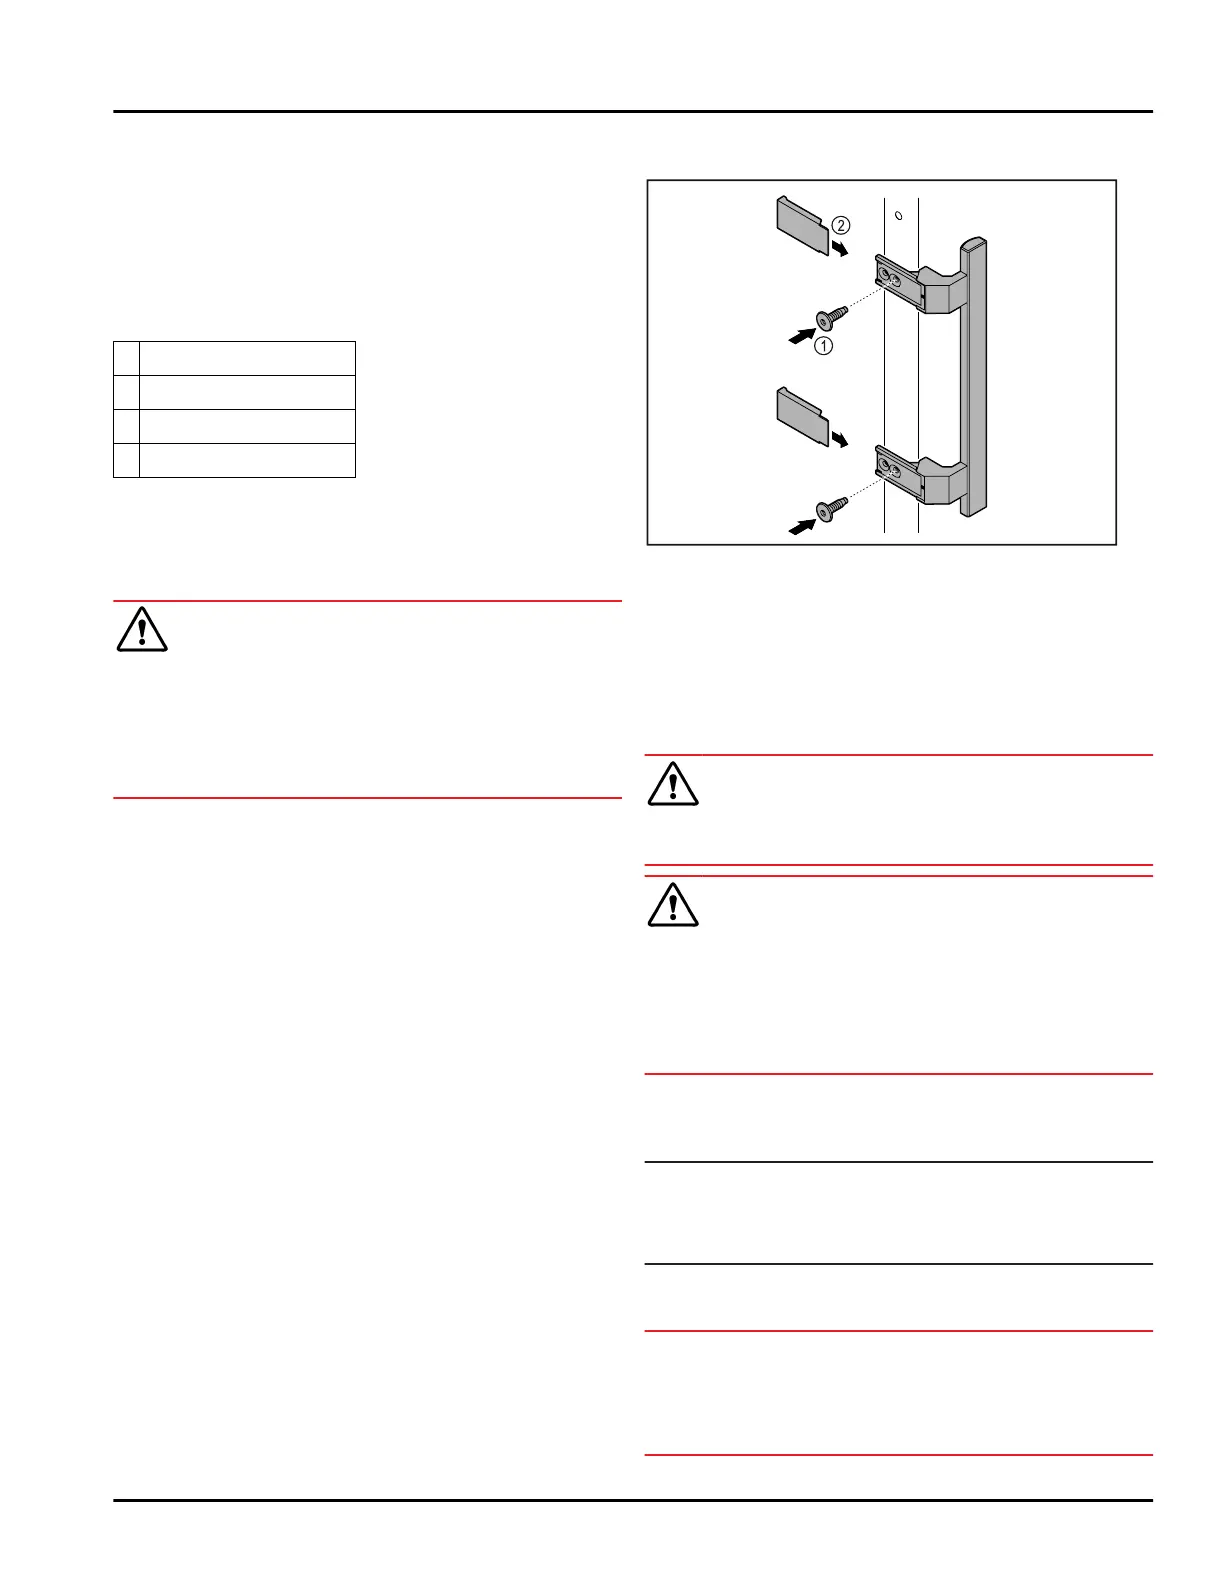
Fig. 6 Example illustration
(A) Appliance height
including feet/
rollers
(C) Appliance depth
without handle
[handle depth
= 45 mm (1 6/8 in)]
(B) Appliance width
without handle
[handle depth
= 45 mm (1 6/8in)]
(D) Appliance depth with
open door
A 819mm(32 1/4in)
B 597mm(23 1/2in)
C
605mm(23 13/16in)
x
D
1162mm(45 3/4in)
x
x
For appliances with the enclosed wall spacers, the
dimension increases by 35mm(1 3/8in).
4.3 Transporting the appliance
WARNING
There is a risk of injury from pieces of broken glass.*
When transporting at an altitude of more than
1500 m (4,921.26 ft), the glass panes of the door may
break. This can result in sharp-edged fragments, which
can cause serious injuries.
► Adopt suitable protective measures.
Observe the following when transporting the appli‐
ance:
► Transport the appliance upright.
► Use two people when transporting the appliance.
During the first use:
► Transport the appliance packaged.
During appliance transport or at first use (e.g. when
moving or cleaning):
► Empty the appliance.
► Secure the door against undesired opening.
4.4 Unpacking the appliance
► Check the appliance and the packaging for transport
damage. Contact the supplier immediately if you
suspect any damage. Do not connect the appliance
to the power supply.
► Remove all packaging materials from the rear or the
side walls of the fridge that may prevent proper
installation or prevent air flow and ventilation.
4.5 Installing the door handle
Fig.7
► Attach handle from accessory kit to the door using
supplied screws Fig.7(1).
► Put on cover Fig.7(2).
► Insert the plug from the enclosed package on the
other side. *
4.6 Setting up the appliance
CAUTION
Risk of injury and damage.
► Use 2 people to set up the appliance.
CAUTION
Risk of injury and damage.
The door can strike against the wall and become
damaged as a result. In the case of glass doors, the
damaged glass can cause injuries.
► Protect the door from striking against the wall.
Attach a door stopper, e.g. felt stopper, to the wall.
► Connect all necessary components (e.g. power
cable) to the back of the appliance and route to the
side.
Note
Cables can be damaged.
► Do not crush the cable when pushing the appliance
back.
4.7 Leveling out the appliance
NOTICE
Appliance body can become deformed and door will not
close.
► Align appliance horizontally and vertically.
► Compensate for uneven floors using adjustable feet.
Start-up
10 * Depending on model and options
Bekijk gratis de handleiding van Liebherr SRTvh 1501 Perfection, stel vragen en lees de antwoorden op veelvoorkomende problemen, of gebruik onze assistent om sneller informatie in de handleiding te vinden of uitleg te krijgen over specifieke functies.
Productinformatie
| Merk | Liebherr |
| Model | SRTvh 1501 Perfection |
| Categorie | Koelkast |
| Taal | Nederlands |
| Grootte | 7558 MB |


