Handleiding
Je bekijkt pagina 47 van 84
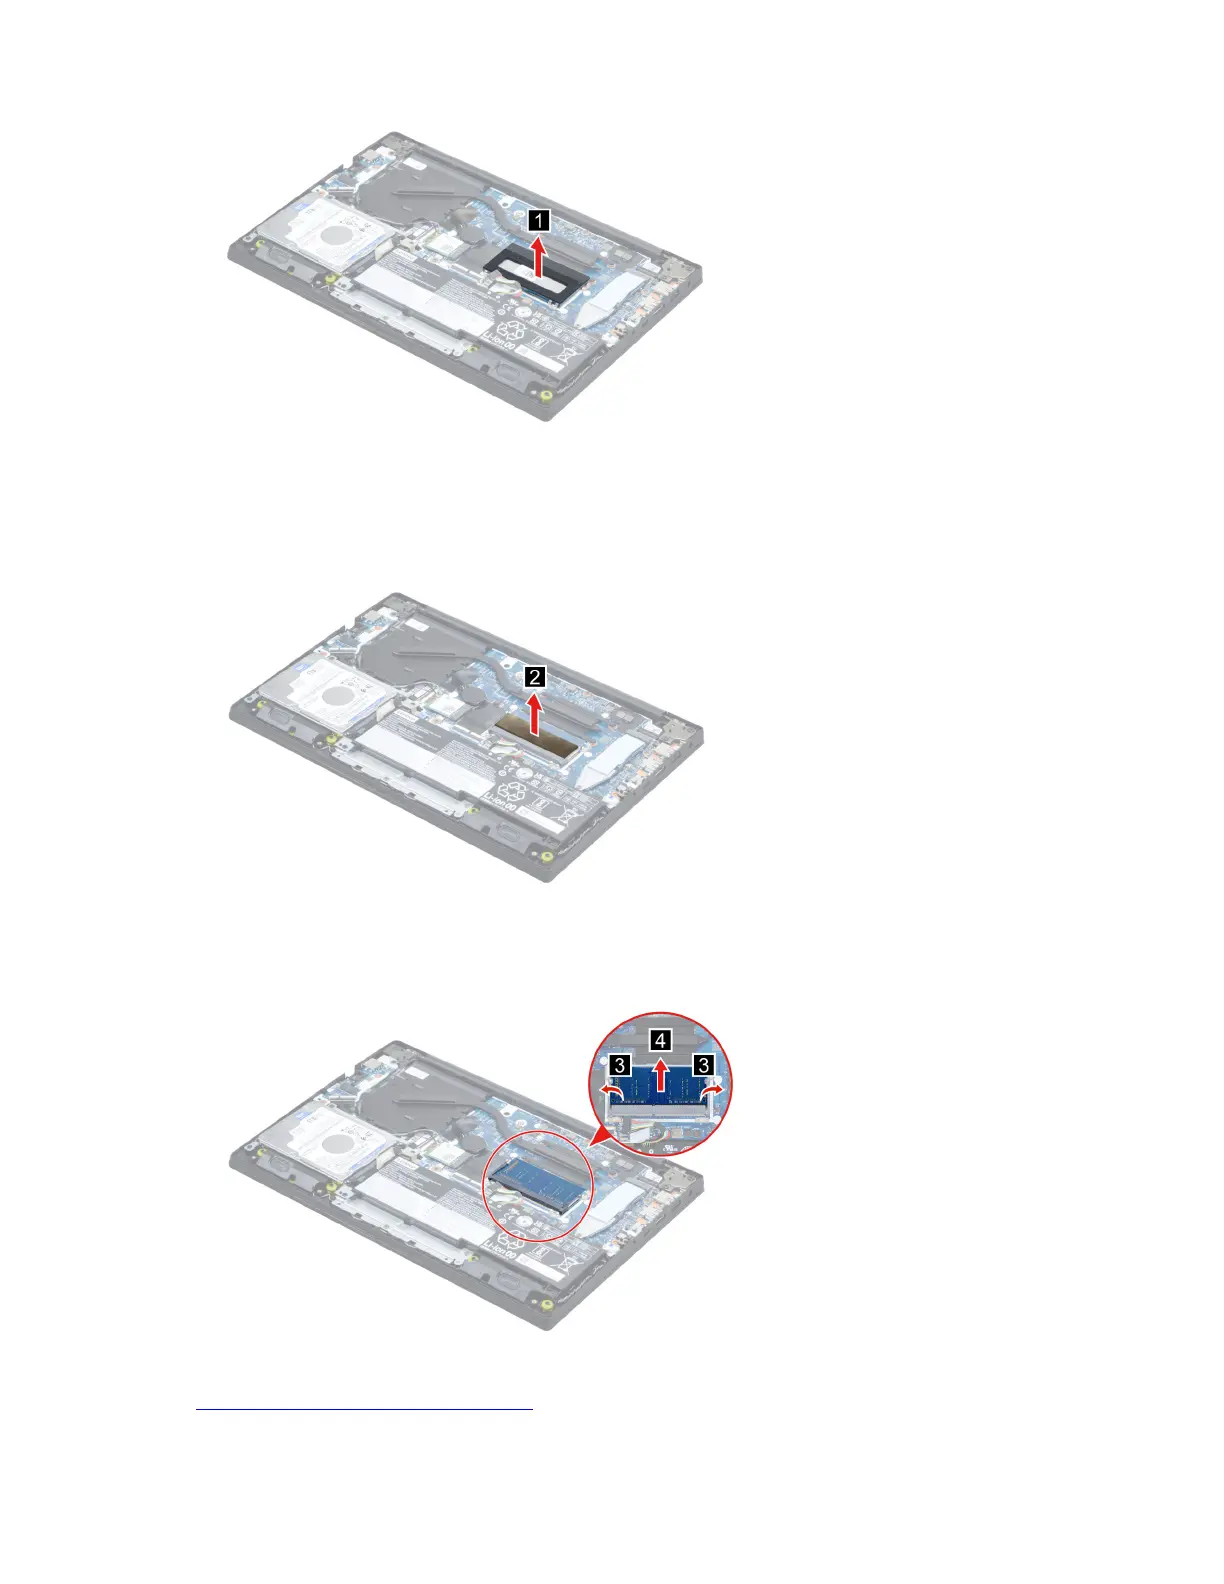
Figure 18. Remove the memory module shielding
Step 3. Remove the DIMM absorber.
Note: Don't forget to reinstall DIMM absorber back to original location when replacing related
FRUs.
Figure 19. Remove the DIMM absorber
Step 4. Release the two latches on both edges of the socket at the same time. Then remove the memory
module.
Figure 20. Remove the memory module
Go to https://support.lenovo.com/partslookup to look up the Lenovo part numbers of the following
replacement parts:
Chapter 4. Removing a FRU or CRU 41
Bekijk gratis de handleiding van Lenovo V15 Gen 3, stel vragen en lees de antwoorden op veelvoorkomende problemen, of gebruik onze assistent om sneller informatie in de handleiding te vinden of uitleg te krijgen over specifieke functies.
Productinformatie
| Merk | Lenovo |
| Model | V15 Gen 3 |
| Categorie | Laptop |
| Taal | Nederlands |
| Grootte | 20888 MB |


