Handleiding
Je bekijkt pagina 114 van 128
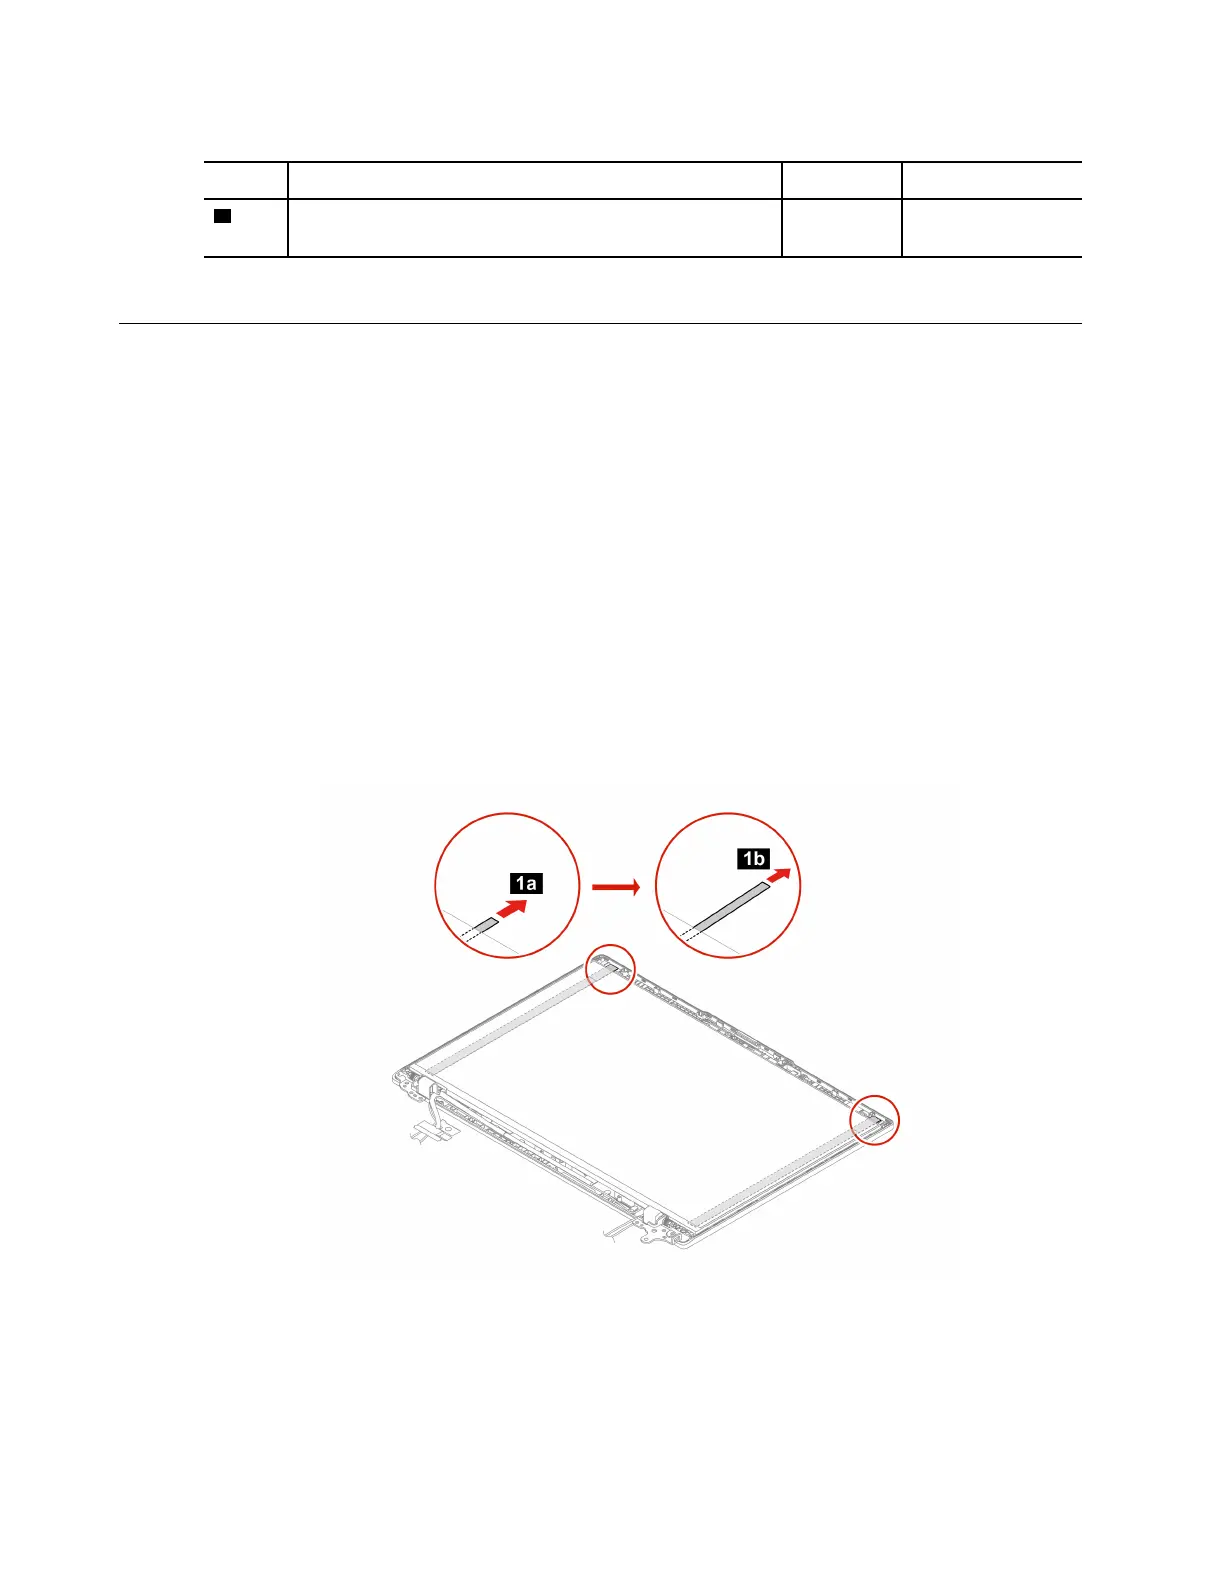
Table 15. For models with aluminium cover
Step Screw (quantity) Color
Torque
1
M2.5 × L4 mm, flat-head, nylon-coated (6)
Black 0.294 Nm
(3.0 kgf-cm)
Step 2. Install the LCD hinges in reverse order.
LCD panel and elastic adhesive tapes
Follow the instructions to replace the LCD panel and elastic adhesive tapes.
For access, remove these FRUs in order:
• “Base cover assembly” on page 72
• “LCD unit” on page 102
• “LCD bezel with webcam privacy shutter” on page 106
Removal steps
Follow the instructions to remove the LCD panel and elastic adhesive tapes.
Step 1.
Note: Do not pull the tapes too fast, otherwise, the tapes might snap.
Pull out each tape slowly in the direction as shown until the adhesive tapes are all released from
LCD unit.
Step 2. Turn over the LCD panel and detach the LCD cable from the LCD panel as shown.
108
ThinkPad L14 Gen 5 and ThinkPad L16 Gen 1 Hardware Maintenance Manual
Bekijk gratis de handleiding van Lenovo ThinkPad L14 Gen 5, stel vragen en lees de antwoorden op veelvoorkomende problemen, of gebruik onze assistent om sneller informatie in de handleiding te vinden of uitleg te krijgen over specifieke functies.
Productinformatie
| Merk | Lenovo |
| Model | ThinkPad L14 Gen 5 |
| Categorie | Laptop |
| Taal | Nederlands |
| Grootte | 16343 MB |


