Handleiding
Je bekijkt pagina 65 van 86
Screw specifications Number of screws
M2 x L3 4
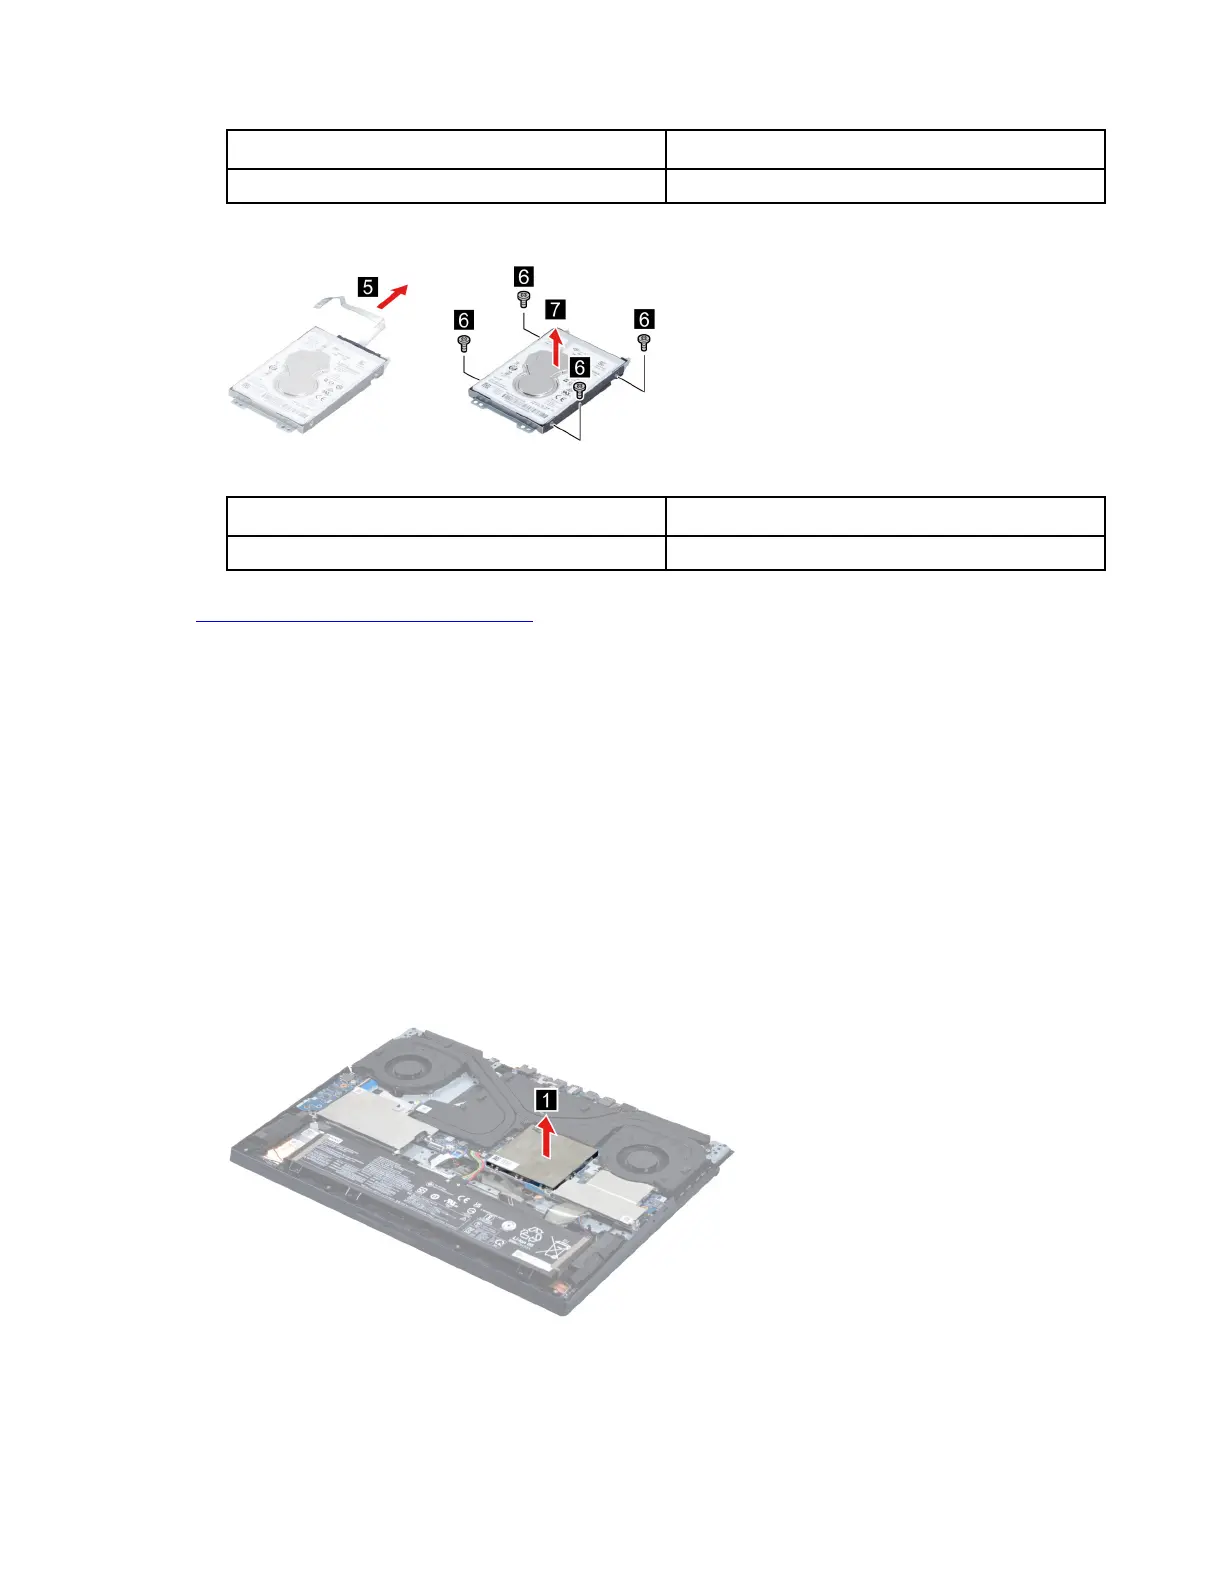
Step 3. Remove the HDD cable. Then remove four screws and separate the HDD from the HDD bracket.
Figure 49. Separate the HDD cable, HDD and the HDD bracket
Screw specifications Number of screws
M2 x L3 4
Go to
https://support.lenovo.com/partslookup to look up the Lenovo part numbers of the following
replacement parts:
HDD
HDD cable
HDD bracket
Remove the memory module
Make sure the following FRU (or CRU) has been removed.
“Remove the lower case” on page 53
Step 1. Disconnect the battery pack cable from the system board.
Attention: Use your fingernails to pull the connector to unplug it. Do not pull the cable.
Step 2. Remove the memory module shielding.
Figure 50. Remove the memory module shielding
Step 3. Release the two latches on both edges of the socket at the same time. Then, remove the memory
module.
Chapter 4. Removing a FRU or CRU 59
Bekijk gratis de handleiding van Lenovo Legion 5 15ACH6A, stel vragen en lees de antwoorden op veelvoorkomende problemen, of gebruik onze assistent om sneller informatie in de handleiding te vinden of uitleg te krijgen over specifieke functies.
Productinformatie
| Merk | Lenovo |
| Model | Legion 5 15ACH6A |
| Categorie | Laptop |
| Taal | Nederlands |
| Grootte | 20183 MB |
Caratteristiche Prodotto
| Kleur van het product | Zwart |
| Gewicht | 2400 g |
| Breedte | 362.56 mm |
| Diepte | 260.61 mm |
| Hoogte | 25.75 mm |


