Handleiding
Je bekijkt pagina 41 van 86
“Remove the lower case” on page 33
Step 1. Disconnect the battery pack cable from the system board.
Attention: Use your fingernails to pull the connector to unplug it. Do not pull the cable.
Step 2. Remove the right SSD plate.
Note: For details, see “Remove the solid-state drive (SSD) plates” on page 34.
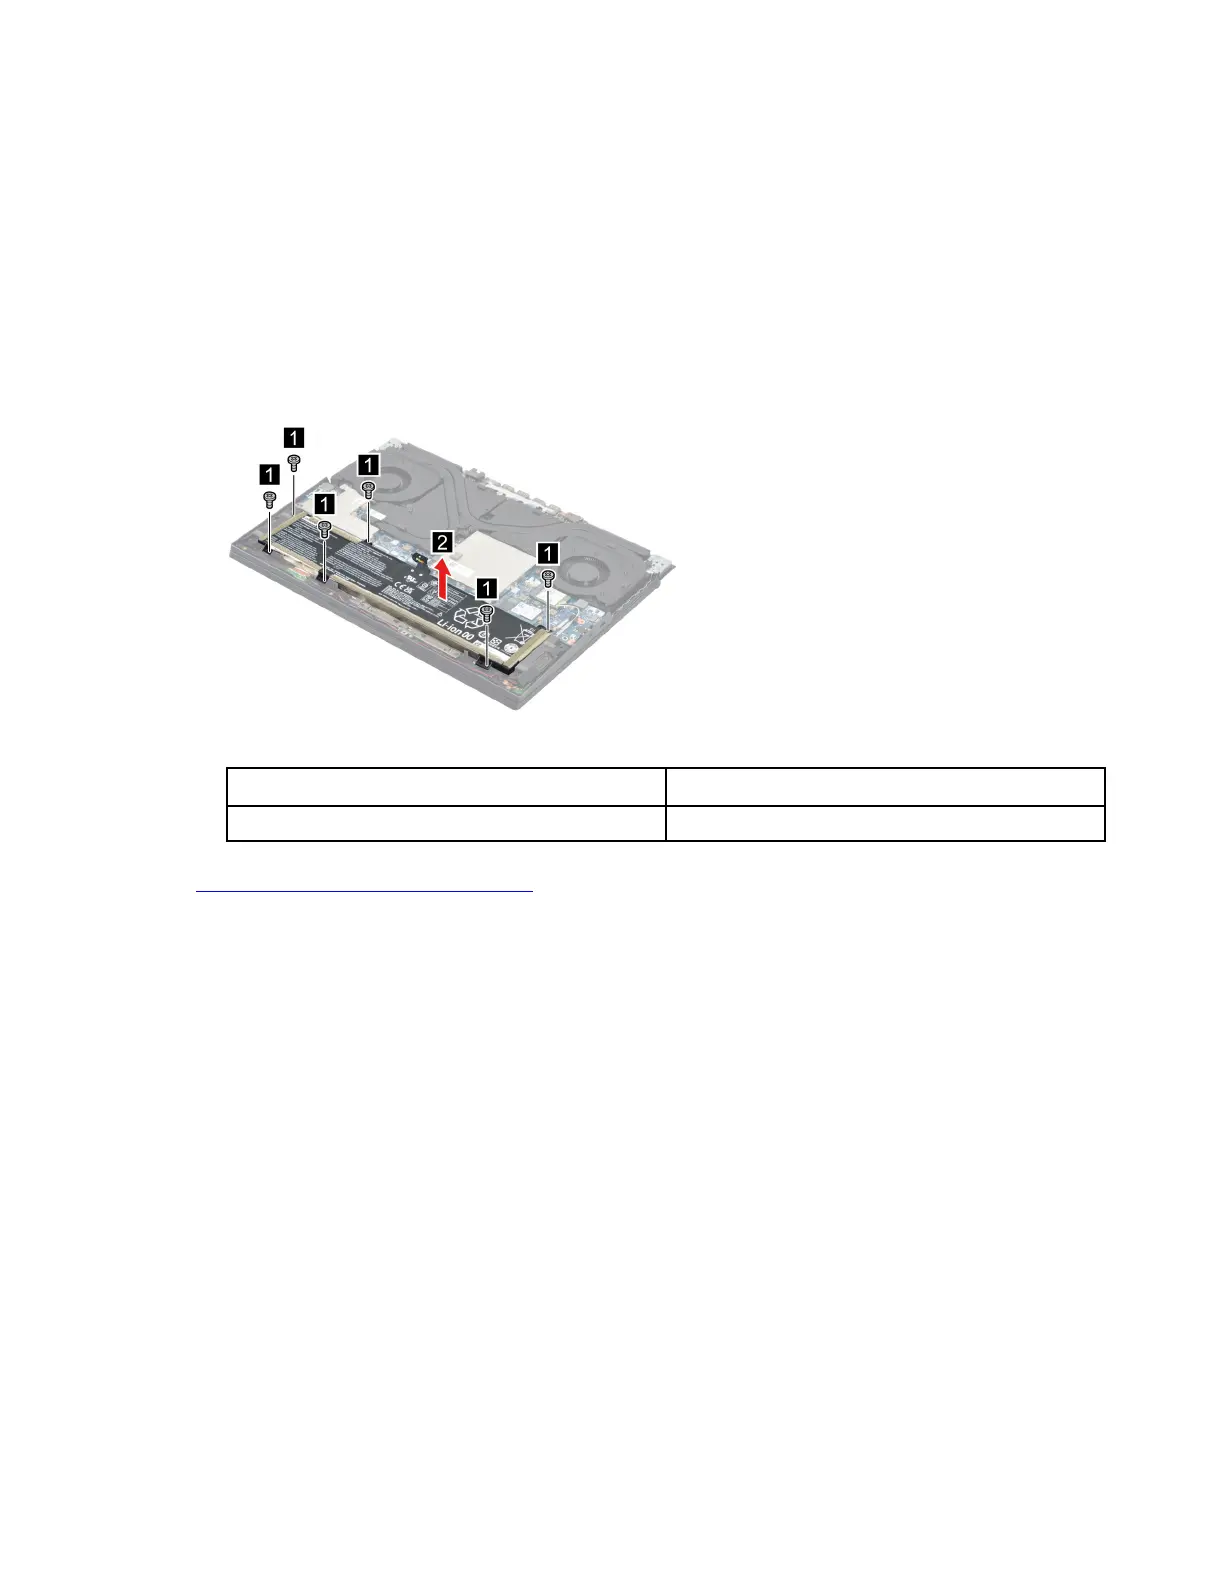
Step 3. Remove six screws and then remove the battery pack.
Note: Attach the battery sponge to the battery pack when replacing the battery pack.
Figure 9. Remove six screws and remove the battery pack
Screw specifications Number of screws
M2 x L4.5 6
Go to
https://support.lenovo.com/partslookup to look up the Lenovo part numbers of the following
replacement parts:
Battery pack
battery sponge
Remove the solid-state drive (SSD)
Make sure the following FRUs (or CRUs) have been removed.
“Remove the lower case” on page 33
“Remove the solid-state drive (SSD) plates” on page 34
Step 1. Remove two screws.
Chapter 4. Removing a FRU or CRU 35
Bekijk gratis de handleiding van Lenovo Legion 5 15ACH6A, stel vragen en lees de antwoorden op veelvoorkomende problemen, of gebruik onze assistent om sneller informatie in de handleiding te vinden of uitleg te krijgen over specifieke functies.
Productinformatie
| Merk | Lenovo |
| Model | Legion 5 15ACH6A |
| Categorie | Laptop |
| Taal | Nederlands |
| Grootte | 20183 MB |
Caratteristiche Prodotto
| Kleur van het product | Zwart |
| Gewicht | 2400 g |
| Breedte | 362.56 mm |
| Diepte | 260.61 mm |
| Hoogte | 25.75 mm |


