Lectrosonics M2T-X handleiding
Handleiding
Je bekijkt pagina 15 van 24
Digital IEM Transmitter
Rio Rancho, NM
15
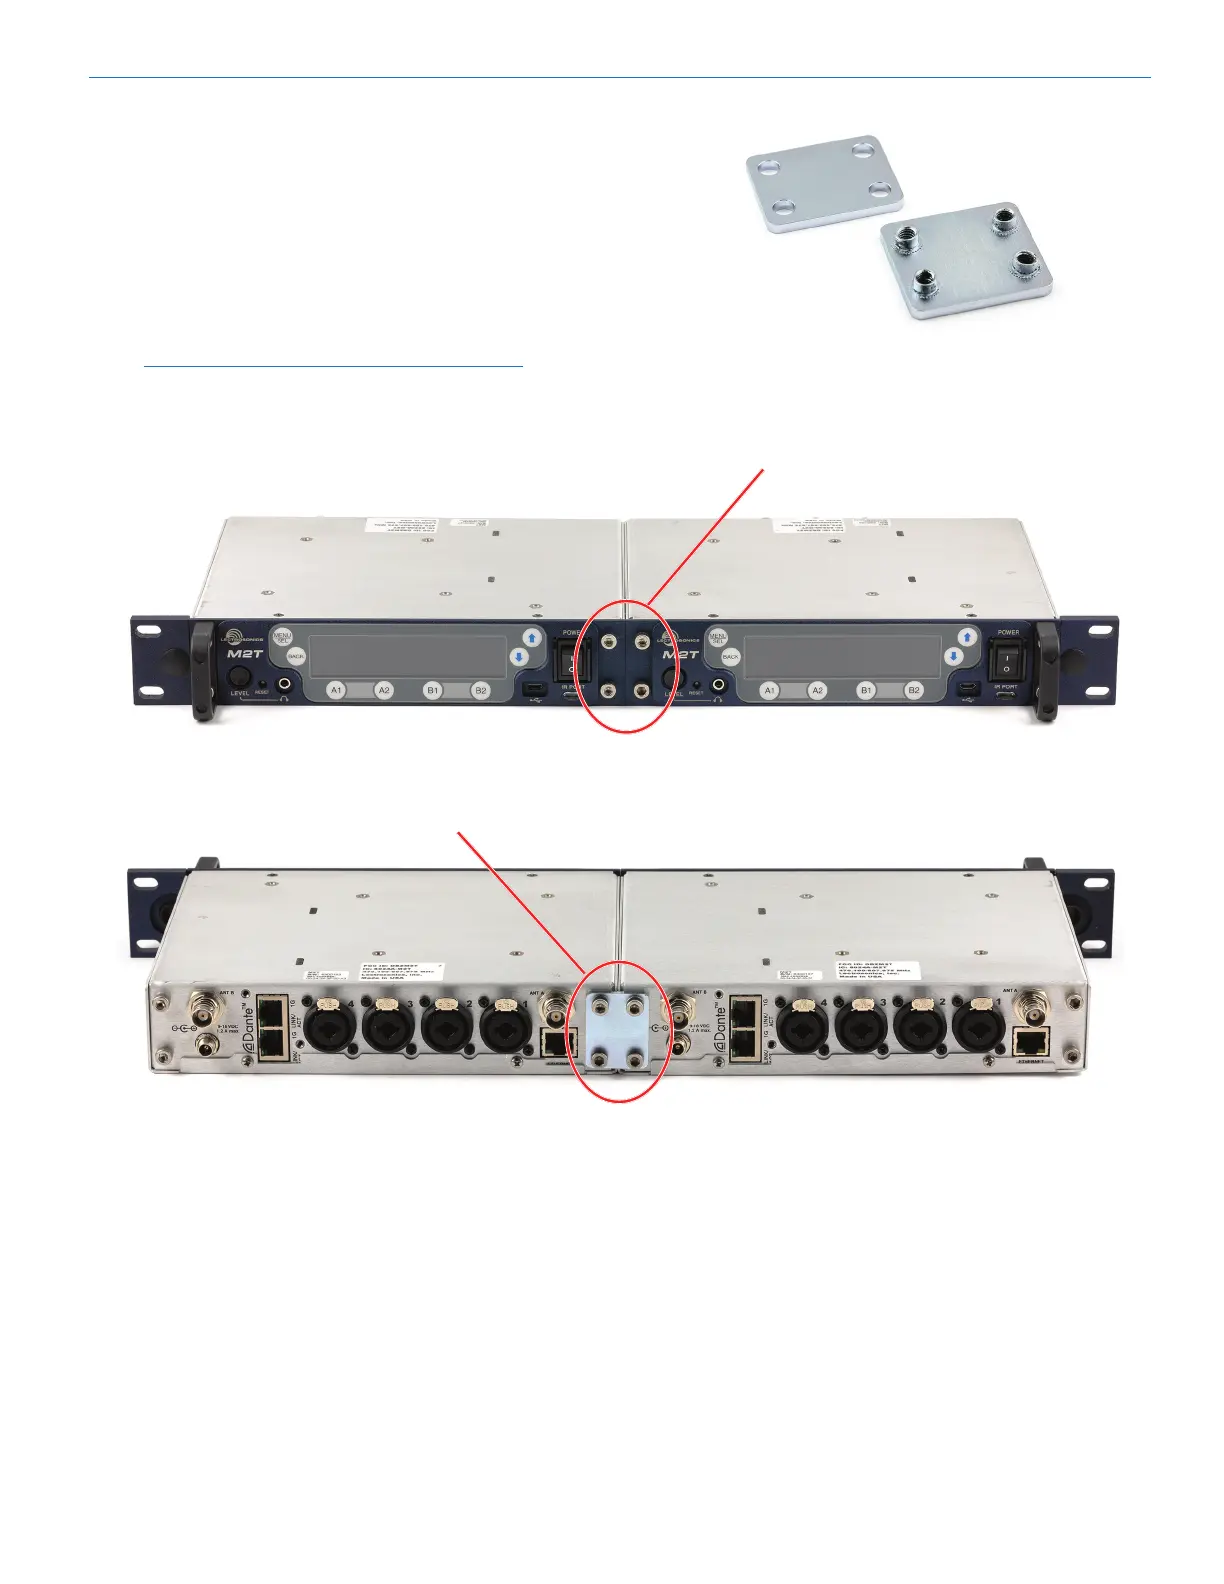
Slide the other transmitter over the tie bracket and
insert the screws, but do not tighten them com-
pletely until the rear tie bracket is installed.
7. Remove the four cap screws from the adjacent rear
panels, and then use them to attach the rear tie
bracket. Do not tighten the screws completely.
8. After front and rear tie brackets are installed, place
the transmitters on a at surface so the that the
front panels are even with each other. Hold the
transmitters in place and tighten all cap screws on
the front and rear brackets.
NOTE: If the supplied rubber feet are installed
on under side of M2T, M2T/E01, M2T/E02, M2T/
E06, it will not fit in a rack unless there is an
empty space below it.
Rear tie bracket
(Part #25990)
Front tie bracket
(Part #25991)
Bekijk gratis de handleiding van Lectrosonics M2T-X, stel vragen en lees de antwoorden op veelvoorkomende problemen, of gebruik onze assistent om sneller informatie in de handleiding te vinden of uitleg te krijgen over specifieke functies.
Productinformatie
| Merk | Lectrosonics |
| Model | M2T-X |
| Categorie | Niet gecategoriseerd |
| Taal | Nederlands |
| Grootte | 10631 MB |


