Lectrosonics M2T-X handleiding
Handleiding
Je bekijkt pagina 14 van 24
M2T, M2TND, M2T/E01, M2TND/E01, M2T/E02, M2T/E06
LECTROSONICS, INC.
14
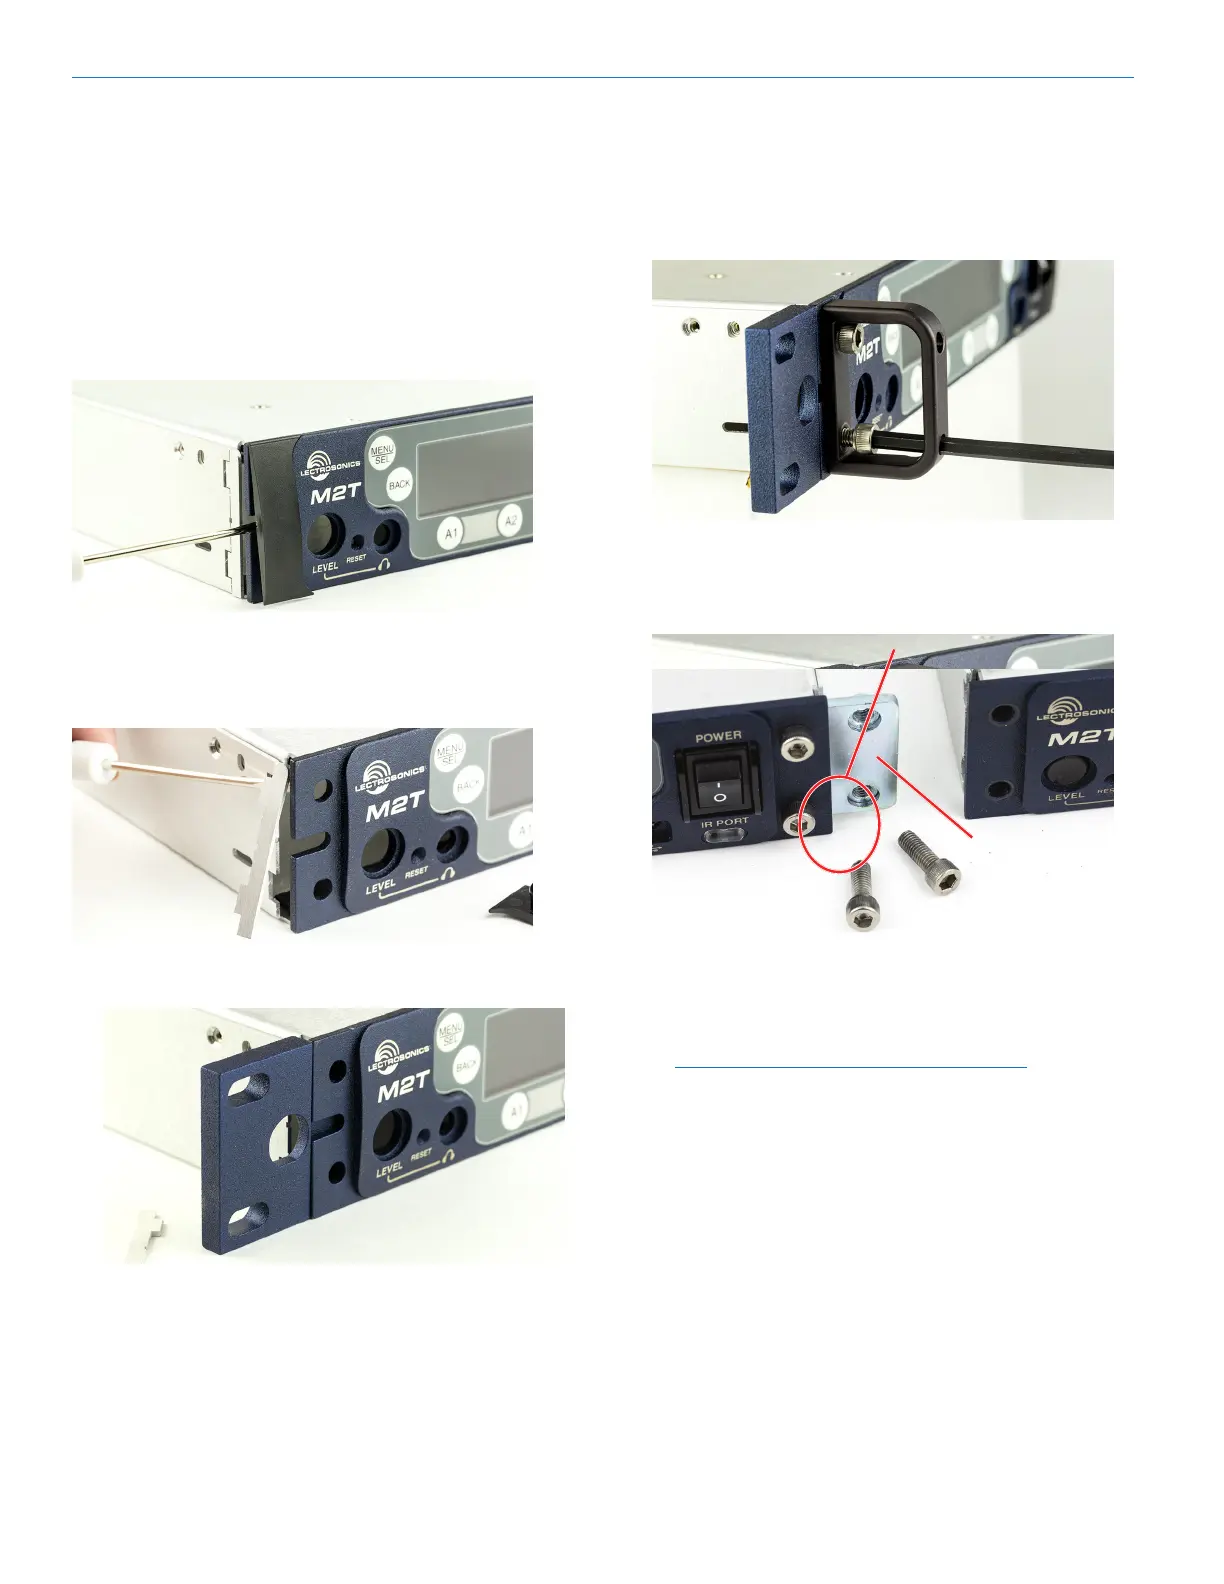
4. Insert two (2) cap screws (Part #28885) through the
rack handle (Part #27082) holes and install the rack
handle onto the ange bracket through the holes in
the unit’s front panel. Firmly tighten the cap screws
using the hex key (Allen wrench) as shown.
5. If antennas will NOT be mounted on the front
panel of the transmitters, install the hole cap (Part
#35959) by aligning the at on the cap with the at
on the opening.
Tensioning lock
nuts on the rear
side of the bracket
6. Install one side of the front tie bracket (Part
#25991) into the side panel opening in one of the
transmitters. Insert the screws, but do not tighten
them completely at this point.
Installing two M2T, M2T/E01, M2T/E02,
M2T/E06 Transmitters into a Single Rack
Space
The M2T, M2T/E01, M2T/E02, M2T/E06 transmitter oc-
cupies a half rack space, and comes with hardware to
mount two transmitters into a single rack space.
1. Remove the Trim Cap (Part #P1330) from both
sides of the front panel on both transmitters.
2. Remove the breakaway tabs on both sides of the
chassis side panels. Use a at blade screwdriver
to pry the tabs outward and snap them o of the
chassis.
3. Insert the ange bracket (Part #27076) into the
open slot in the side of the chassis cover panel.
NOTE: The retaining nuts on the panel and
tie brackets are “tensioning lock nut” types
designed to prevent the screws from coming
loose due to vibration. You will usually feel
resistance as you tighten the screws - this is
normal.
Bekijk gratis de handleiding van Lectrosonics M2T-X, stel vragen en lees de antwoorden op veelvoorkomende problemen, of gebruik onze assistent om sneller informatie in de handleiding te vinden of uitleg te krijgen over specifieke functies.
Productinformatie
| Merk | Lectrosonics |
| Model | M2T-X |
| Categorie | Niet gecategoriseerd |
| Taal | Nederlands |
| Grootte | 10631 MB |


