Kramer VS-1616D handleiding
Handleiding
Je bekijkt pagina 23 van 170
16 VS-1616D - Connecting the VS-1616D
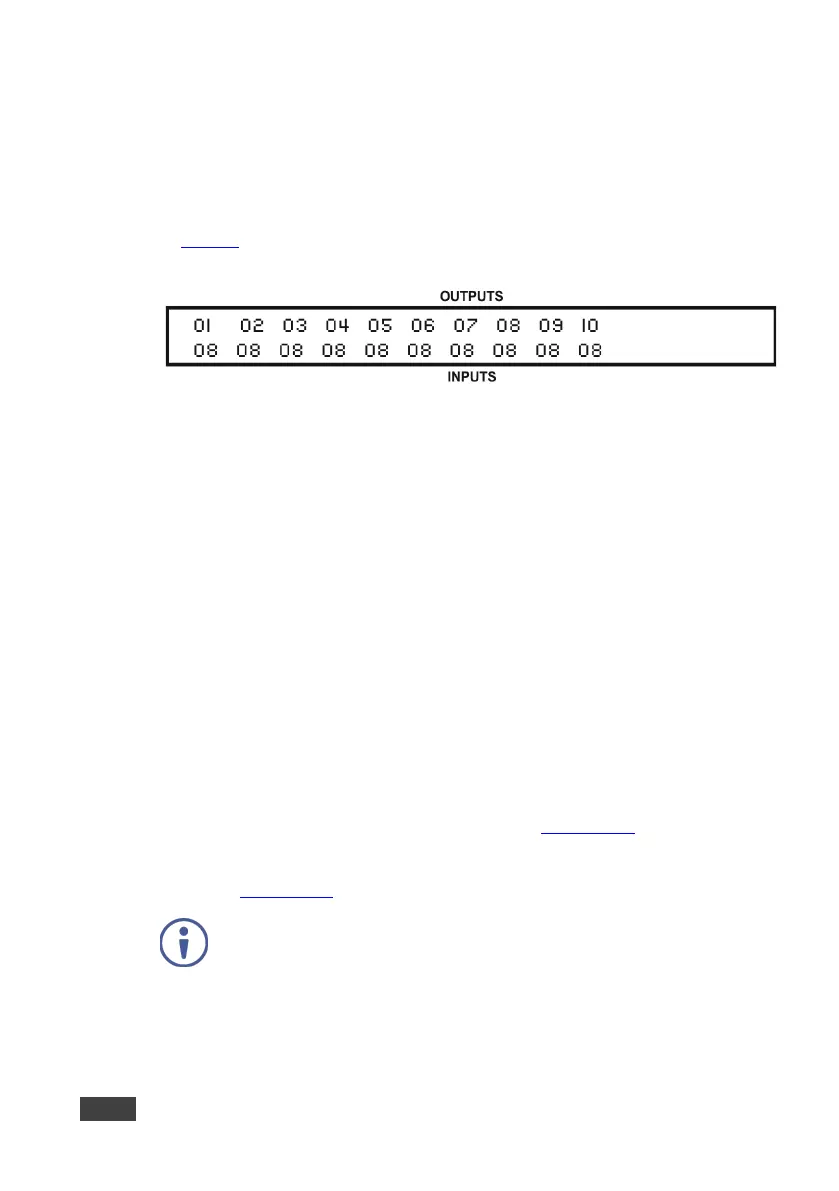
When assigning EDIDs, note that the top row of the LCD display labeled OUTPUTS
relates to the ports connected to the sources (AV inputs), and the bottom row of the
LCD display labeled INPUTS relates to the ports connected to displays (AV
outputs).
In Figure 6
, the EDID from EDID input 8 (VS-1616D Output port 8) has been
assigned to all EDID outputs (VS-1616D Input ports).
Figure 6: EDID Numbering Assignment
5.2 Connecting to the VS-1616D via RS-232
You can connect to the VS-1616D via an RS-232 connection using, for example, a
PC. Note that a null-modem adapter/connection is not required.
To connect to the VS-1616D via RS-232:
• Connect the RS-232 9-pin D-sub rear panel port on the VS-1616D unit via a
9-wire straight cable (only pin 2 to pin 2, pin 3 to pin 3, and pin 5 to pin 5 need
to be connected) to the RS-232 9-pin D-sub port on your PC.
5.3 Connecting to the VS-1616D via Ethernet
You can connect to the VS-1616D via Ethernet using either of the following
methods:
• Directly to the PC using a crossover cable (see Section 5.3.1
).
• Via a network hub, switch, or router, using a straight-through cable
(see Section 5.3.2
).
If you want to connect via a router and your IT system is based on
Ipv6, speak to your IT department for specific installation instructions.
Bekijk gratis de handleiding van Kramer VS-1616D, stel vragen en lees de antwoorden op veelvoorkomende problemen, of gebruik onze assistent om sneller informatie in de handleiding te vinden of uitleg te krijgen over specifieke functies.
Productinformatie
| Merk | Kramer |
| Model | VS-1616D |
| Categorie | Niet gecategoriseerd |
| Taal | Nederlands |
| Grootte | 20785 MB |


