Kramer VIA Connect3 handleiding
Handleiding
Je bekijkt pagina 3 van 8
Step 5: Connect power
Connect the 12V DC power adapter to VIA CONNECT 3 and plug it into the mains electricity.
Caution:
There are no operator serviceable parts inside the unit.
Caution:
The device is intended to be installed at a height of 2 meters or less.
Warning:
Use only the Kramer Electronics power adapter that is provided with the unit.
Warning:
Disconnect the power and unplug the unit from the wall before installing.
See www.KramerAV.com for updated safety information.
Step 6: Configure VIA CONNECT 3
Connect your VIA Connect 3 to the local network to begin. Some settings may require initial
adjustment. When the VIA is connected to a display, the display shows the VIA’s IP address
(this can be disabled in the web interface). To customize settings, log into the Gateway web
interface by entering the VIA IP address in a browser connected to the same network. It may
be necessary to customize settings according to network, customer, or IT requirements.
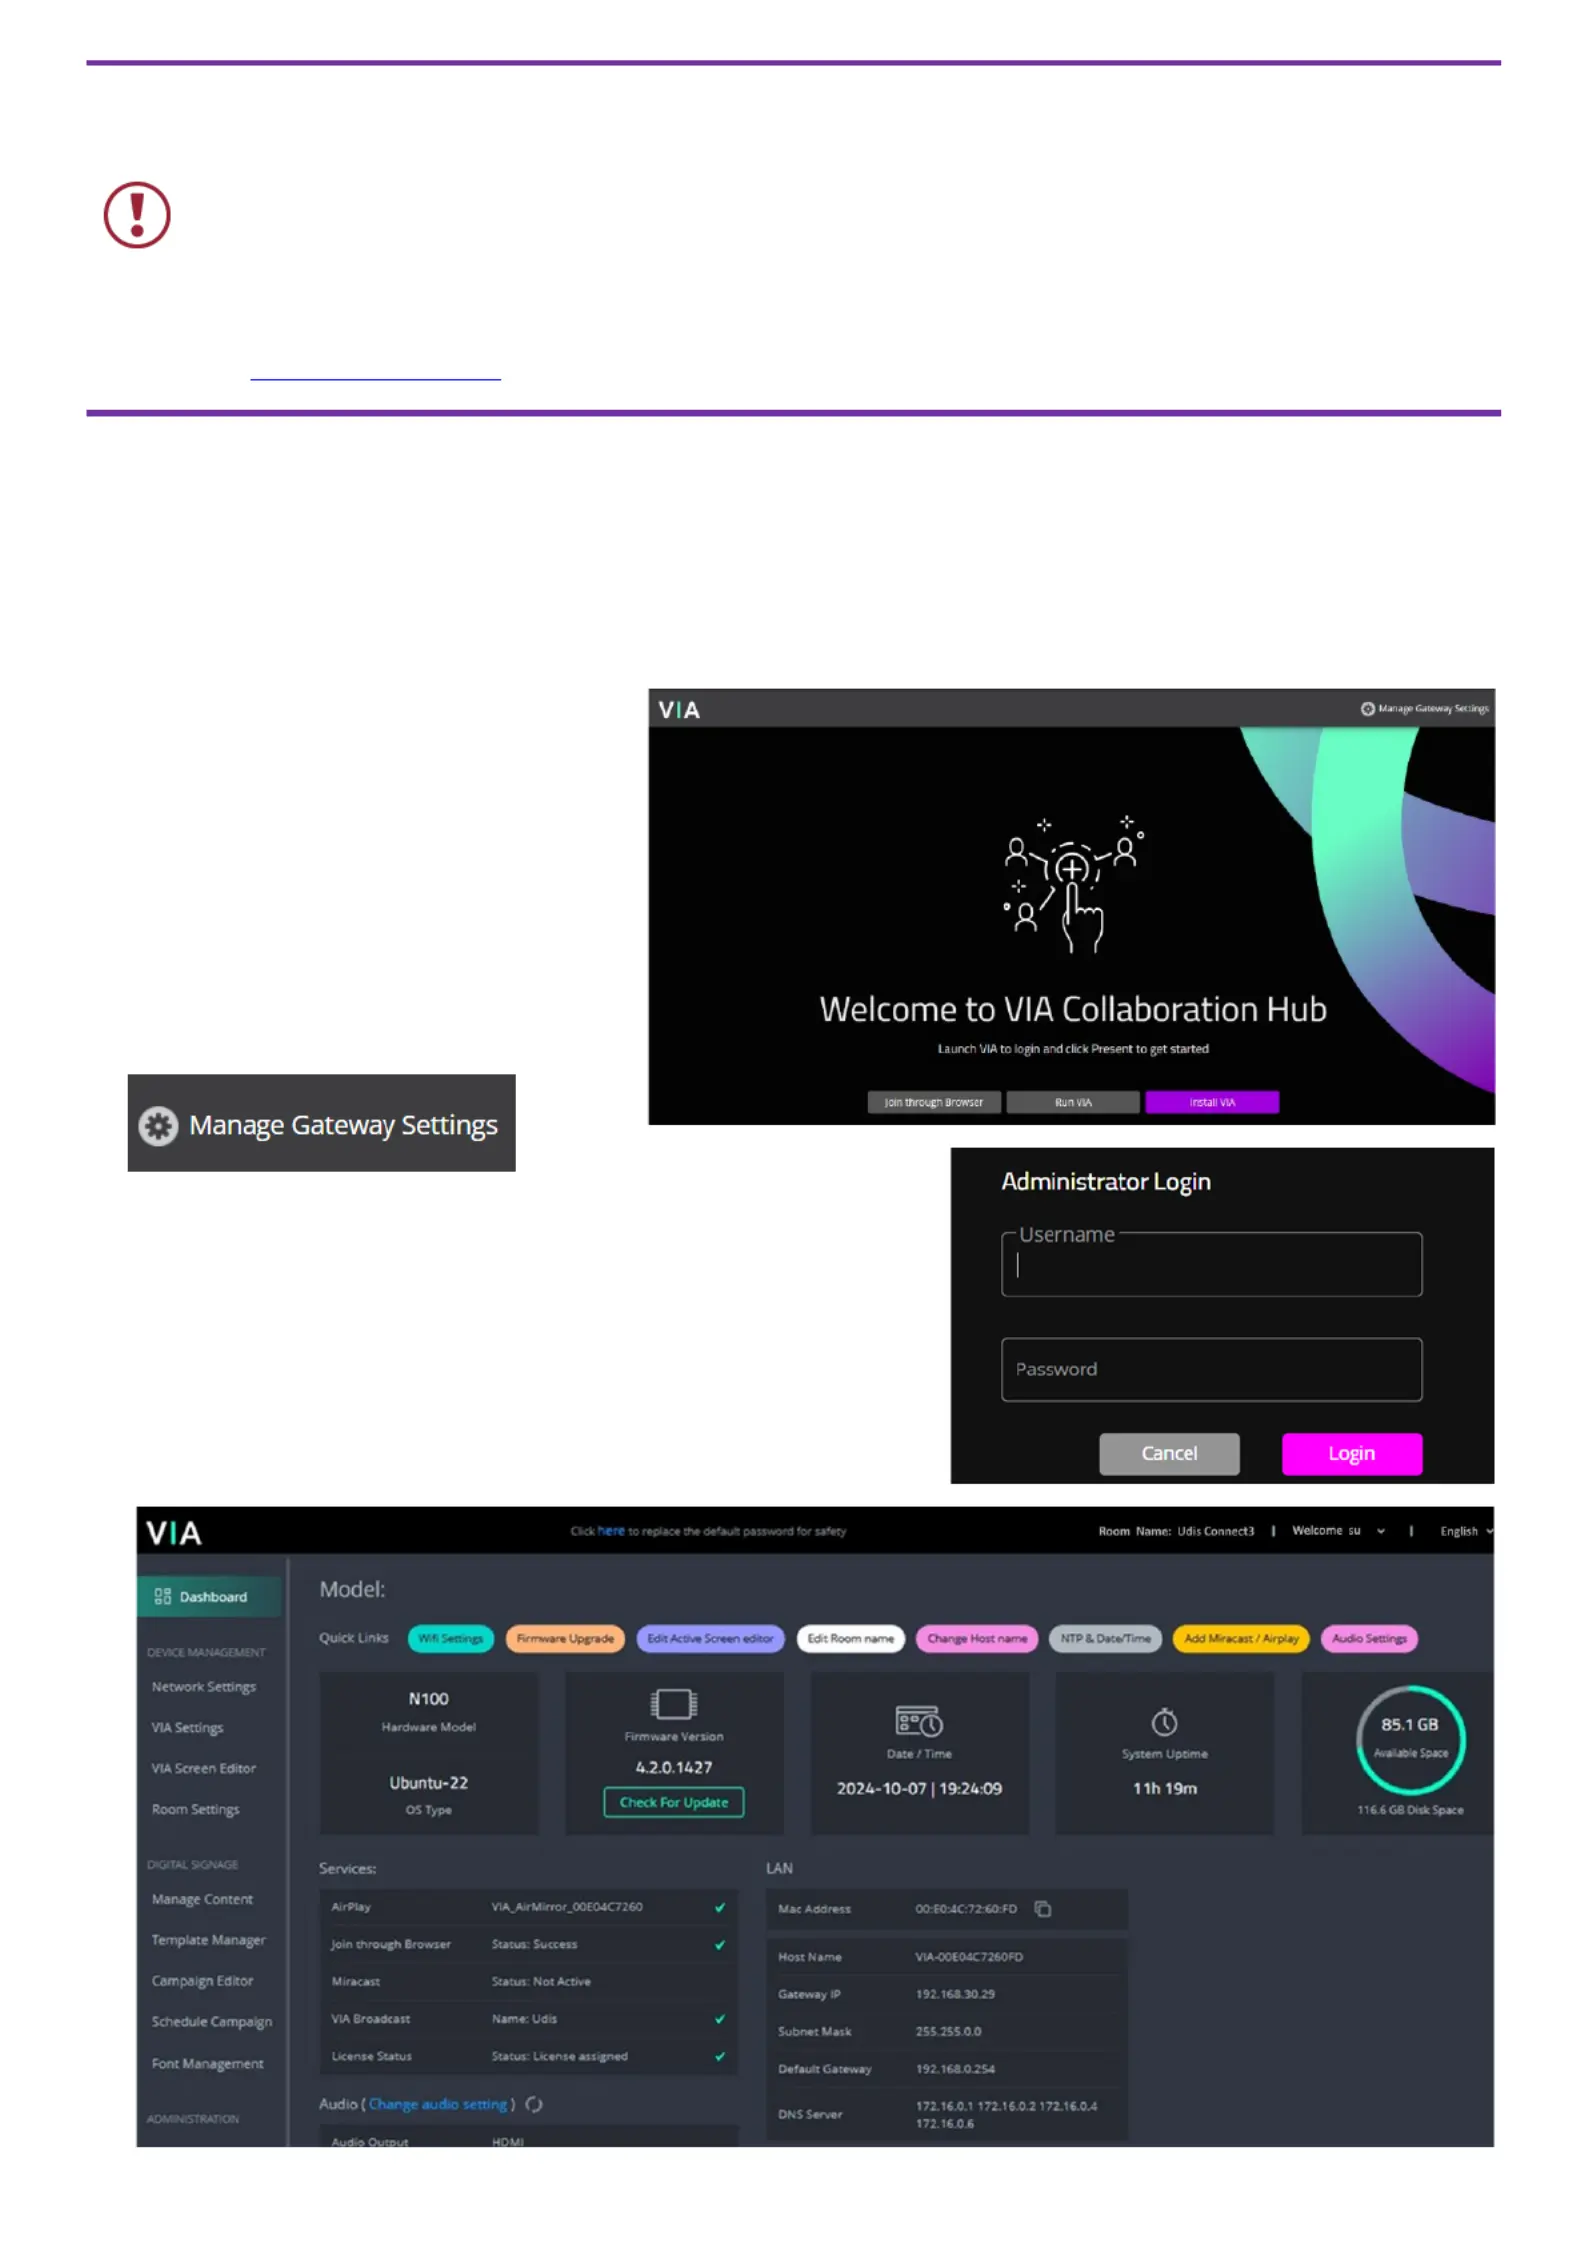
Login to VIA
1. Open a Chrome browser and
browse to the CONNECT 3 IP
address; the Welcome page will
open.
2. Click Manage Gateway Settings in
the upper right corner.
3. Enter the username and password (default = su / supass)
and click Login.
4. After logging in, the VIA Dashboard will open.
The Dashboard top has quick links for common tasks.
Bekijk gratis de handleiding van Kramer VIA Connect3, stel vragen en lees de antwoorden op veelvoorkomende problemen, of gebruik onze assistent om sneller informatie in de handleiding te vinden of uitleg te krijgen over specifieke functies.
Productinformatie
| Merk | Kramer |
| Model | VIA Connect3 |
| Categorie | Niet gecategoriseerd |
| Taal | Nederlands |
| Grootte | 3493 MB |


