Kramer VIA Connect3 handleiding
Handleiding
Je bekijkt pagina 2 van 8
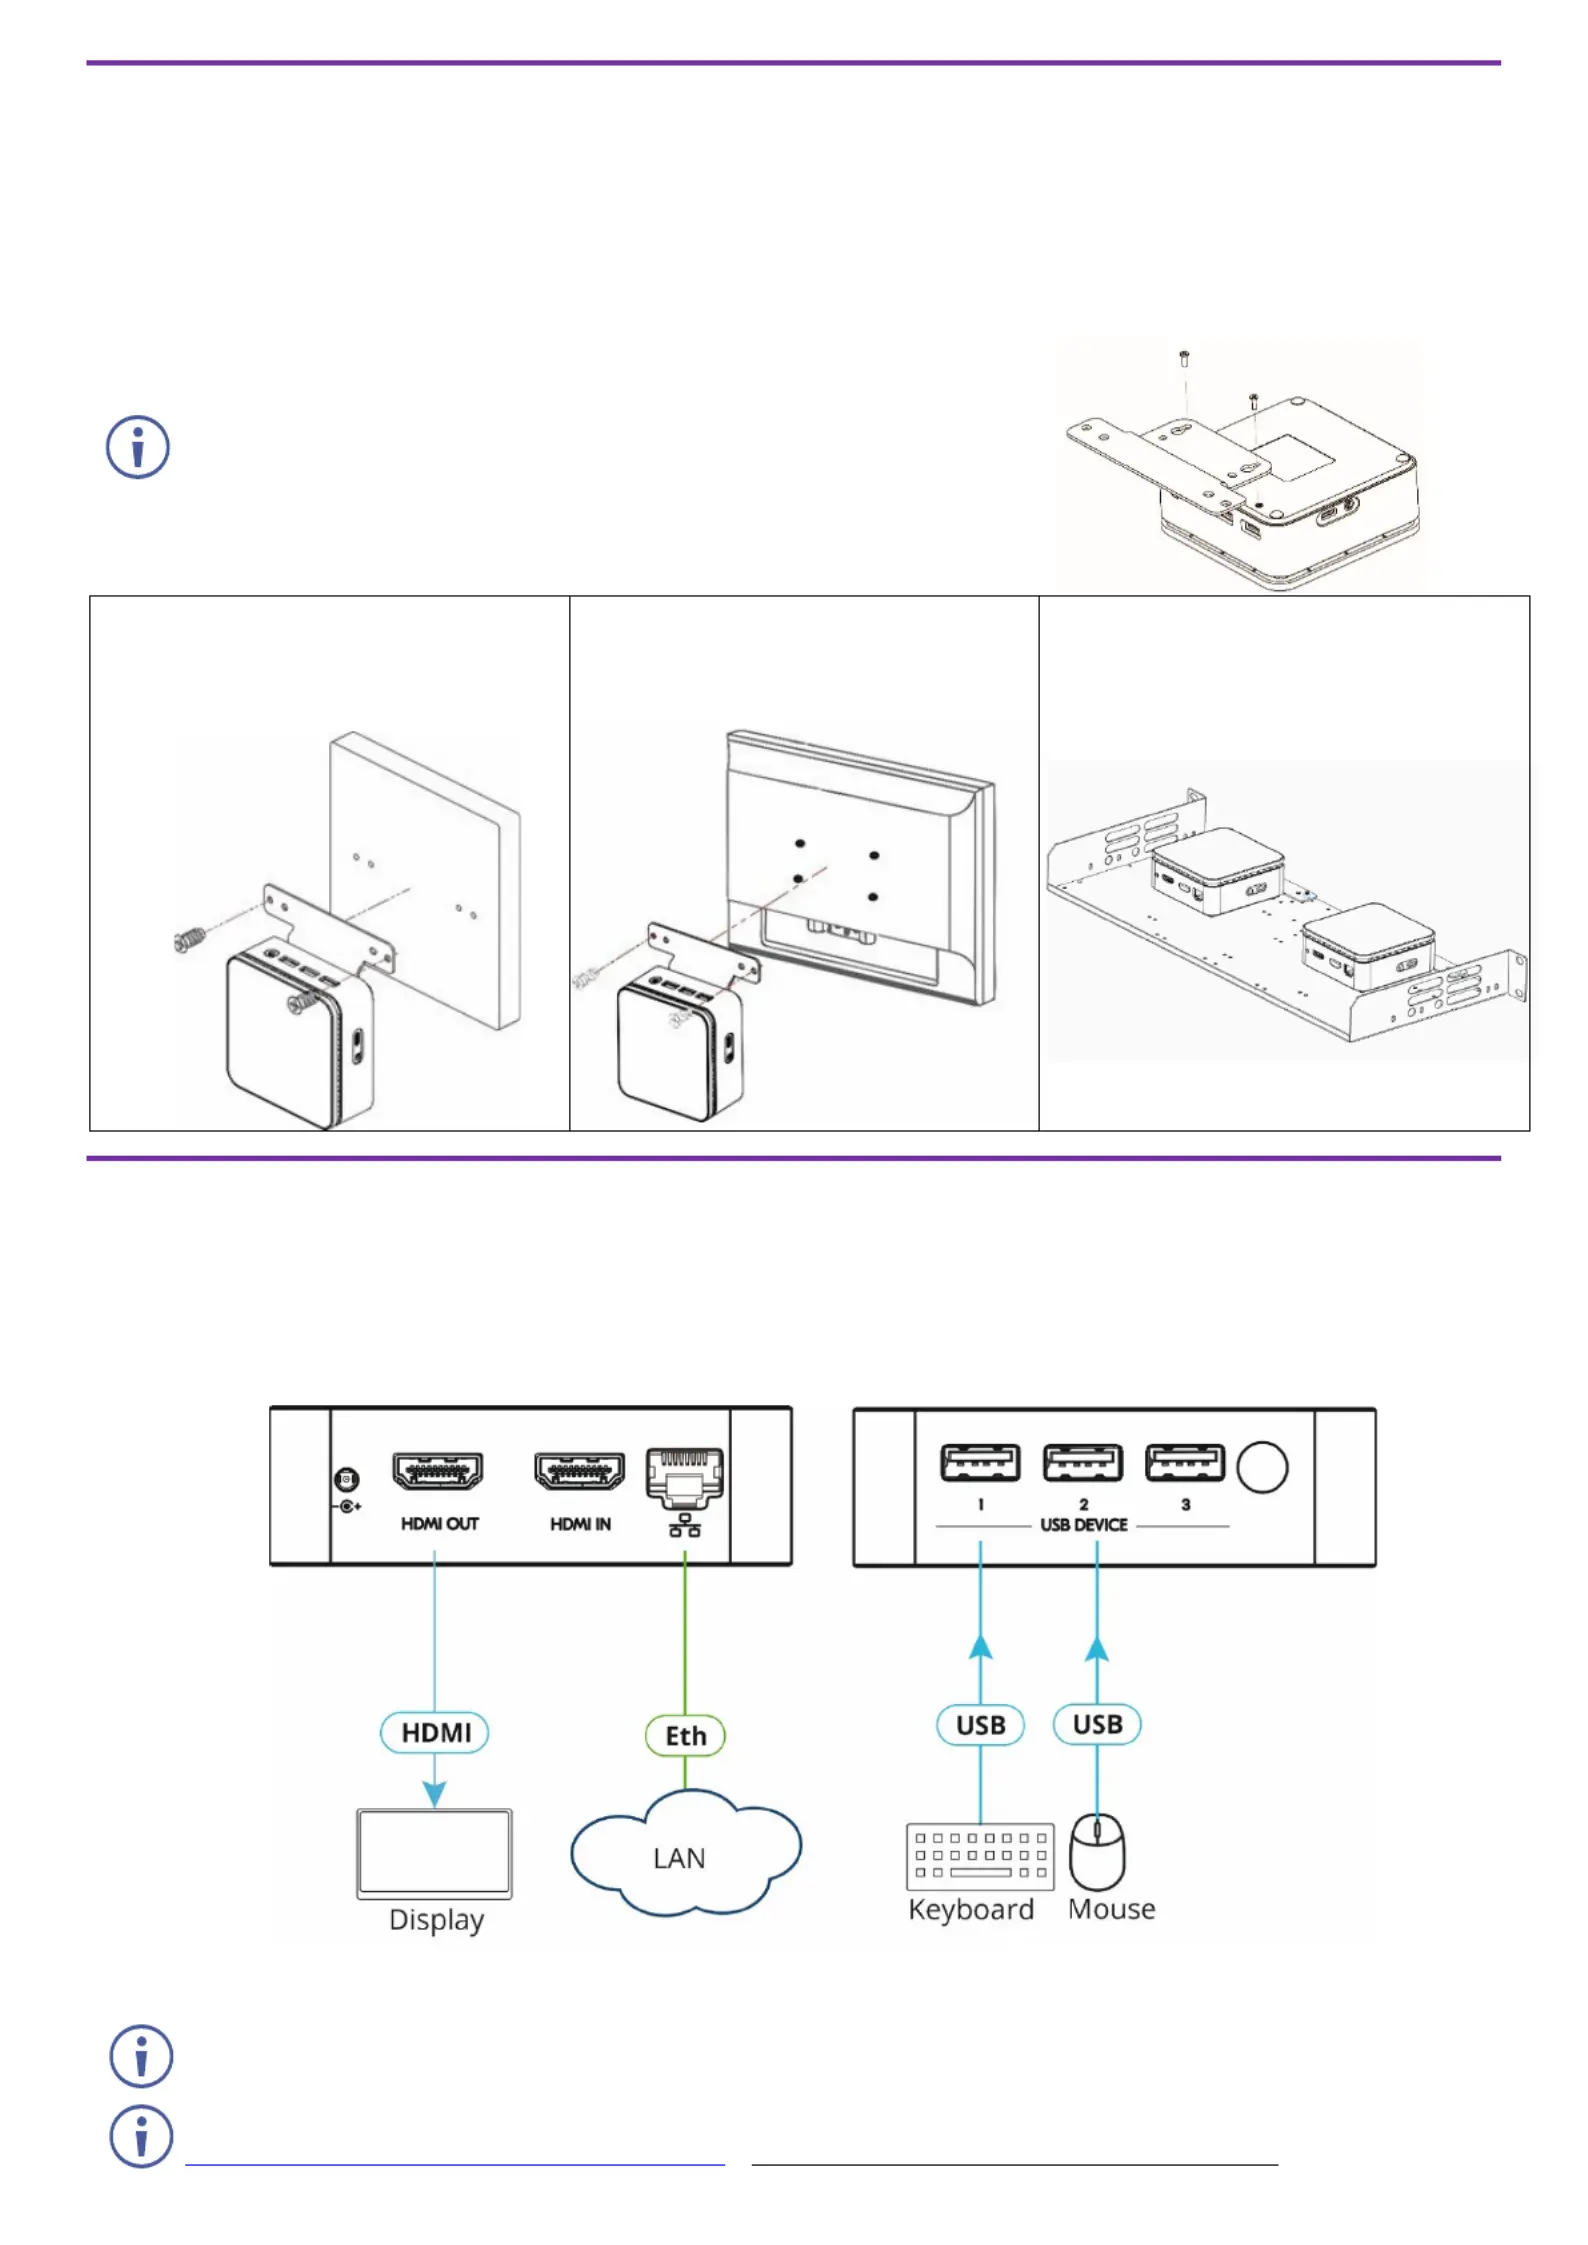
Step 3: Mount VIA CONNECT 3
VIA CONNECT 3 can be installed on a flat surface / wall, rear of a monitor or rack mount using the included
VESA mounting bracket and screw set:
Mount VIA CONNECT 3 to the Mounting Bracket
Attach the mounting bracket to the VIA CONNECT 3 with 2 screws.
This step is required for all options detailed below.
To Mount to a Flat Surface / Wall
To Mount to rear of monitor
To Mount to a Rack Mount
Secure the mounting bracket to a
flat surface / wall with dedicated
screws.
Secure the mounting bracket to
VESA holes located on rear of
monitor.
Secure the mounting bracket(s) to
the rack mount with dedicated
screws.
Step 4: Connect inputs and outputs
Always switch OFF the power on each device before connecting it to your VIA CONNECT 3.
1. Connect a USB device.
2. Connect an HDMI display.
3. Connect to the LAN (default mode).
To use a Kramer active optical pluggable HDMI cable with your VIA CONNECT 3, contact your local
Kramer office to assist in purchasing the correct cable.
To achieve specified extension distances, use the recommended Kramer cables available at
www.kramerav.com/product/VIA
CONNECT3. Using third-party cables may cause damage!
Bekijk gratis de handleiding van Kramer VIA Connect3, stel vragen en lees de antwoorden op veelvoorkomende problemen, of gebruik onze assistent om sneller informatie in de handleiding te vinden of uitleg te krijgen over specifieke functies.
Productinformatie
| Merk | Kramer |
| Model | VIA Connect3 |
| Categorie | Niet gecategoriseerd |
| Taal | Nederlands |
| Grootte | 3493 MB |


