Kramer VIA Campus² handleiding
Handleiding
Je bekijkt pagina 12 van 136
Kramer Electronics Ltd.
VIA Campus2/ VIA Campus2PLUS – For Installer: Mounting VIA Campus2/ VIA Campus2PLUS
11
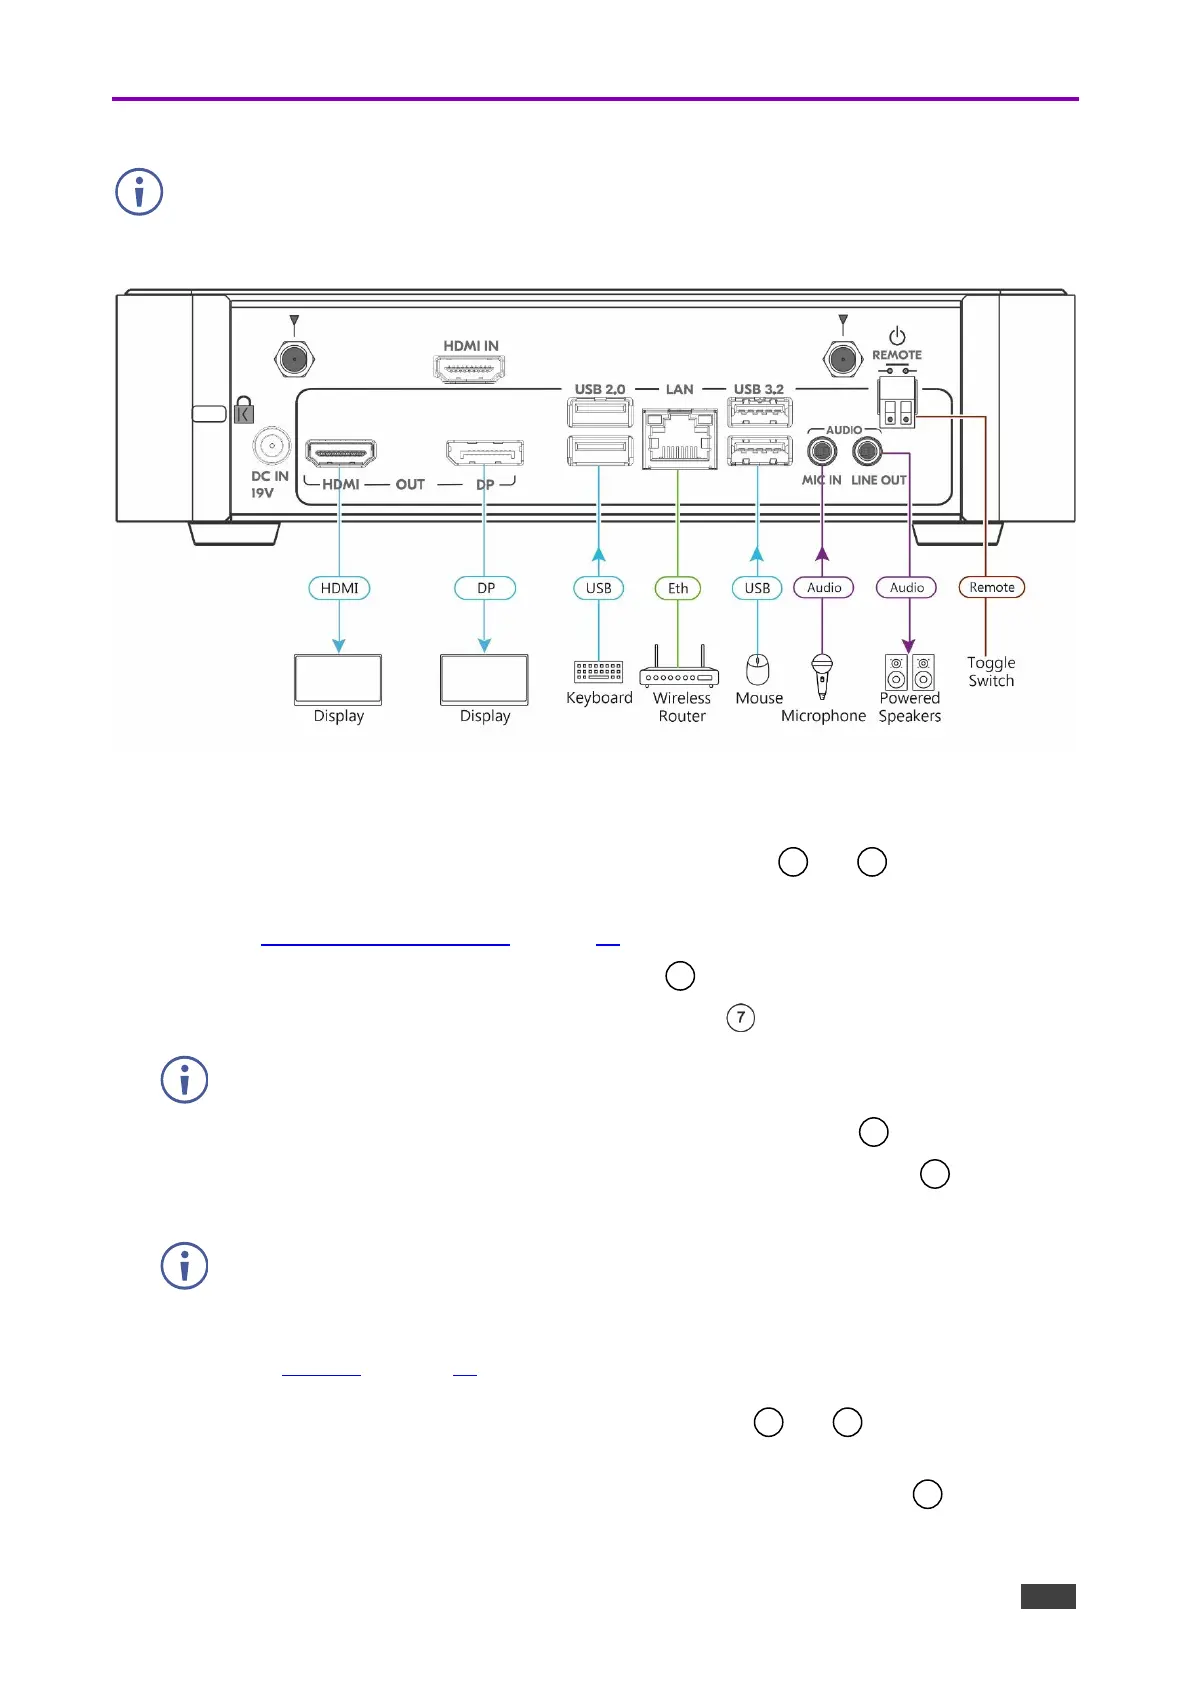
Connecting Device
For illustration purposes, the diagram shows connections for VIA Campus2/ VIA
Campus2PLUS. The connections for VIA Campus2/ VIA Campus2PLUS are the same,
except for the HDMI IN connector (which is in VIA Campus2Plus).
Figure 6: Connecting to the Error! No document variable supplied. Rear Panel
To connect the VIA Campus2/ VIA Campus2PLUS as illustrated in (Figure 6):
1. Connect the keyboard and mouse to the USB Connectors and .
2. Connect one of the following to be used as the main display for the meeting
(see Connecting Main Display on page 13):
▪ HDMI display to the HDMI OUT Connector .
▪ DisplayPort display to the DisplayPort Connector .
A touchscreen display is best for annotation.
3. Connect a laptop or other HDMI source to the HDMI IN Connector .
4. Connect a Local Area Network (LAN) cable to the LAN RJ-45 Connector for
connection to your network.\
VIA Campus2/ VIA Campus2PLUS can be connected to a local area network (LAN). In
this setup, the default IP setting is DHCP that assigns an automatic IP address to your
unit. This enables easy Plug and Play setup when connecting your VIA Campus2/ VIA
Campus2PLUS to the network. To assign a static IP address,
(see Settings on page 89).
5. Connect the Wi-Fi antennas to the Wi-Fi Antenna Ports and for using the built-in
wireless capability.
6. Connect powered speakers and a microphone to the AUDIO Mini Jacks .
8
9
5
6
10
4
11
13
Bekijk gratis de handleiding van Kramer VIA Campus², stel vragen en lees de antwoorden op veelvoorkomende problemen, of gebruik onze assistent om sneller informatie in de handleiding te vinden of uitleg te krijgen over specifieke functies.
Productinformatie
| Merk | Kramer |
| Model | VIA Campus² |
| Categorie | Niet gecategoriseerd |
| Taal | Nederlands |
| Grootte | 19601 MB |


