KitchenAid KSGS330SPS handleiding
Handleiding
Je bekijkt pagina 21 van 80
21
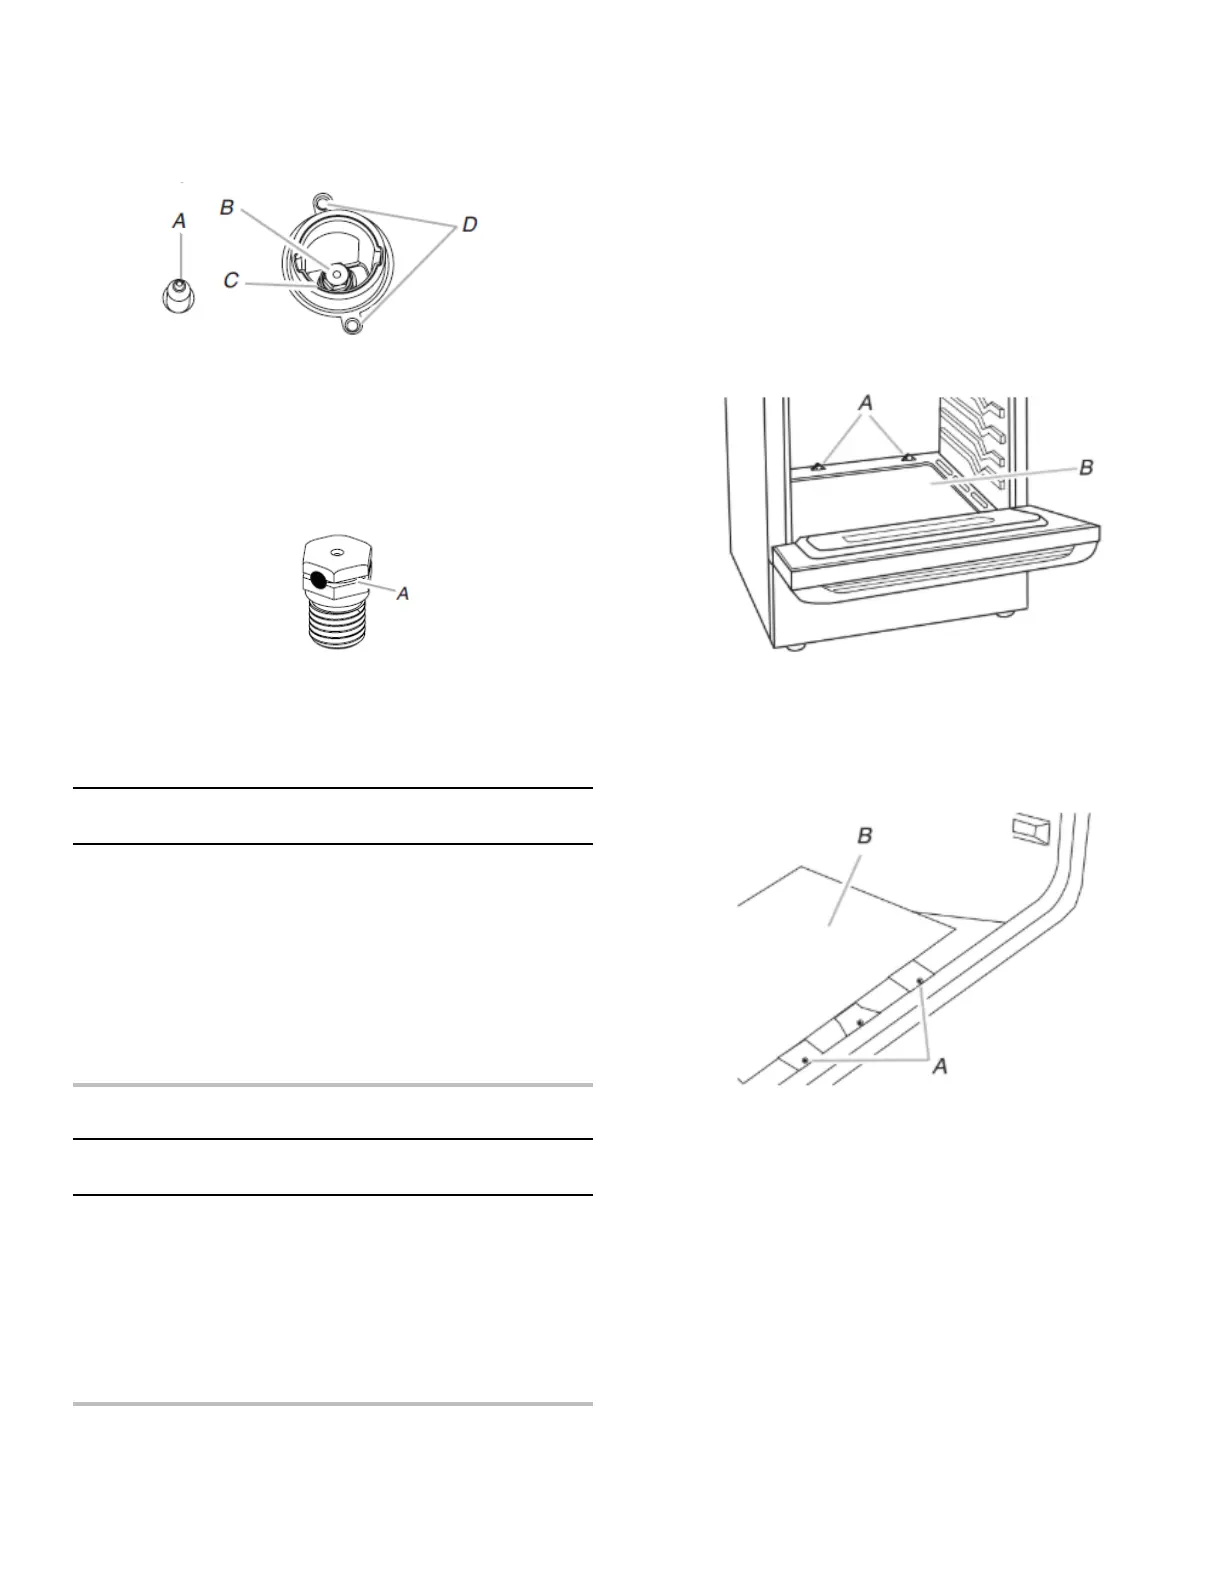
3. Apply masking tape to the end of a 9/32" (7 mm) nut driver to
help hold the gas orifice spud in the nut driver while changing
it. Press nut driver down onto the gas orifice spud and remove
by turning it counterclockwise and lifting out. Set gas orifice
spud aside.
A. Igniter electrode
B. Orifice spud
C. Orifice spud holder
D. Screws
4. Remove the orifice spuds shipped in the literature package in
the oven. Gas orifice spuds are stamped with a number and
have a groove in the hex area. Replace the Natural gas orifice
spud with the correct propane gas orifice spud.
A. Propane groove
Refer to the following chart for correct Propane gas orifice
spud placement.
Propane Gas Orifice Spud Chart for Surface Burner For
KSGS530S*
Placement Burner
Rating / Type
Size (mm) ID Number
LF 13000 0.96 096AM
LR 4500 0.61 061AM
RF 13000 0.96 096AM
RR 7500 0.80 080AM
CC 12000 0.98 098AM
CF/CR 12000
0.73
(2 orifices
provided)
073AM
Propane Gas Orifice Spud Chart for Surface Burner For
KSGS330S*
Placement Burner
Rating / Type
Size (mm) ID Number
LF 13000 0.96 096AM
LR 4500 0.61 061AM
RF 13000 0.96 096AM
RR 7500 0.80 080AM
CTR 12000
0.73
(2 orifices
provided)
073AM
NOTE: Refer to the Tech Sheet located on the rear cover for the
applicable individual burner BTU rating per fuel type.
5. Place Natural gas orifice spuds in the orifice spud bag.
IMPORTANT: Keep the Natural gas orifice spuds in case of
reinstallation with Natural gas.
6. Replace the burner base.
7. Replace burner cap.
8. Repeat steps 1-7 for the remaining burners.
To Convert Oven Bake Burner (Natural Gas to
Propane Gas)
1. Remove the oven racks.
2. Remove 2 screws at the rear of the oven bottom.
3. Lift the rear of the oven bottom up and back until the front of
the panel is away from the front frame. Remove from oven
and set it aside on a covered surface.
A. Screws
B. Oven bottom
4. Remove 2 screws from the front tabs of the flame spreader.
Lift the front of the flame spreader and pull forward to remove
tabs from rear of oven and set it aside on a covered surface.
A. Screws
B. Flame spreader
5. Remove 2 screws from the bake burner.
Bekijk gratis de handleiding van KitchenAid KSGS330SPS, stel vragen en lees de antwoorden op veelvoorkomende problemen, of gebruik onze assistent om sneller informatie in de handleiding te vinden of uitleg te krijgen over specifieke functies.
Productinformatie
| Merk | KitchenAid |
| Model | KSGS330SPS |
| Categorie | Fornuis |
| Taal | Nederlands |
| Grootte | 15849 MB |


