Handleiding
Je bekijkt pagina 11 van 24
11
EN
Figure 10: Move the strain relief to the top and lock it.
[Optional Steps for Moving Strain Relief to Top Panel]
Insert the PRESS-IN PLUG into the side hole in the TERMINAL COVER.
Figure 11: Insert the PRESS-IN PLUG
Step 4 – Connect the Wiring to the Removable Locking Connector(s) – Two 2-pin removable locking connectors are included
with the speaker – one for IN and the other for LOOP OUT. Connect the wiring to the removable locking connectors by stripping
the insulation back about 5 mm (about 3/16 inch) – stripping the wire longer risks shorting, and stripping the wire shorter risks a
poor connection to the connector. Insert the bare end of wire into the connector and screw down the hold-down screw until tight
using a small at blade screwdriver. Tighten any unused screws to avoid vibration. Double-check that the wires are not frayed,
and that bare wire is not exposed (either of which can lead to shorting between the wires).
Figure 12:
Connecting Wires to Removeable Locking Connector (Shown
with individual un-jacketed wires, with 2 input wires)
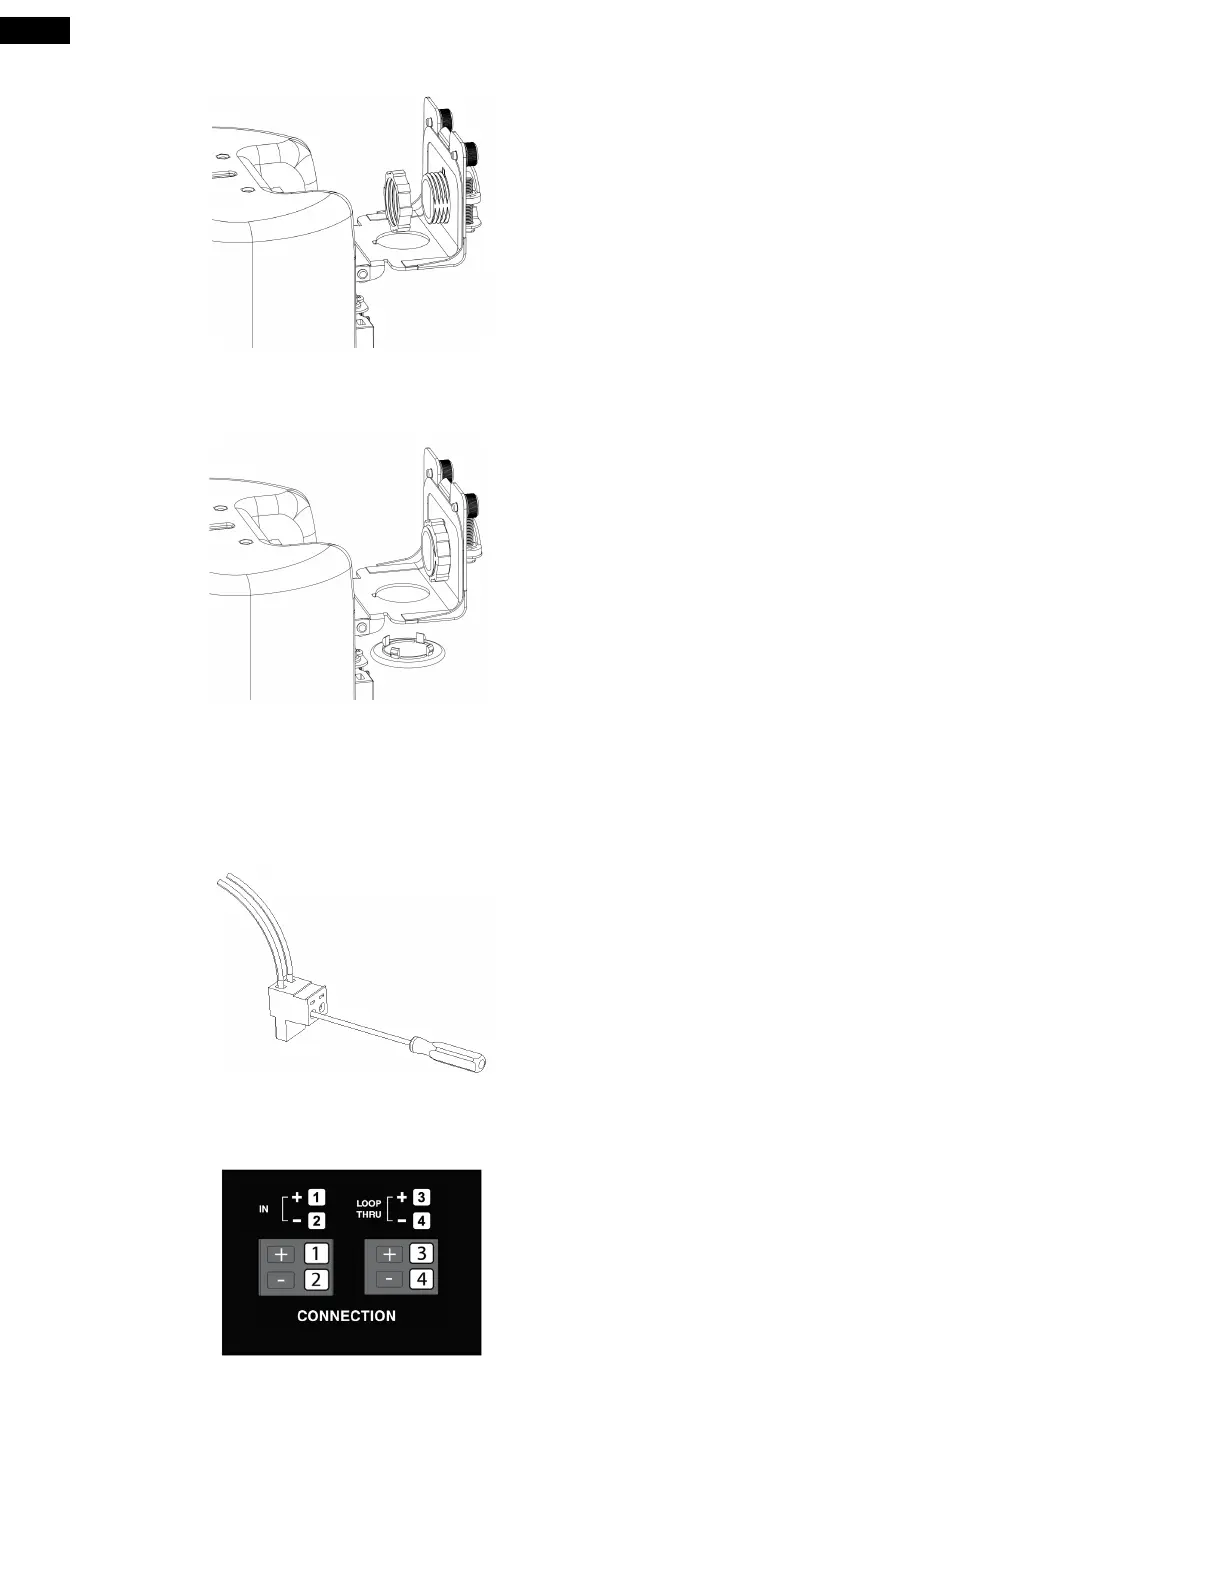
Guide to the Pins for Connection - The 2 removable locking input connectors contain 2 terminals each. The pin functions are
listed on the label located on the terminal cover plate.
Figure 13:
Connector Pins
Pins 1 & 2 (on one of the 2-pin connectors) are the “+” and “-” inputs to the loudspeaker. Pins 3 & 4 are the loop-through
connections to subsequent loudspeakers. Pins 3 & 4 are connected to pins 1 & 2, respectively (Pin 1 connects to Pin 3 and Pin 2
connects to Pin 4) inside the speaker.
Bekijk gratis de handleiding van JBL Control 424C/T, stel vragen en lees de antwoorden op veelvoorkomende problemen, of gebruik onze assistent om sneller informatie in de handleiding te vinden of uitleg te krijgen over specifieke functies.
Productinformatie
| Merk | JBL |
| Model | Control 424C/T |
| Categorie | Speaker |
| Taal | Nederlands |
| Grootte | 3263 MB |


