Intergas Xtend Split handleiding
Handleiding
Je bekijkt pagina 37 van 88
37
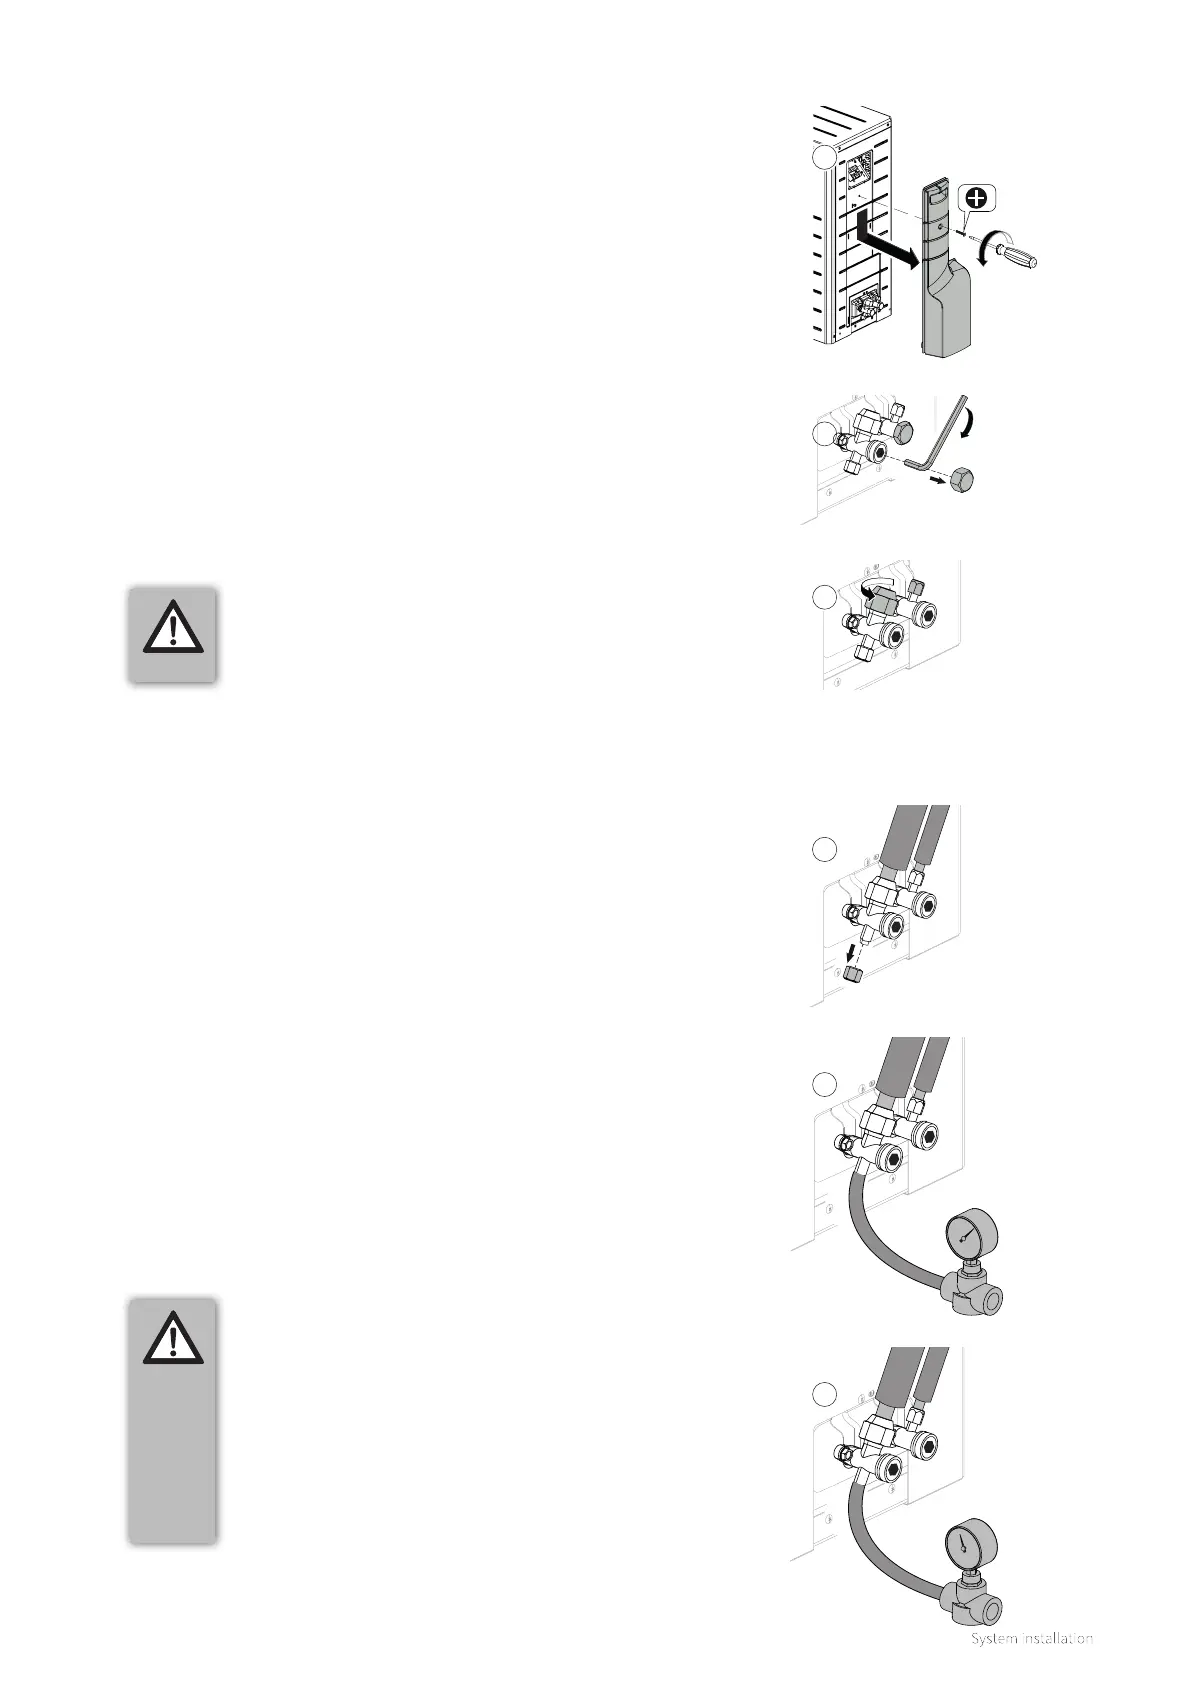
8.6.3 Making refrigerant connections to the outdoor unit
1. Remove the side panel from the outdoor unit (A).
2. Remove the 19 mm lockshield caps from the service valves and
check that they are closed using a 5 mm Allen key (B).
3. Unscrew the ½" and ¼" flare nuts from both service valves (C).
4. Cut the now installed refrigerant lines running from the indoor
unit to the desired length using a pipe cutter and deburr them.
5. Place the nuts onto the refrigerant lines and then flare the lines.
► Instead of flaring the line yourself, a flare press-fit or flare
solder adapter can be used.
6. Apply a smear of compressor oil or sealing fluid to the surface
of the flare adapter to be sealed as this will improve the seal.
7. Connect both of the refrigerant lines via the flare connections.
8. Secure the connections by tightening them to the required
torque setting.
► - ¼" nut: 14-18 Nm
► - ½" nut: 49-61 Nm
8.6.4 Strength test and Tightness testing
1. Using a 5 mm Allen key check that the service valves are fully
closed, then remove the 14 mm sealing cap from the Schrader
valve on the ½" gas line service valve (A)
2. Appropriate PPE must be worn at this stage.
3. Using a certified removal tool remove the schrader valve and
keep safe in a dust free environment, then using OFN (Oxygen
free Nitrogen) connected via a pressure regulator slowly raise the
pressure to 42 bar in increments of 5 bar (B) checking for leaks
(listen for hissing sound) or use leak detection fluid that is suitable
for use on refrigeration, (repair if required).
Hold the pressure for 2 minutes then gently lower the pressure to
10 bar by slowly venting the Nitrogen to a well ventilated area (C).
4. Check that the connections on the indoor and outdoor unit are
leak tight.
► Check that the pressure on the meter set is not going down
► Use leak-detecting spray that is suitable for hydrocarbon
gases.
► Any leaks must be repaired and re-tested before continuing.
5. Once complete and tightness proved slowly releasethe notrogen to
a well ventilated area.
IMPORTANT
► Prevent internal connection lines from
twisting.
A
B
C
A
B
10 bar
IMPORTANT
► For safety reasons when carrying out the
strength and tightness tests to BS EN 378
appropriate PPE must be worn.
Venting of Nitrogen must be done in a well
ventilated place, away from any area where the
vented gas could produce flying dust or objects.
In poorly ventilated areas Nitrogen can
displace the air, leading to an Oxygen deficient
atmosphere where asphyxiation could occur.
C
Strength test
Tightness test
42 bar
Bekijk gratis de handleiding van Intergas Xtend Split, stel vragen en lees de antwoorden op veelvoorkomende problemen, of gebruik onze assistent om sneller informatie in de handleiding te vinden of uitleg te krijgen over specifieke functies.
Productinformatie
| Merk | Intergas |
| Model | Xtend Split |
| Categorie | Niet gecategoriseerd |
| Taal | Nederlands |
| Grootte | 11570 MB |


