Intergas Xtend Split handleiding
Handleiding
Je bekijkt pagina 36 van 88
36
¼"
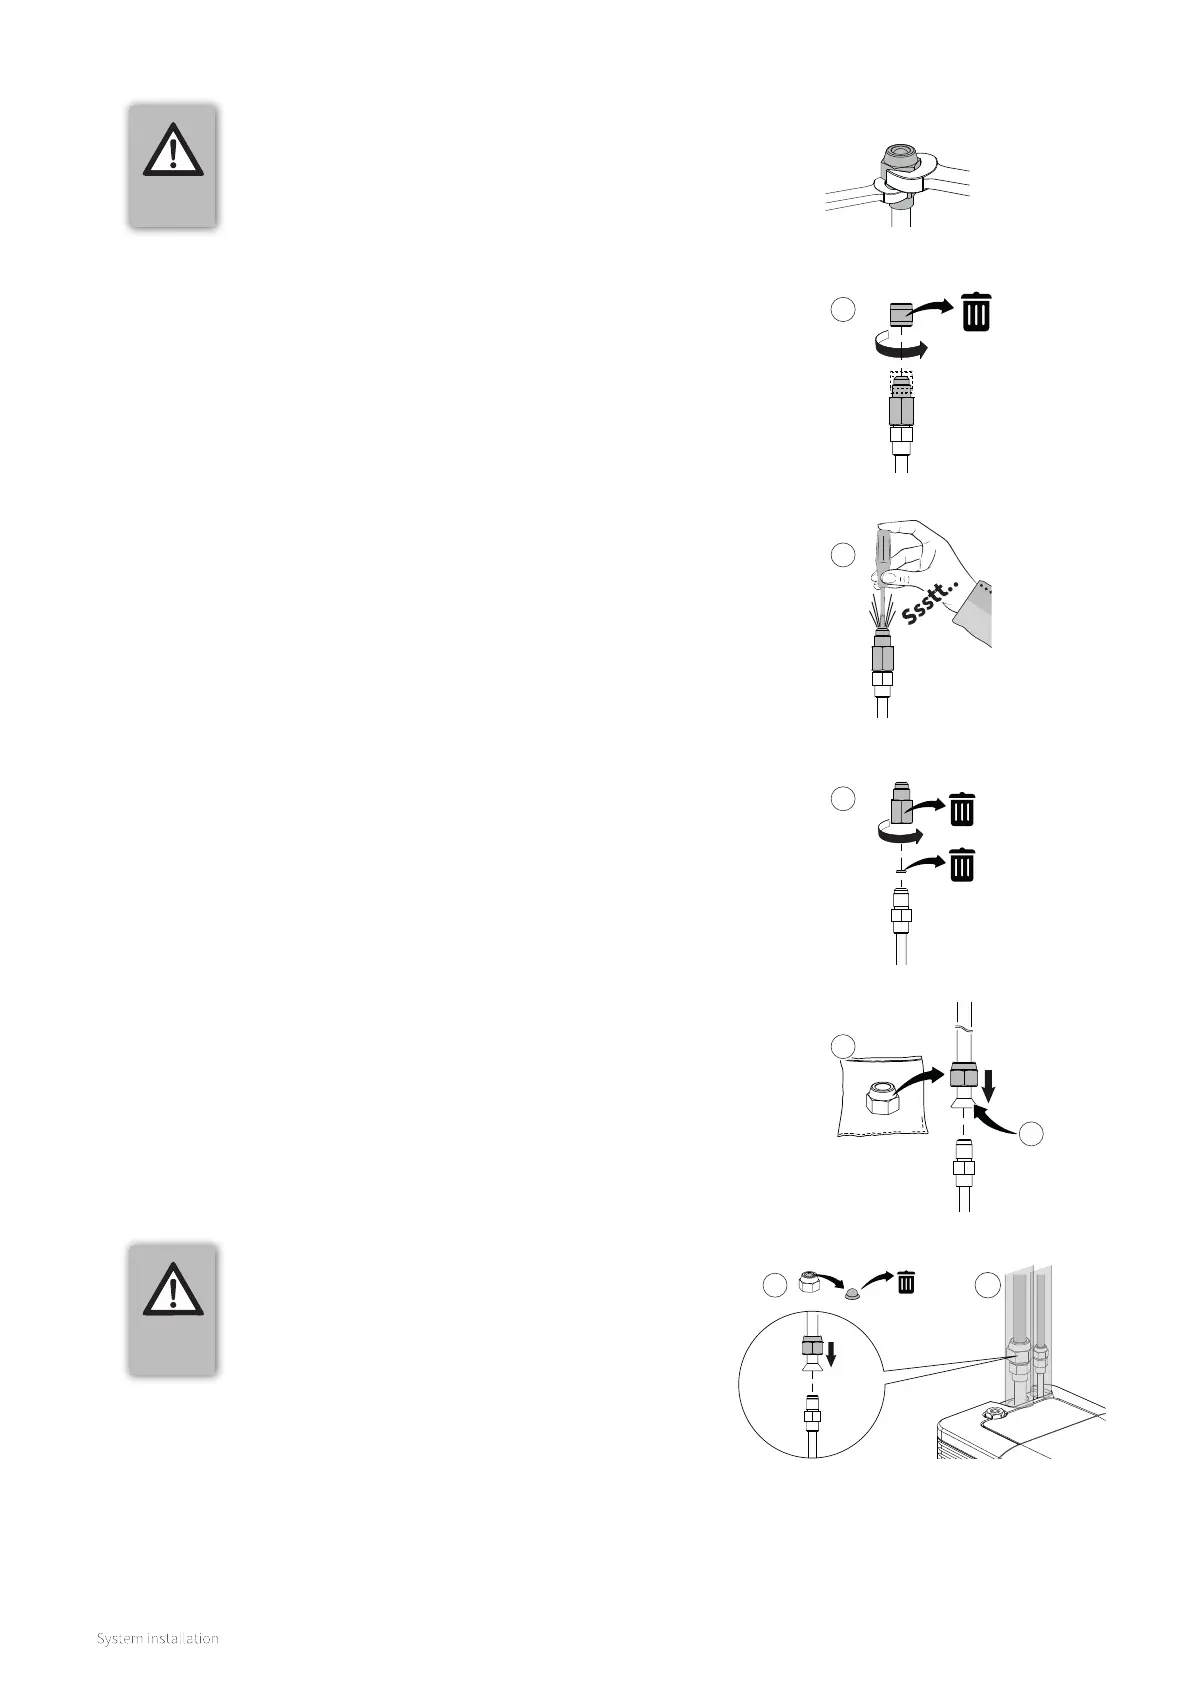
8.6.2 Making refrigerant connections to the indoor unit
1. Cut the refrigerant lines to the correct lenght using a pipe cutter
(not a hacksaw) then fully deburr the edges.
Liquid line (see example):
2. Unscrew and remove the cap from the schrader valve to the ¼“
liquid line ¼“ (A).
3. Check to ensure that the indoor unit is leak tight. Carefully insert
a screwdriver or pointed tool into the schrader valve. You should
hear a hissing sound when you do this which indicates that the
unit is leak tight; see (B). (The unit is pre-charged with Oxygen free
Nitrogen which is inert and not a greenhouse gas).
4. Remove the schrader valve and the copper seal ring, then dispose
of them responsibly (C).
5. Remove the flare nut for the liquid line from the accessory bag
supplied with the unit (D).
6. Place the nut onto the ¼“ liquid line and then flare the end using a
proprietary flaring tool (E).
► Instead of flaring the line yourself, a flare press-fit or flare
solder adapter can be used.
7. Apply a smear of compressor oil or sealing fluid to the surface of
the flare adapter to be sealed as this will improve the seal.
8. Connect the liquid line to the indoor unit via the flare connection.
9. Secure the connections by tightening them to the required torque
setting.
► - ¼" nut: 14-18 Nm
Gas line:
10. Remove the flare nut from the " gas line. Save the nut and
dispose of the copper sealing ring.
11. Place the nut onto the " gas line and then flare the end using a
proprientary flaring tool (F).
► Instead of flaring the line yourself, a flare press-fit or flare
solder adapter can be used.
12. Apply a smear of compressor oil or sealing fluid to the surface of
the flare adapter to be sealed as this will improve the seal.
13. Connect the gas line to the indoor unit via the flare connection.
14. Secure the connections by tightening them to the required torque
setting.
► - ½" nut: 49-61 Nm
IMPORTANT
► Prevent internal connection lines from
twisting by using a suitable spanner to
secure the refrigerant coupler.
IMPORTANT
► Place the included insulation material
around the lines beforehand so that it can
later be pushed down over the refrigerant
connectors; see (G) but also §8.6.7.
A
B
C
D
E
½"
F
G
Bekijk gratis de handleiding van Intergas Xtend Split, stel vragen en lees de antwoorden op veelvoorkomende problemen, of gebruik onze assistent om sneller informatie in de handleiding te vinden of uitleg te krijgen over specifieke functies.
Productinformatie
| Merk | Intergas |
| Model | Xtend Split |
| Categorie | Niet gecategoriseerd |
| Taal | Nederlands |
| Grootte | 11570 MB |


