Handleiding
Je bekijkt pagina 18 van 30
18
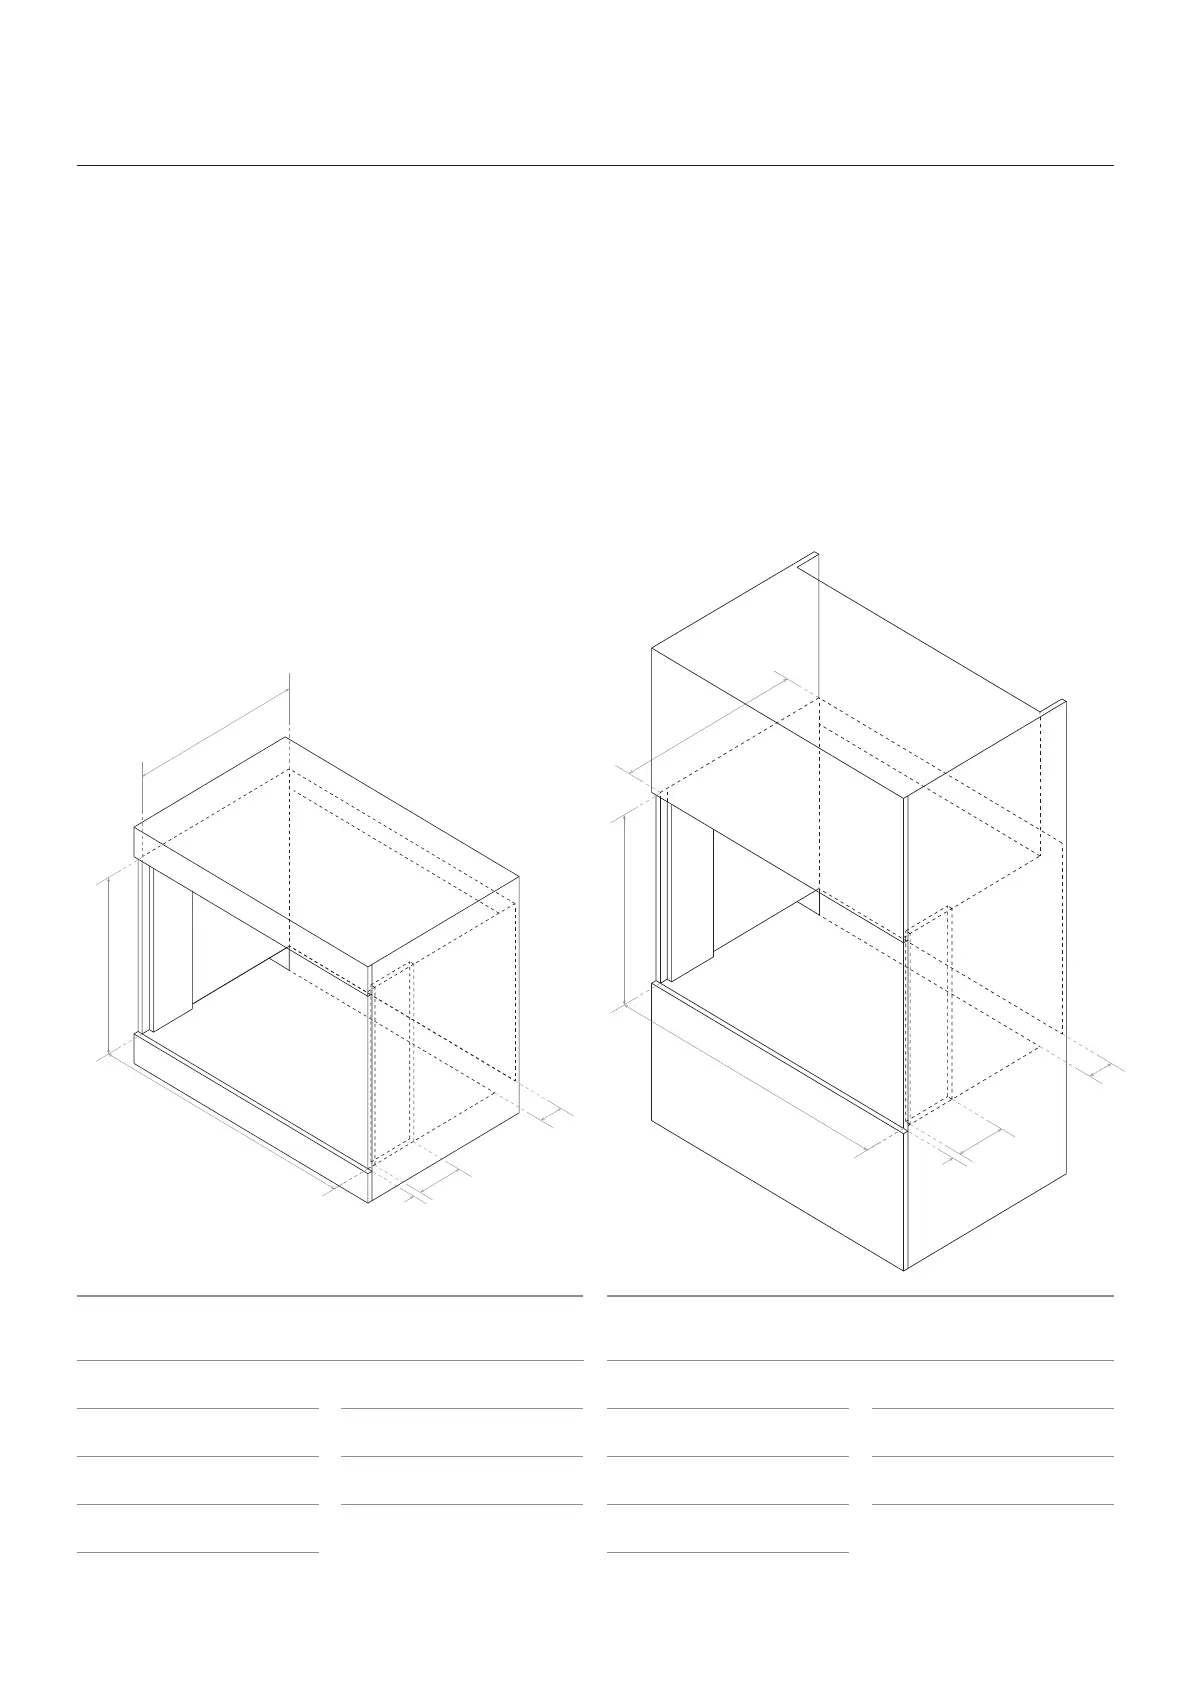
Installation of Built-in Ovens
In order to ensure that the built-in appliance functions
properly, the cabinet containing it must be appropriate.
Figure 1 below gives the dimensions of the cut-out for
installation under the counter, while Figure 2 shows the
dimensions need for a wall cabinet unit.
• In order to ensure adequate ventilation, the back panel
of the cabinet unit must be removed. Installing the oven
so that it rests on two strips of wood is preferable. If the
oven rests on a continuous, flat surface, there must be an
aperture of at least 45×560mm at the rear.
• To fasten the oven to the cabinet, open the door of the
oven and attach it by inserting the 4 wooden screws into
the 4 holes located on the perimeter of the frame.
W
W
H
H
D
D
G
I
I
G
J
J
W 896
D Proud: 560
H 597
I 180
G 22
D Flush: 581
J 45
W 896
D Proud: 560
H 597
I 180
G 22
D Flush: 581
J 45
Minimum inside cavity (mm) Fig. 1 Minimum inside cavity (mm) Fig. 2
Installing Your Oven (Continued)
Bekijk gratis de handleiding van InAlto IO9060XL10T, stel vragen en lees de antwoorden op veelvoorkomende problemen, of gebruik onze assistent om sneller informatie in de handleiding te vinden of uitleg te krijgen over specifieke functies.
Productinformatie
| Merk | InAlto |
| Model | IO9060XL10T |
| Categorie | Oven |
| Taal | Nederlands |
| Grootte | 3185 MB |


