IK Multimedia iLoud Micro Monitor Pro handleiding
Handleiding
Je bekijkt pagina 13 van 72
iLoud Micro Monitor Pro
Advanced features and insights
13
Advanced features and insights
Custom ARC calibration
Thanks to the ARC technology, iLoud Micro Monitor Pro can be tailored to fit your listening space perfectly.
IMPORTANT: An ARC MEMS calibration microphone is necessary to proceed with the calibration.
1. Use a suitable XLR microphone cable to connect the ARC MEMS microphone to the XLR input on the back
of the iLoud Micro Monitor Pro.
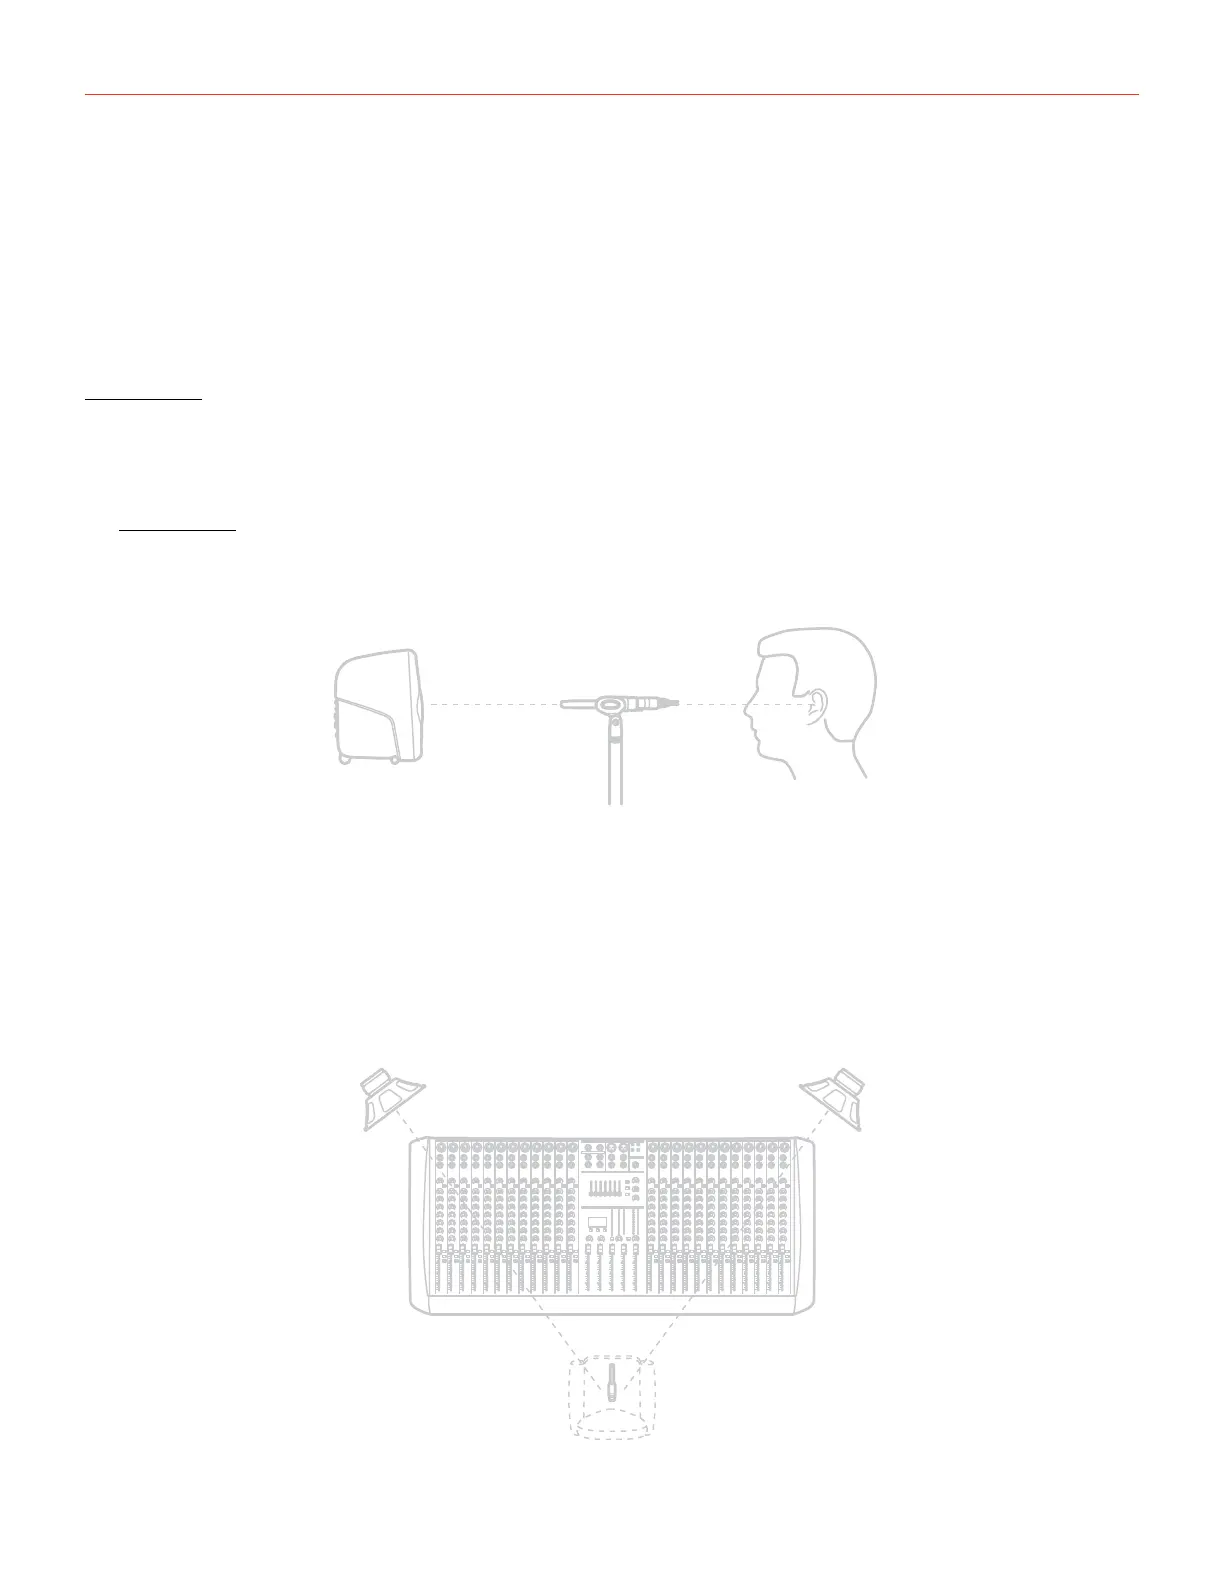
IMPORTANT: The measurement microphone must be positioned HORIZONTALLY.
Example of correct microphone positioning:
2. Place the microphone at the listening point, making sure the mic capsule aperture points towards the ceiling
and that the microphone is placed exactly in the center spot between the two speakers at the listening
position. Try to use a mic stand with a boom arm that is extended as far away from the stand as possible.
This helps avoid reflections from the stand that may interfere with the analysis at high frequencies. Do not
stand or sit near the microphone while the analysis procedure is running. As indicated in the figure above,
the microphone has to be set at the same height as your ears when listening to the speakers.
Bekijk gratis de handleiding van IK Multimedia iLoud Micro Monitor Pro, stel vragen en lees de antwoorden op veelvoorkomende problemen, of gebruik onze assistent om sneller informatie in de handleiding te vinden of uitleg te krijgen over specifieke functies.
Productinformatie
| Merk | IK Multimedia |
| Model | iLoud Micro Monitor Pro |
| Categorie | Speaker |
| Taal | Nederlands |
| Grootte | 6360 MB |