Hyundai HYSH2800E handleiding
Handleiding
Je bekijkt pagina 18 van 38
Assembly
www.hyundaipowerproducts.co.uk
18
Assembly Overview
There are 3 steps to the assembly:
STEP 1. Building The Wheel Assembly
STEP 2. Attaching The Wheel Assembly To The Main Unit
STEP 3. Attaching The Collection Bag To The Main Unit
STEP 1: Building The Wheel Assembly
NOTE: This section requires the left and right brackets, 2 x bushings, 2 x wheels, 2 x
wheel covers, 2 x hex nuts & washers and the hex key. These are all supplied in the
box contents with the machine.
NOTE: This section also requires the use of a Phillips screwdriver to lock the axle into
place when attaching the wheels. The Phillips screwdriver is also supplied with the
product.
NOTE: We recommend attaching one wheel at a time for practical assembly.
NOTE: When unboxing the product and its components, the 2 x hex nuts & washers
and 2 x bushings will be attached to the axle. Use the hex key to remove them
from the axle before assembling the wheels.
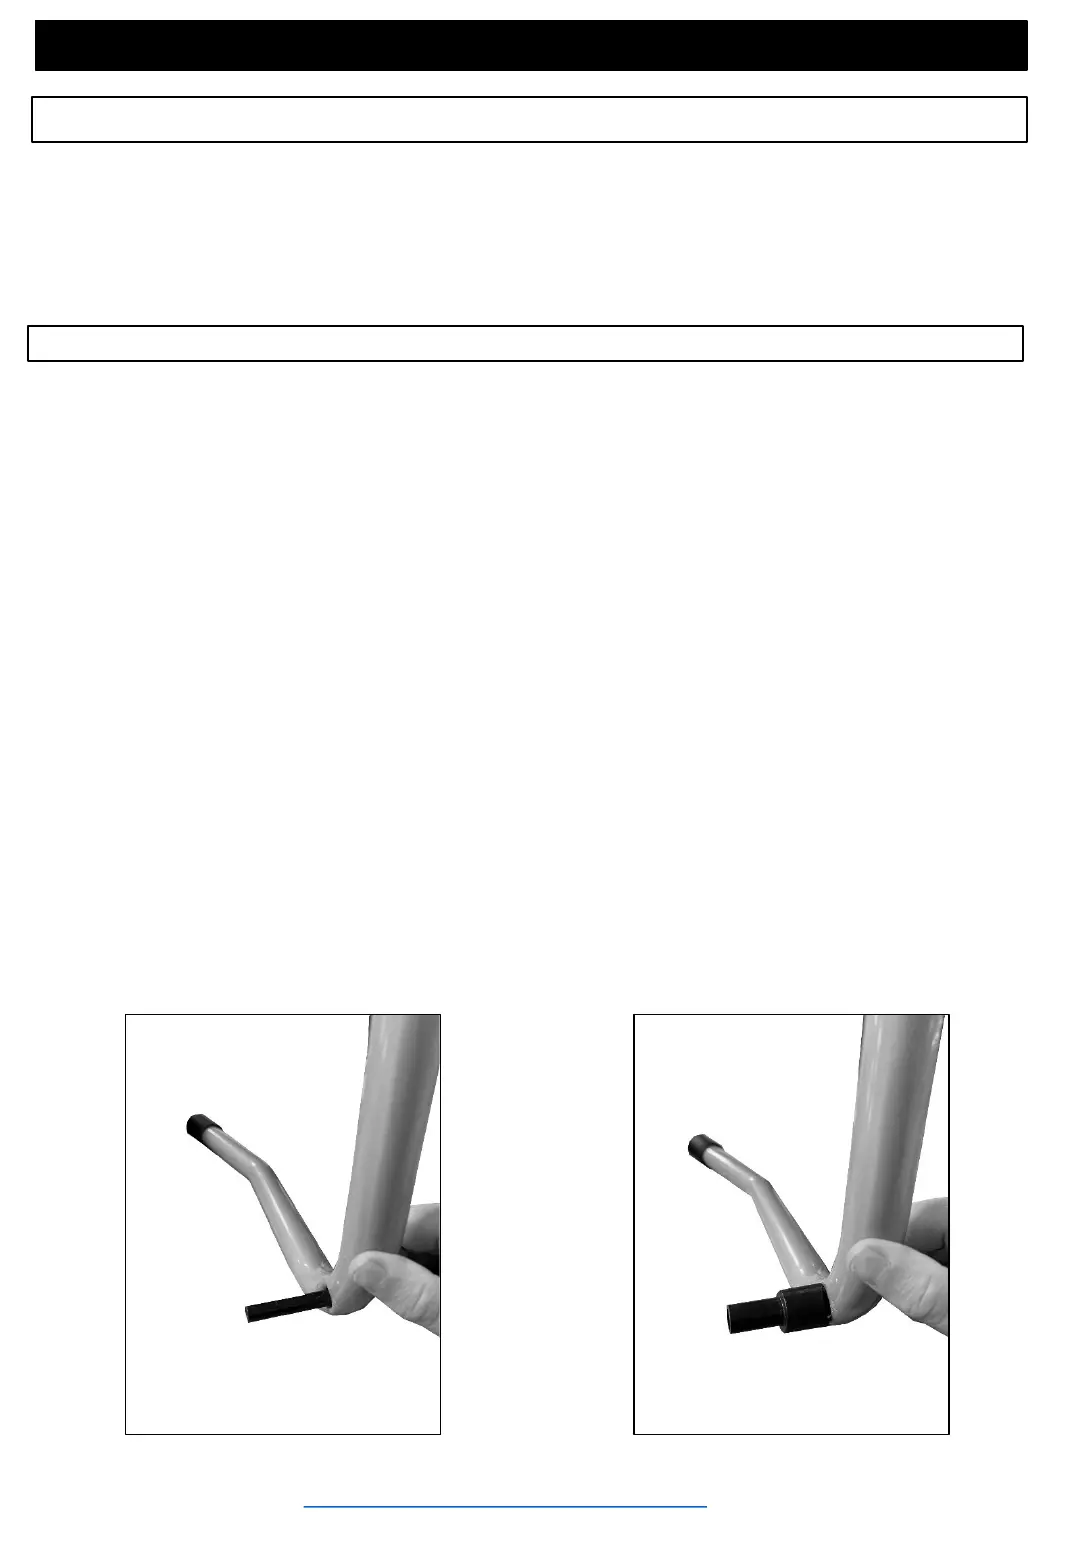
1. Slide the end of the axle through the hole located in the left bracket.
2. Slide the bushing over the area of the axle that has been pushed through the
bracket (Pictured below).
NOTE: When fitting the bushing across the axle, ensure the curvature of the bushing
fits the contour of the bracket.
1. 2.
Bekijk gratis de handleiding van Hyundai HYSH2800E, stel vragen en lees de antwoorden op veelvoorkomende problemen, of gebruik onze assistent om sneller informatie in de handleiding te vinden of uitleg te krijgen over specifieke functies.
Productinformatie
| Merk | Hyundai |
| Model | HYSH2800E |
| Categorie | Niet gecategoriseerd |
| Taal | Nederlands |
| Grootte | 5466 MB |


