HP ProDesk 2 G1a E handleiding
Handleiding
Je bekijkt pagina 46 van 125
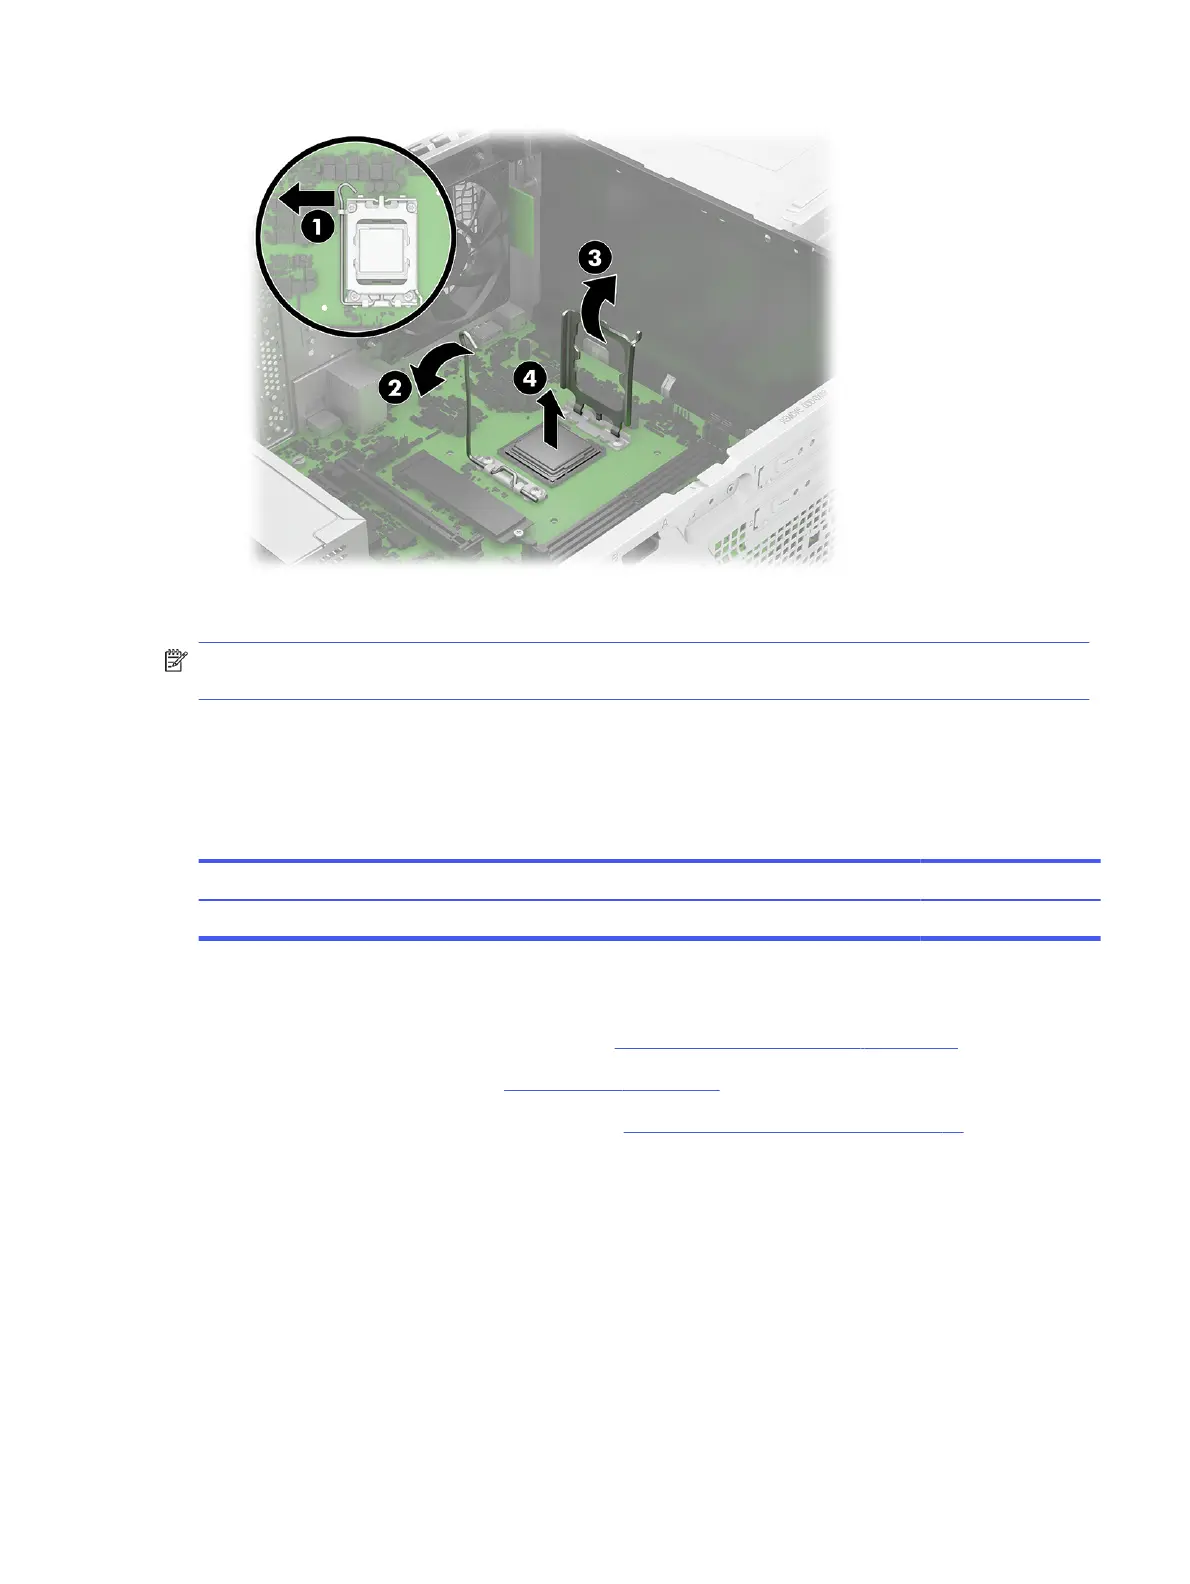
To replace the processor, reverse the removal procedures.
NOTE: After installing a new processor onto the system board, always update the system ROM to
ensure that the latest version of the BIOS is being used on the computer.
Rear USB port assembly
To remove the rear USB port assembly, use these procedures.
Table 4-12
Rear USB port assembly description and part number
Description Spare part number
Rear USB port assembly P24514-001
Before removing the rear USB port assembly, follow these steps:
1. Prepare the computer for disassembly (see Preparation for disassembly on page 19).
2. Remove the access panel (see Access panel on page 19).
3. (UMA models only) Remove the fan duct (see Fan duct (UMA models only) on page 22).
Remove the rear USB port assembly:
1. From the back of the computer, remove the screw (1) that secures the port assembly to the
computer.
2. Disconnect the USB port cable from the system board connector (2).
Rear USB port assembly
39
Bekijk gratis de handleiding van HP ProDesk 2 G1a E, stel vragen en lees de antwoorden op veelvoorkomende problemen, of gebruik onze assistent om sneller informatie in de handleiding te vinden of uitleg te krijgen over specifieke functies.
Productinformatie
| Merk | HP |
| Model | ProDesk 2 G1a E |
| Categorie | Niet gecategoriseerd |
| Taal | Nederlands |
| Grootte | 16582 MB |


