Handleiding
Je bekijkt pagina 33 van 56
33
22) Grip wrench B in a new position on the tension rod and hold (prepare for tension
pressure), then using wrenchA, loosen the lock nut.
23) Once loose, turn wrench B counter-clockwise to add tension on the tension rod. Without
releasing the pressure on wrench B and the tension rod, use wrench A to tighten the
lock nut.
24) Verify swing. Open the door and test the opening and closing tension. Adjust as needed
until the door opens and closes correctly.
25) Move the control panel hole plugs to the other side, then replace and secure the control
panel and front panel in their correct positions. Verify light switch and lock function and
adjust as necessary.
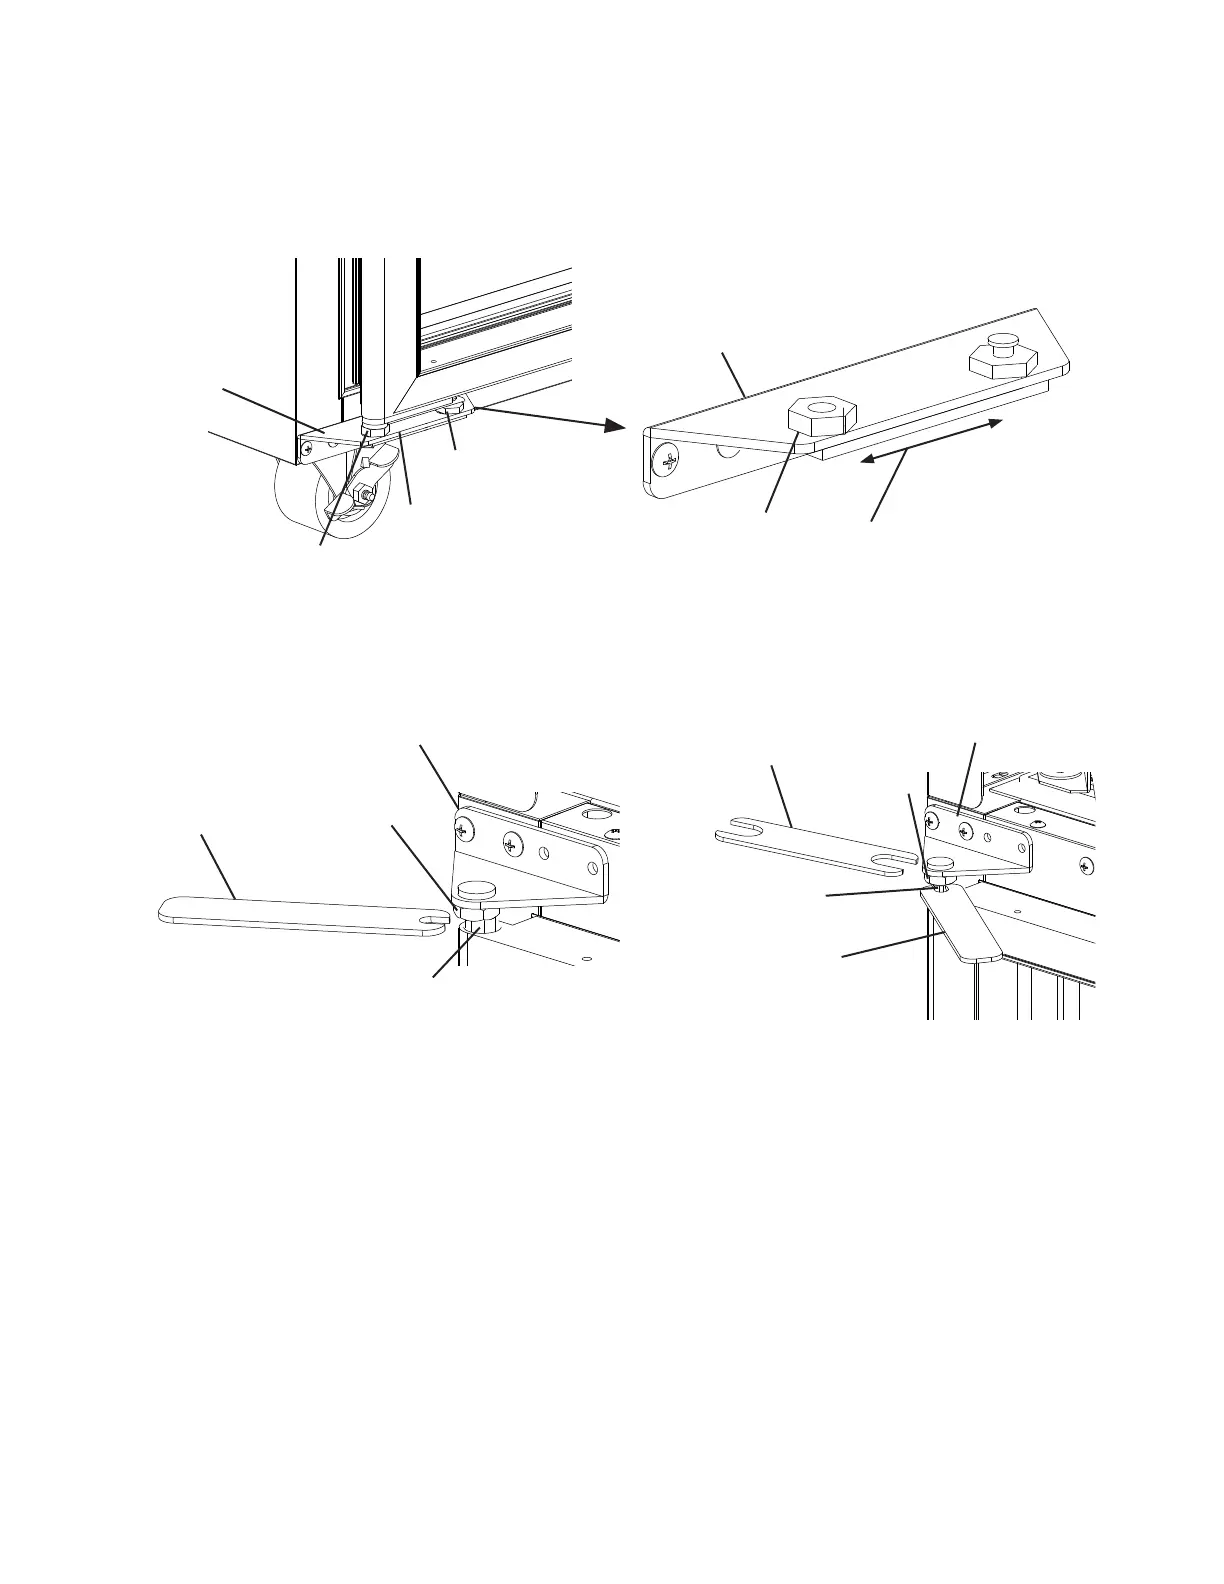
Fig. 50
Fig. 51
Backer Plate
Wrench B
Upper Hinge Bracket
Lower Hinge
Bracket
Lower Hinge
Arm
Slide left or right to level door
Reference Lines
Upper Hinge Bracket
21) Place wrench B on the tension rod and rotate counter-clockwise to add tension to the
tension rod. Without releasing the pressure on wrench B and the tension rod, use
wrench A to tighten the lock nut. See Fig. 51.
19) Close the door. Make sure the upper hinge bracket lock nut is loose.
20) Level the door by sliding the backer plate to the left or to the right, then tighten the slide
pin and bottom hinge bushing with a wrench until it is tight. See Fig. 50. Next, mark a
reference line on the bracket and bushing then tighten the tting an additional 1/8 turn.
Lower Hinge
Bushing
Side Pin
Lower Hinge
Bushing
Lower Hinge
Bracket
Side Pin
Backer Plate
Backer Plate
Lock Nut
Tension Rod
Wrench A
Lock Nut
Tension Rod
Wrench B
Bekijk gratis de handleiding van Hoshizaki Steelheart F2A-FSN, stel vragen en lees de antwoorden op veelvoorkomende problemen, of gebruik onze assistent om sneller informatie in de handleiding te vinden of uitleg te krijgen over specifieke functies.
Productinformatie
| Merk | Hoshizaki |
| Model | Steelheart F2A-FSN |
| Categorie | Vriezer |
| Taal | Nederlands |
| Grootte | 5596 MB |


