Hobart LXNR-2 handleiding
Handleiding
Je bekijkt pagina 9 van 32
– 9 –
3.
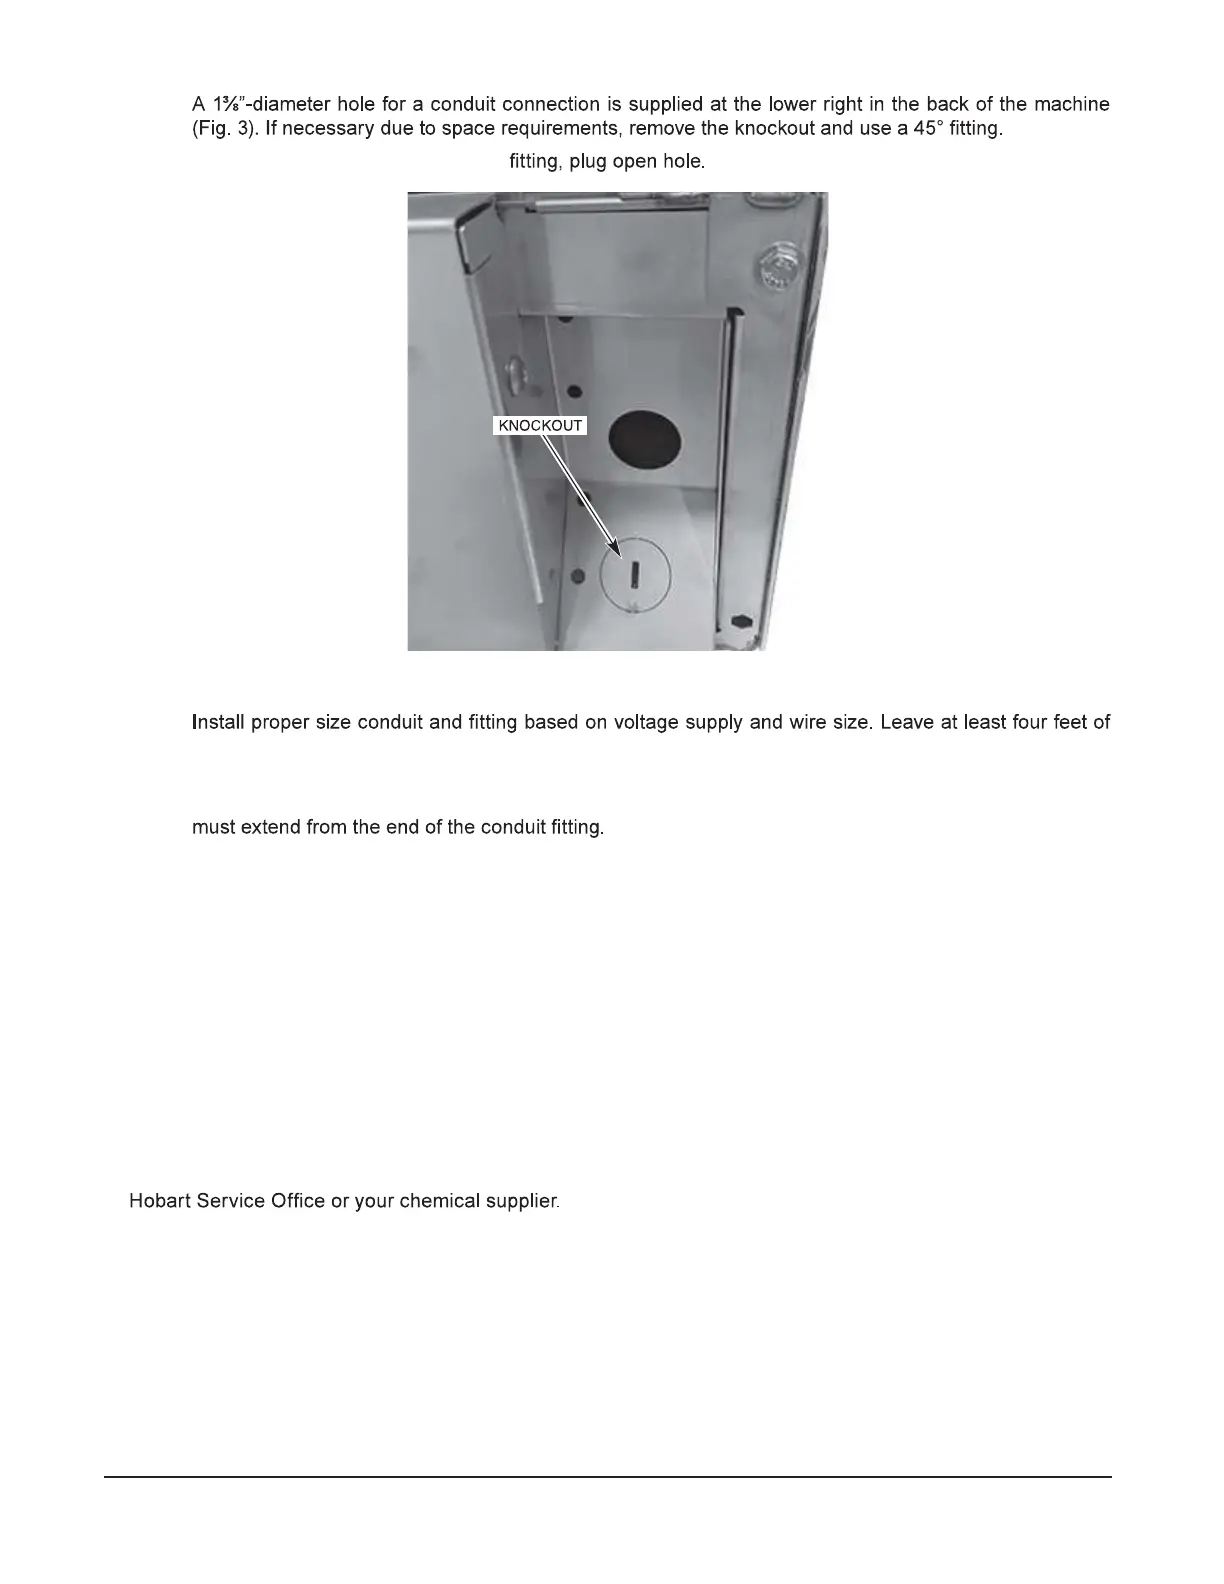
NOTE: If using knockout with a 45°
4.
electrical line between wall connection and machine. This allows machine to be pulled away from the
wall for cleaning and/or servicing.
5. Feed wires thru base of unit to front of unit. At least 24” and not more than 28” of the required wire size
6. Make electrical connections according to wiring diagram supplied with the machine and secure wires to
the machine service connection. Keep excess wire in the base of the unit to a minimum.
7. Replace the left side panel, top of unit, and lower front panel. Re-install the three screws located behind
the door and the two screws at the bottom of the front panel.
CHEMICALS
Detergent and Rinse Aid
Use only commercial-grade detergents recommended by your chemical professional. Do not use detergents
formulated for residential dishwashers.
The detergent and rinse aid pump "ON" times are factory-set. If adjustments are required, contact your local
Place the detergent and rinse aid containers (which are obtained from an independent supplier) in a location
where the delivery tubes will reach them.
Remove the detergent bottle cap and put the red delivery tube in the detergent container.
Remove the rinse aid bottle cap and place the blue delivery tube in the rinse aid container.
Be sure to push the delivery tube standpipes completely to the bottom of each container. Check to make sure
there are no obstructions or kinks in the delivery tubes.
Fig. 3
Bekijk gratis de handleiding van Hobart LXNR-2, stel vragen en lees de antwoorden op veelvoorkomende problemen, of gebruik onze assistent om sneller informatie in de handleiding te vinden of uitleg te krijgen over specifieke functies.
Productinformatie
| Merk | Hobart |
| Model | LXNR-2 |
| Categorie | Niet gecategoriseerd |
| Taal | Nederlands |
| Grootte | 4923 MB |
