Handleiding
Je bekijkt pagina 66 van 84
66
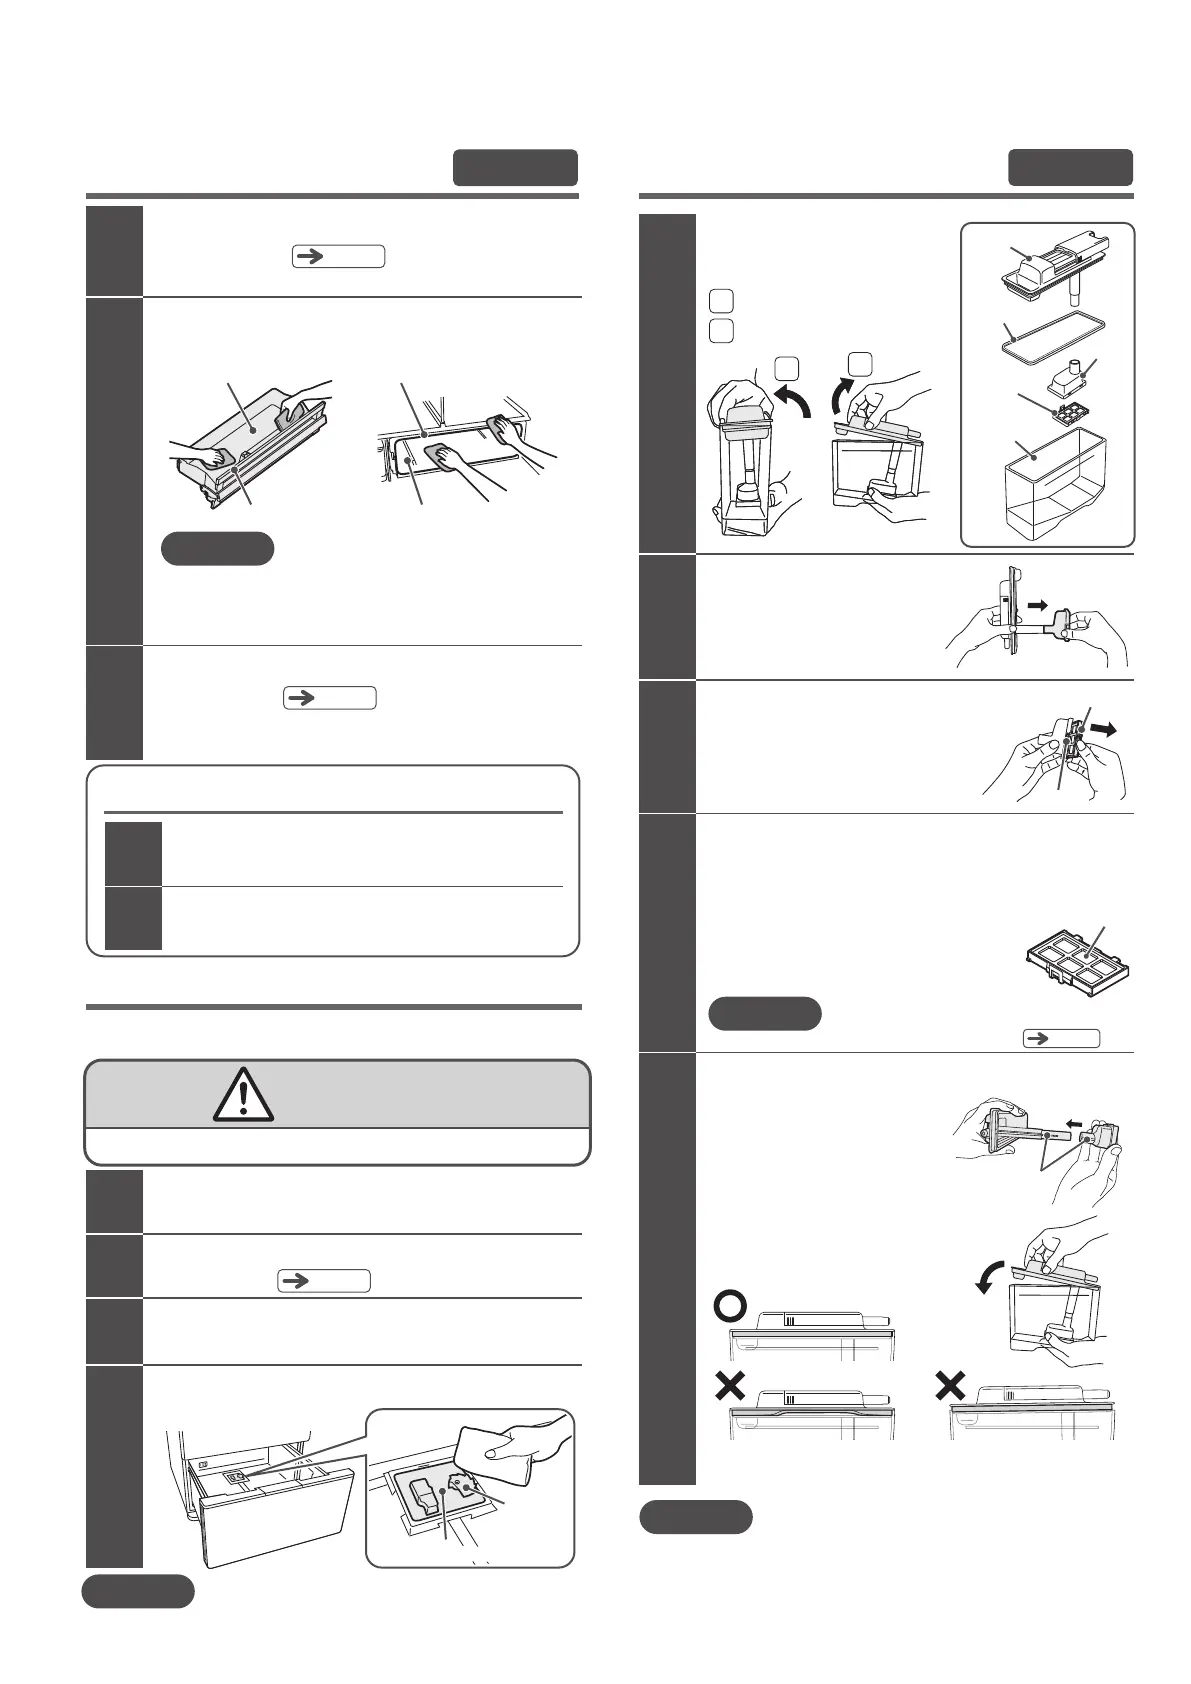
Water Supply Tank
Take out the water supply
tank and remove the lid.
1
Remove the gasket and
case from the lid.
2
Pull the case to remove it
from the lid.
Remove the water filter from the case.
3
Pull the knob of the water filter
to remove it from the fork, and
remove the case.
Wash each part of the water supply tank
with water.
4
Use a soft sponge.Do not use detergent, etc.
Attach each part of the water supply tank, add water,
and position it in place.
5
Insert the lid from the rear side and
close it in the direction of the arrow.
Insert the lid and case so that
the protrusions are aligned.
If you will not be using the automatic ice maker for a long time, after
cleaning the water supply tank, dry it carefully and position it in place.
(It is especially important to dry the water filter thoroughly.)
The gasket is twisted.
The lid is not closed properly
and is lifted up.
Protrusions
1
2
Lift the front side of the lid.
Tilt the lid in the direction of the arrow.
1
2
Rinse the dirty area with a soft sponge.
Wipe off the moisture with a dry cloth
and allow it to air dry.
1
2
If the Vacuum Compartment gasket is extremely dirty
*
Do not use detergent, etc.
Pull the Vacuum Case forward.
Wipe each part with a soft cloth moistened with warm water.
2
3
1
How to remove
Please remove the food stored in the Vacuum Case.
If the Vacuum Compartment gasket is loose or the Vacuum Case
rattles, the vacuum cannot be maintained.
Auto Drawer
When a food is dropped/trapped and/or food juice collects on the
upper part of the Auto Drawer unit, please take care of those.
Remove the dropped or trapped food, etc.
Wipe the collected food juice with soft and dry cloth.
2
3
4
1
Be sure to remove the power plug from the outlet.
Remove each case of the Lower Freezer or the Vegetable
Compartment.
Linkage
part
Auto Drawer unit
Do not splash water on the Auto Drawer unit. It may cause a malfunction.
Do not disassemble the Auto Drawer unit. It may cause an injury or malfunction.
Be sure not to move the linkage part.It may cause a malfunction.
●
●
●
WARNING
Be sure to remove the power plug from the outlet to prevent injury.
* Do not use a sponge when washing
the filter part of the water filter.
Wash it out with water gently.
MAINTENANCE
(
Continued
)
Vacuum Compartment
Once a month
Pg
.68
*
Do not use detergent, etc.
Aluminum tray
Vacuum Compartment gasket
Vacuum gasket receptacle
Vacuum Container
Request
●
●
Gently wipe the inside top of the compartment (LED lamp inside the compartment).
Wiping with excessive force may cause breakage.
If you use detergent, etc., the Vacuum Compartment gasket may break, deform,
or become discolored, and may not be able to maintain a vacuum state.
Attach the Vacuum Case.
How to attach
Pg
.68
Pg
.69
Note
Once a week
Front
side
Rear
side
Lid
Gasket
Case
Water
filter
Water supply
tank
Front
side
Rear
side
Fork
Knob
Note
The water filter should be replaced
about every 3 to 4 years.
Pg
.78
Front side
Rear
side
Request
Filter
Bekijk gratis de handleiding van Hitachi R-GW670TV, stel vragen en lees de antwoorden op veelvoorkomende problemen, of gebruik onze assistent om sneller informatie in de handleiding te vinden of uitleg te krijgen over specifieke functies.
Productinformatie
| Merk | Hitachi |
| Model | R-GW670TV |
| Categorie | Koelkast |
| Taal | Nederlands |
| Grootte | 15601 MB |