Handleiding
Je bekijkt pagina 4 van 16
3
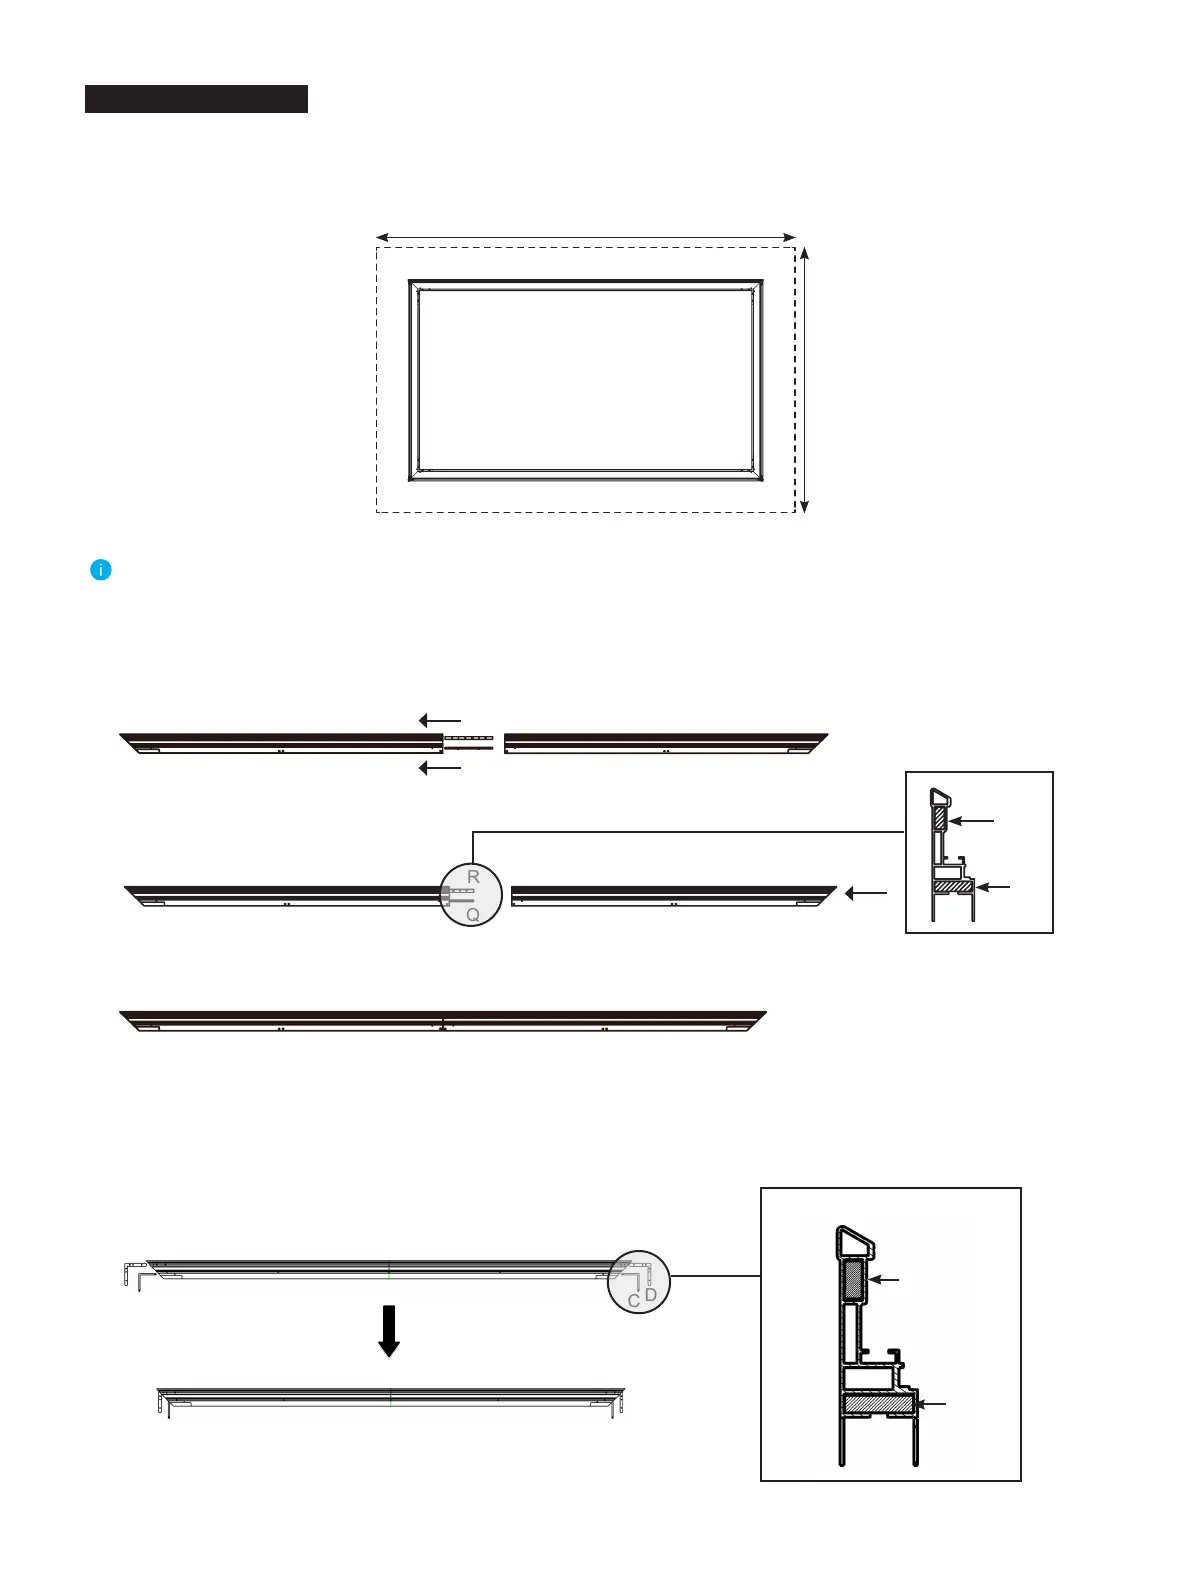
Place the
Cloth liner (F)
sponge on clean area on the ground to assemble the screen.
1. Connect
Long Inner Frame (17 springs included) (A1)
and
Long Inner Frame (A2)
with
Connector (Q)
and
Connector
(R)
to an integrated long inner frame, tighten
M4x6 Screws (E)
to secure it. The connecting procedures are as follows:
2.
Insert the
L Corner Piece (C)
, and then insert
L
Elbow Joint (D)
(front side is up) into each end of the
Long Inner Frame
(A1 , A2)
as shown below.
A2
D
D
D
C
D
D
C
C
C
C
Frame Assembly
Note:
The installation space should be at least 3.5m x 2.5m ( 137.8 inches x 98.43 inches).
≥ 3.5m (137.8 inches)
≥2.5m (98.43 inches)
A1
A2
A1
1) Use
M4x6 Screws (E)
to connect
Connector (Q)
and
Connector (R)
with
Long Inner Frame (17 springs included) (A1)
.
2) Insert
Connector (Q)
and
Connector (R)
to
Long Inner Frame (A2)
.
A1
R
Q
A2
A1 A2
R
Q
3) Use
M4x6 Screws (E)
to fix
Connector (Q)
and
Connector (R)
with
Long Inner Frame (A2)
.
A1
A2
Tips:
Fastening methods of screws refer to step 4.
R
Q
Prole
Prole
Bekijk gratis de handleiding van Hisense 120L9HTUKA, stel vragen en lees de antwoorden op veelvoorkomende problemen, of gebruik onze assistent om sneller informatie in de handleiding te vinden of uitleg te krijgen over specifieke functies.
Productinformatie
| Merk | Hisense |
| Model | 120L9HTUKA |
| Categorie | Televisie |
| Taal | Nederlands |
| Grootte | 1800 MB |


