Hinkley Lighting 992002FBN handleiding
Handleiding
Je bekijkt pagina 3 van 15
Safety Cable
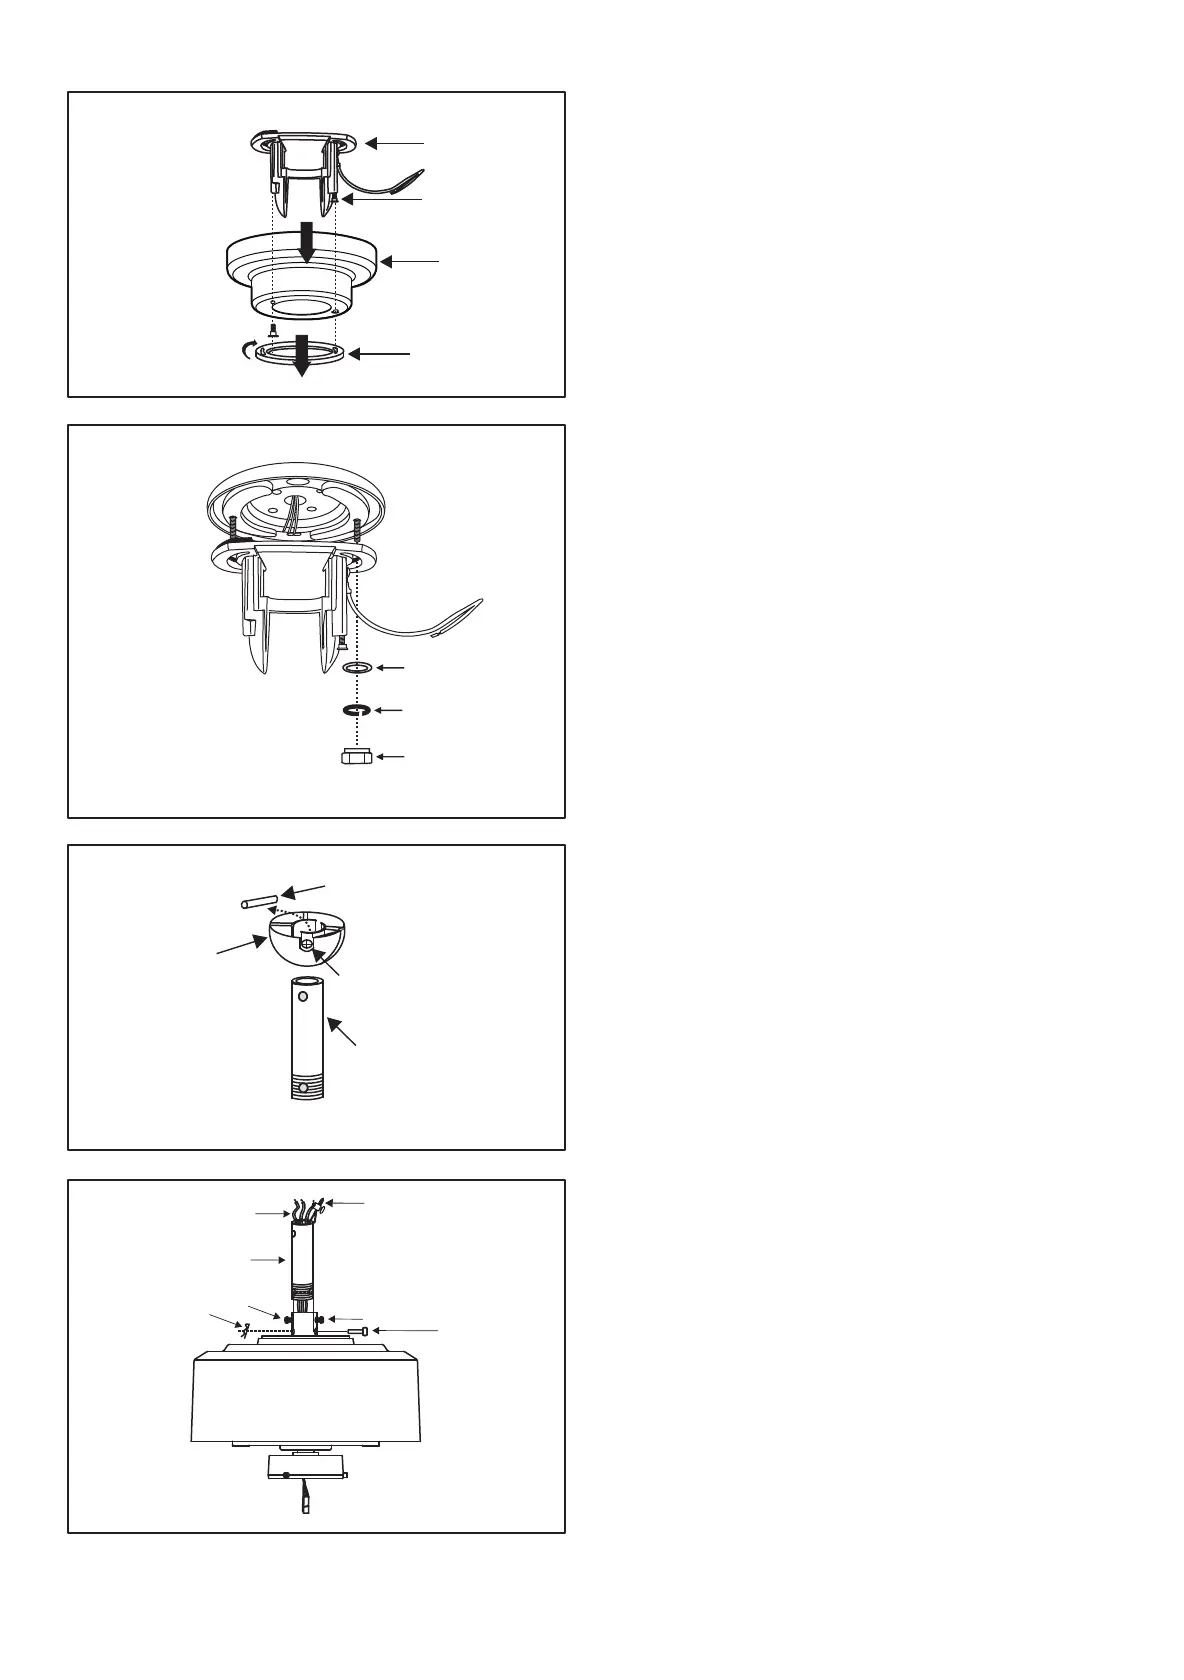
Fig. 7
Fig. 8
Fig. 9
Fig. 10
1. Remove the canopy cover from the canopy by
turning the cover counter clockwise. Remove the
hanger bracket from the canopy by removing the 1 of
2 screws from the bottom of the hanger bracket and
loosening the other one a half turn from the screw
head. This will enable you to remove the hanger
bracket. (Fig. 7)
2. Attach the hanger bracket to the mounting plate
using the two hex nuts and washers and lock
washers provided. (Fig. 8)
DO NOT tighten completely at this point. Allow
hanger bracket to rotate but hold the weight of the
ceiling fan.
3. If you plan to use the downrod packaged with your
ceiling fan, remove the hanger ball by loosing the set
screw, unscrewing the safety pin and unscrewing the
hanger ball. If you are using a different downrod, skip
to the next step. (Fig. 9)
4. Loosen the two set screws in the motor coupling
until the inside channel is clear of the screws. Remove
the Safety Pin and Locking Clip in the top of the motor
coupling. (Fig. 10)
5. Carefully feed the fan lead wires and safety cable
up through the downrod. Thread the downrod into the
motor coupling until the Safety Pin holes are aligned.
(Fig. 9) Next, replace the Safety Pin and secure with
the Locking Clip. Securely tighten both set screws.
(Fig. 10)
INSTALLING THE HANGING BRACKET TO
MOUNTING PLATE ASSEMBLY
Hanger
bracket
Ceiling
canopy
Screws
Canopy
cover
Fig. 5
Flat washers
Lock washers
Hex nuts
Downrod
Hitch pin
Hanger
ball
Set screw
Supply wires
Downrod
Hitch pin
Lock pin
Set screws
Set screws
Bekijk gratis de handleiding van Hinkley Lighting 992002FBN, stel vragen en lees de antwoorden op veelvoorkomende problemen, of gebruik onze assistent om sneller informatie in de handleiding te vinden of uitleg te krijgen over specifieke functies.
Productinformatie
| Merk | Hinkley Lighting |
| Model | 992002FBN |
| Categorie | Verlichting |
| Taal | Nederlands |
| Grootte | 2088 MB |