HiLook THC-B129-MS handleiding
Handleiding
Je bekijkt pagina 19 van 25
Screw B
Screw A
Trim Ring
Rotation Position
[0° to 360°]
Tilt Position
[0° to 180°]
Pan Position
[0° to 360°]
Figure 2-43 3-Axis Adjustment
4). Loosen the trim ring to adjust the pan position
[0° to 360°].
5). Loosen screw A to adjust the tilt position [0° to
180°].
6). Loosen screw B to adjust the rotation position [0°
to 360°].
7. Tighten the trim ring and screws to finish the
installation.
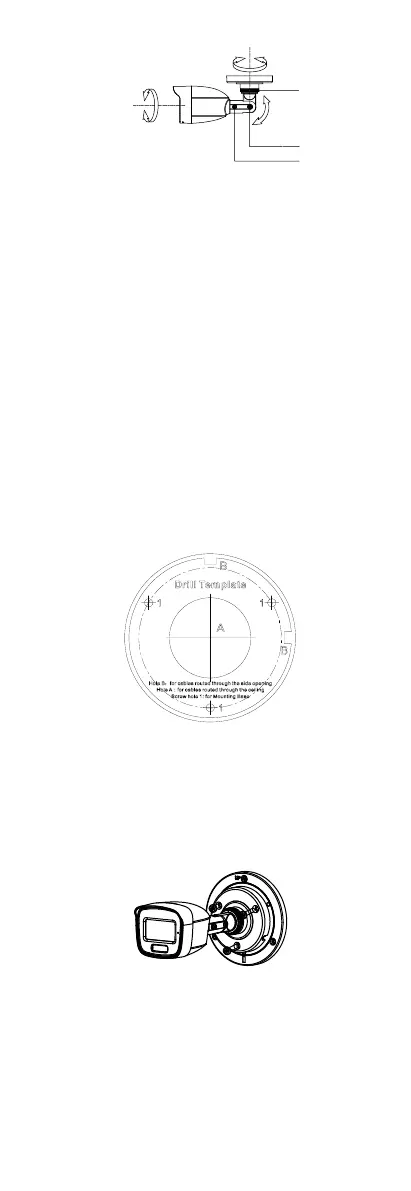
2.4.2 Ceiling/Wall Mounting with Junction Box
Before you start:
You need to purchase a junction box in advance.
Ceiling mounting and wall mounting are similar.
Following steps take wall mounting as an example.
Steps:
1. Paste the drill template for junction box to the place
where you want to install the camera.
2. (Optional) For cement wall, drill the screw holes
with a 5.5 mm drill and insert the supplied wall
plugs.
Figure 2-44 Drill Template for Junction Box
3. (Optional) Drill the cable hole, when the cables are
routed through the wall.
4. Take apart the junction box.
5. Align the screw holes of the camera with those on
the junction box cover. Attach the camera to the
junction box cover with three PM4 × 10 screws.
Figure 2-45 Attach the Camera to the Junction Box
Cover
6. Secure the junction box body on the wall with three
PA4 × 25 screws (supplied).
Bekijk gratis de handleiding van HiLook THC-B129-MS, stel vragen en lees de antwoorden op veelvoorkomende problemen, of gebruik onze assistent om sneller informatie in de handleiding te vinden of uitleg te krijgen over specifieke functies.
Productinformatie
| Merk | HiLook |
| Model | THC-B129-MS |
| Categorie | Bewakingscamera |
| Taal | Nederlands |
| Grootte | 3739 MB |
Caratteristiche Prodotto
| Kleur van het product | Wit |
| Gewicht | 286 g |
| Soort | CCTV-bewakingscamera |
| Materiaal behuizing | Metaal |
| Internationale veiligheidscode (IP) | IP66 |

