Handleiding
Je bekijkt pagina 18 van 24
©2021 Hestan Commercial Corporation
18
EN
LEAK TESTING & ADJUSTMENT
(cont.)
GENERAL
A complete gas tightness check must be performed of all gas-carrying components due to possible
movement during installation, or excessive pressure unknowingly being applied to parts of the unit.
BEFORE TESTINGBEFORE TESTING
• DO NOT SMOKE while leak testing.
• Never leak test with an open flame.
• Make a soap solution of one part liquid detergent and one part water, for leak testing purposes.
• Apply the solution to the gas fittings by using a spray bottle, a brush or small sponge.
• For LP units, always check with a full LP cylinder.
• Check for adequate inlet gas pressure - 7” w.c. for Natural gas, 11” w.c. for LP gas.
Gas pressure from the regulator must be 5” w.c. for Natural gas and 10” w.c. for LP gas.
TO TEST TOP BURNERS
• Make sure all control valves are in the “OFF” position.
• Apply the soap solution described above to all fittings, flex hoses, etc.
• Turn the gas supply ON.
• CHECK ALL CONNECTIONS WHERE YOU APPLIED THE SOAP SOLUTION! Check from the
supply line, up to and including the manifold pipe assembly, regulator, etc. Check ALL the hoses
from end to end. Bending of the hoses may have resulted in small cracks in the hoses which must
be found. Apply the soapy solution liberally to detect any leaks. If hoses are cracked, you will
need to replace them.
• Soap bubbles will appear where a leak is present. If a leak is present, immediately turn off gas
supply, tighten any leaking fittings, turn the gas supply back on, and recheck.
• If you cannot stop a gas leak, turn off the gas supply and call the dealer where you purchased
your appliance.
• DO NOT USE THE APPLIANCE UNTIL ALL CONNECTIONS HAVE BEEN CHECKED AND DO
NOT LEAK!
Once the leak check is done and there are no leaks, proceed to re-install all the top burner sheetmetal
parts, LED boards, etc. that were previously removed in steps 1-7. Don’t forget to re-connect the
ignition wire for the center burner (if equipped).
FOR MODELS WITH GRIDDLES, PROCEED TO LEAK TESTING GRIDDLELEAK TESTING GRIDDLE.
FOR MODELS FEATURING GAS OVEN BURNERS, PROCEED TO
LEAK TESTING OVEN BURNERSLEAK TESTING OVEN BURNERS.
If you do not have a griddle or gas oven burners, restore the electrical power to the unit. Make sure
to turn the gas shut-off valve to the open position.
NOTICE
All the control knobs must be in the
OFF position to prevent unintended
operation at power up.
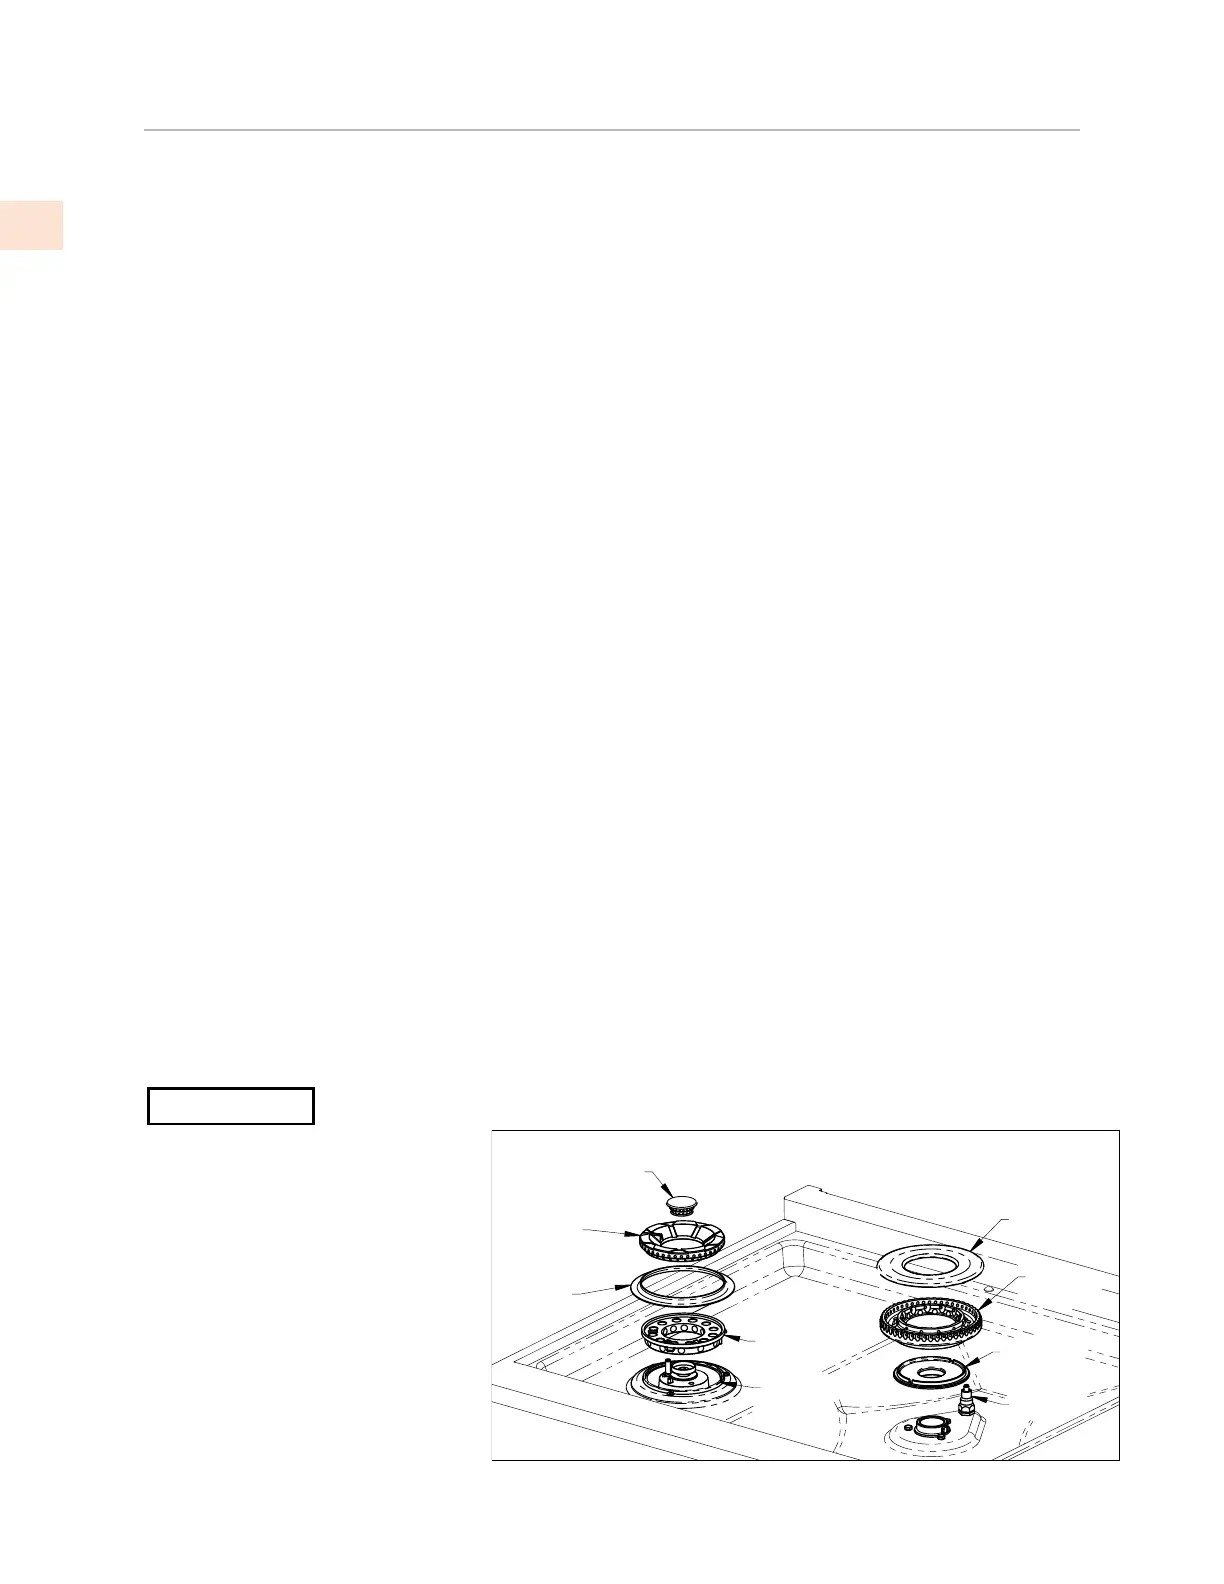
Return all the burner rings and caps
as shown here. Ensure the sealed
burner heads are properly installed
and seated on the burner base as
shown. There are notches on the
burner base and cross ring to help
with alignment. The outer burner
head features a long slot on the
top of the head which aligns with
the spark igniter. Assembly of the
single-flow burner head is similar.
BURNER
RING
BURNER
HEAD
BURNER
BASE
IGNITER
INNER
BURNER
HEAD
OUTER
BURNER
HEAD
BEAUTY
RING
CROSS
RING
BURNER
BASE
DUAL FLOW
BURNER
SINGLE FLOW
BURNER
Bekijk gratis de handleiding van Hestan KRG484GD, stel vragen en lees de antwoorden op veelvoorkomende problemen, of gebruik onze assistent om sneller informatie in de handleiding te vinden of uitleg te krijgen over specifieke functies.
Productinformatie
| Merk | Hestan |
| Model | KRG484GD |
| Categorie | Fornuis |
| Taal | Nederlands |
| Grootte | 13468 MB |