Handleiding
Je bekijkt pagina 10 van 36
10
CWBPM-0525
English
INSTALLATION
Installing the Unit
WARNING
FIRE HAZARD:
• Use caution and avoid hitting condensing unit hoses/
lines when installing unit. Damage caused during
installation is not covered under warranty.
• Condensing unit must be isolated from other electrical
devices in the cabinet with fully sealed partitions.
• DO NOT use installation cabinet for storage of any
items. Cabinet must be used only to keep condensing
unit isolated from all other objects.
• To prevent damage to components, condensing unit
should not be readily accessible to users/operators.
1. Lift the unit out of the shipping frame and carefully lower it
into the countertop cutout.This step requires two or more
people, depending on the unit.
2. Apply NSF-approved silicone sealant around the edge of
the unit to seal it to the countertop.
NOTE: If excessive condensation appears underneath the
countertop during operation, apply polyurethane-based
foam sealant in the gap between the underside of the
countertop and the unit.
3. Install the control panel in the desired location.
• The control panel can be installed on one of three sides
of the condensing unit support frame. Do not obstruct
the air duct in front of the condenser coils.
• The control panel can be installed remotely within 48″
(1219 mm) of the condensing unit. Refer to the “Installing
the Remote Control Panel” procedure in this section.
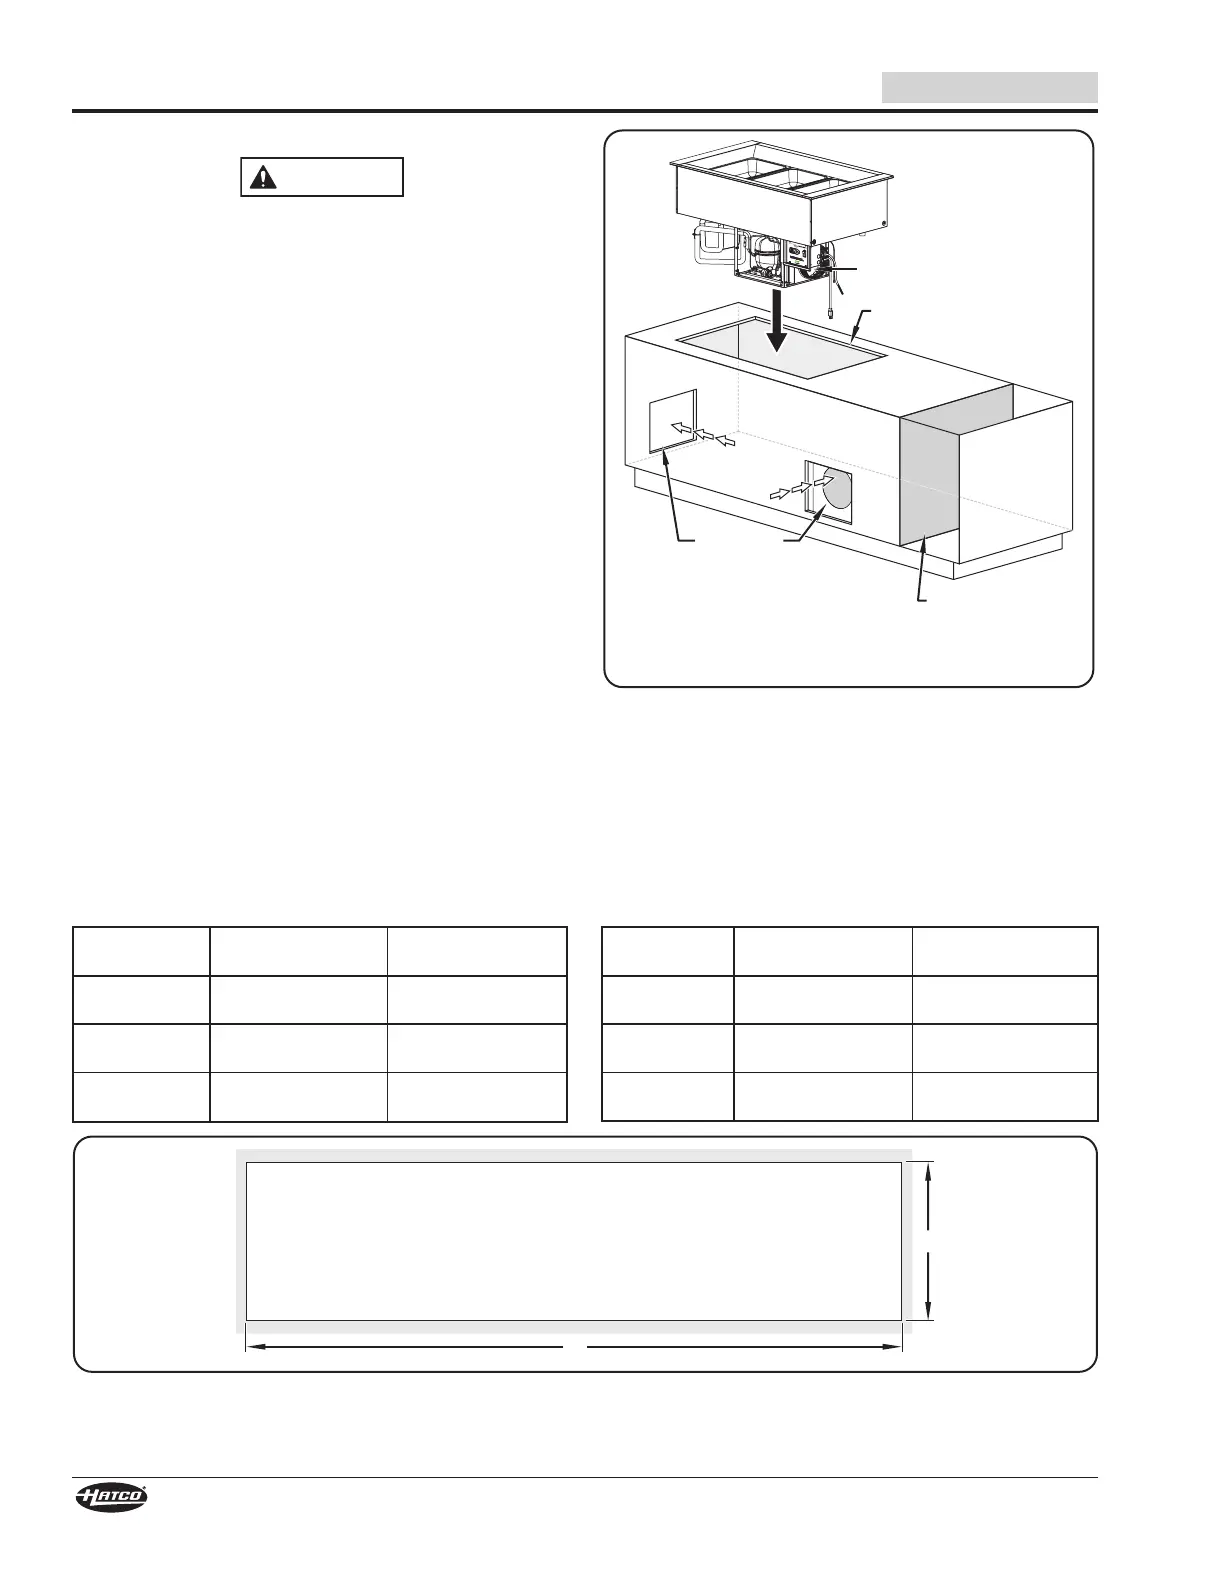
Intake
Air Flow
Condenser Coils
(inside duct collar)
Countertop Cutout
Ventilation
Openings
(on opposite sides
of condenser coils)
Fully sealed
partition between
additional units
inside the same
cabinet.
Exhaust
Air Flow
Exhaust
Air Flow
Installing a CWBP-3 Model in a Closed Cabinet
4. Connect the 1″ drain fitting to a trap and drain line. If a
trap and drain line are not available, a catch pan (not
supplied) must be used under the drain fitting to contain
water draining from the well enclosure.
NOTE: Consult a qualified plumber for proper trap and drain
installation that conforms to local plumbing codes.
Model
Width
(A)
Depth
(B)
CWBP-1 17-1/8″–18″
(435–457 mm)
25-3/16″–26″
(640–660 mm)
CWBP-2 30-1/8″–31″
(765–787 mm)
25-3/16″–26″
(640–660 mm)
CWBP-3 43-1/8″–44″
(1095–1118 mm)
25-3/16″–26″
(640–660 mm)
Model
Width
(A)
Depth
(B)
CWBP-4 56-1/8″–57″
(1426–1448 mm)
25-3/16″–26″
(640–660 mm)
CWBP-5 69-1/8″–70″
(1756–1778 mm)
25-3/16″–26″
(640–660 mm)
CWBP-6 82-1/8″–83″
(2086–2108 mm)
25-3/16″–26″
(640–660 mm)
CWBP-6
B
A
Countertop Cutout Dimensions
Bekijk gratis de handleiding van Hatco CWBP-6, stel vragen en lees de antwoorden op veelvoorkomende problemen, of gebruik onze assistent om sneller informatie in de handleiding te vinden of uitleg te krijgen over specifieke functies.
Productinformatie
| Merk | Hatco |
| Model | CWBP-6 |
| Categorie | Koelkast |
| Taal | Nederlands |
| Grootte | 6069 MB |


