Hager ESR2339010 handleiding
Handleiding
Je bekijkt pagina 86 van 308
84
Technical changes reserved
tehalit.BKB
tehalit.BKB
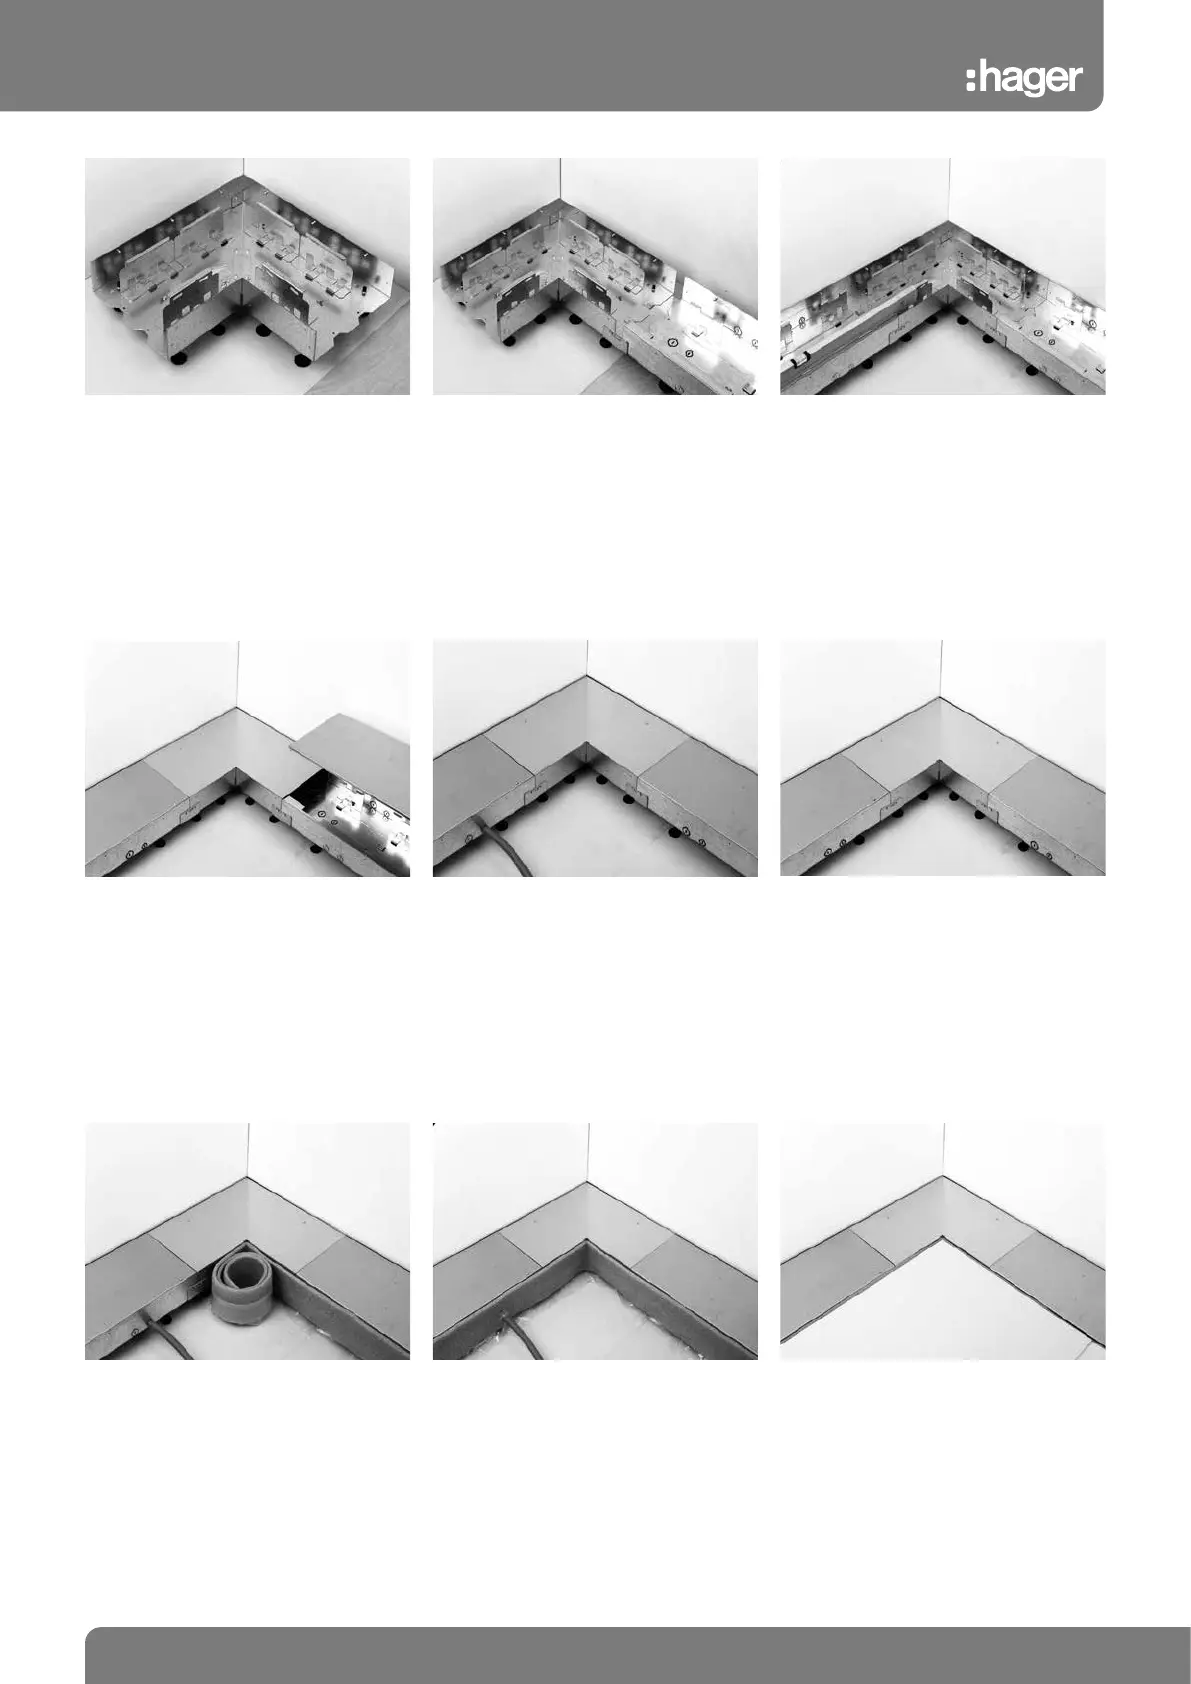
Installation sequence for the trunking system
1. Screw in the set screws with or without
insulating mounts.
2. Align the trunking lower part or inner/outer
corner on the wall side.
3. Joints are connected via couplings. The
ends of the trunking are sealed off with
end pieces. No screed must be allowed to
penetrate inside the trunking. A conductive
connection is established between the
coupling and the lower parts using the
screws enclosed in the packaging of the
coupling.
4. Levelling of the trunking. The trunking it-
self forms the binding setting edge for the
screed, so the levelling process must be
coordinated with the company laying the
screed. Minimum recommendation: 4 lev-
elling screws per running meter.
5. Secure the trunking on the bare floor using
fastening screws.
Minimum recommendation: 2 fastening
screws per running meter.
6. Lay the fitting frame in position.
7. If necessary connect empty tubes; open
the cut-outs beforehand with a slotted
screwdriver. Empty pipes can be con-
nected on four sides.
8. Screw in the fitting frame using the drill-
ing screws enclosed with the trunking (in
the attached foil packaging). These are
screwed directly through the bores in the
fitting frame into the support of the lower
trunking part (without pre-drilling).
10. Screed installation8. Attach the wall insulation strip on the side
of the trunking facing the screed (make
sure that no screed runs under the trunk-
ing). Special precautions must be taken
when using floating screed, hot screed or
aggressive screed. Depending on the floor
covering (e. g. liquid material) it may be
necessary to consult the manufacturer.
9 If necessary, support the side of the trunk-
ing facing the screed to prevent the side
wall from bending under the pressure of
the screed. The screed layer needs to work
the screed cleanly and carefully up to the
level of the top edge of the trunking. Make
sure that no screed or parts of the floor
covering (e. g. liquid material) can run into
the trunking.
Bekijk gratis de handleiding van Hager ESR2339010, stel vragen en lees de antwoorden op veelvoorkomende problemen, of gebruik onze assistent om sneller informatie in de handleiding te vinden of uitleg te krijgen over specifieke functies.
Productinformatie
| Merk | Hager |
| Model | ESR2339010 |
| Categorie | Niet gecategoriseerd |
| Taal | Nederlands |
| Grootte | 89702 MB |
Caratteristiche Prodotto
| Kleur van het product | Wit |
| Breedte | 45 mm |
| Diepte | 40 mm |
| Duurzaamheidscertificaten | RoHS |
| Aantal | 10 |


