Handleiding
Je bekijkt pagina 32 van 36
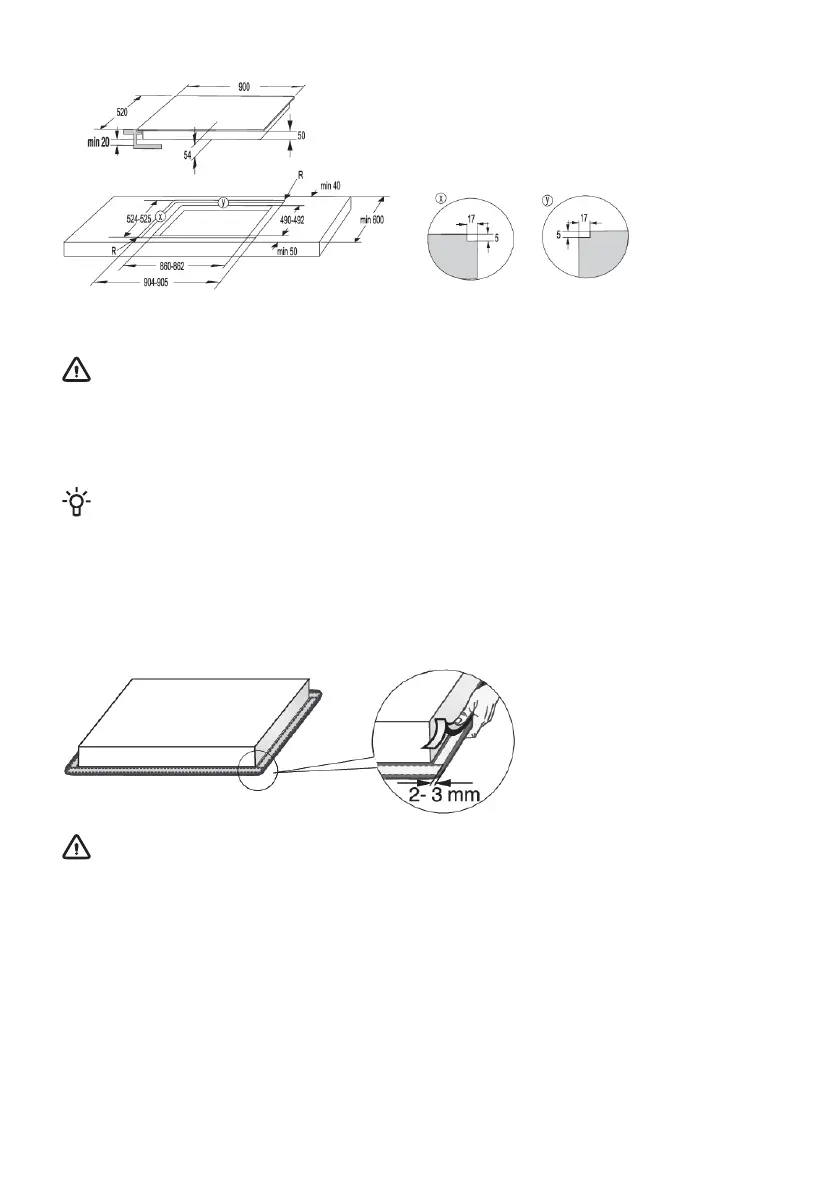
90cm
WARNING!
If the oven is installed under a flush-mounted cooking hob, then the worktop thickness should
be at least 40 mm.
Fitting the foam gasket
INFORMATION!
Some appliances come with the gasket already fitted!
Before installing the appliance into a kitchen worktop, attach the foam gasket supplied with the
appliance to the bottom side of the glass ceramic hob. Remove the protective film from the gasket.
Attach the gasket to the bottom side of the glass (2–3 mm away from the edge). The gasket has to
be applied along the entire edge of the glass. The gasket may not overlap in the corners. When fitting
the gasket, make sure it is not damaged by or in contact with any sharp objects.
WARNING!
Do not install the appliance without the gasket!
32
Bekijk gratis de handleiding van Gorenje IT641BSC, stel vragen en lees de antwoorden op veelvoorkomende problemen, of gebruik onze assistent om sneller informatie in de handleiding te vinden of uitleg te krijgen over specifieke functies.
Productinformatie
| Merk | Gorenje |
| Model | IT641BSC |
| Categorie | Fornuis |
| Taal | Nederlands |
| Grootte | 2296 MB |
Caratteristiche Prodotto
| Apparaatplaatsing | Ingebouwd |
| Soort bediening | Touch |
| Kleur van het product | Zwart |
| Ingebouwd display | Ja |
| Gewicht | 8500 g |


