GLP Fusion Creos handleiding
Handleiding
Je bekijkt pagina 19 van 33
www.glp.de
Rev. 20240917-01 19
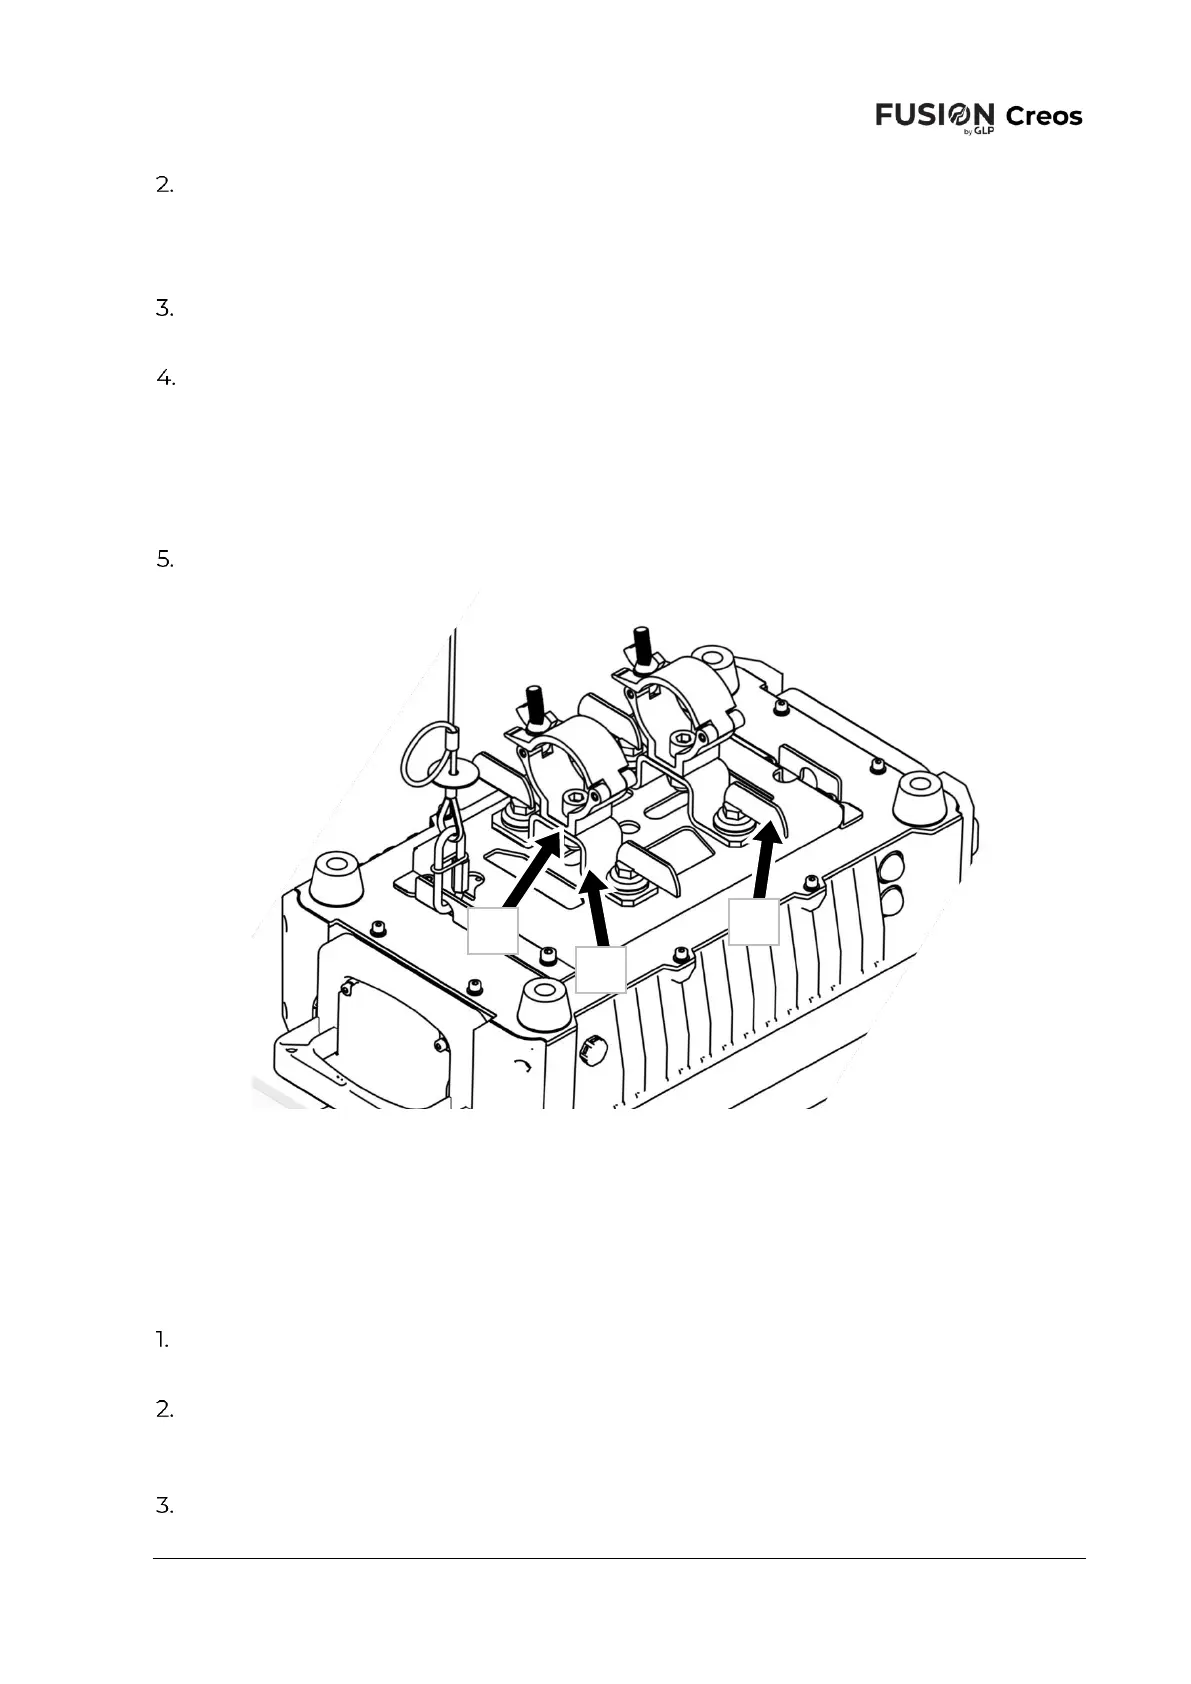
See Figure 6. Bolt a rigging clamp securely to each of the two rigging brackets A
that are supplied with the fixture using high-tensile steel screws or bolts and
self-locking nuts with washers passed through the central holes B in the rigging
brackets.
Fasten the two brackets A to the bottom of the base using two quarter-turn
fasteners C per bracket. Turn each fastener a full 90° to lock it.
Hold the fixture up to the truss and use the rigging clamps to fasten the fixture
securely onto the truss chord.
If there is any risk that the fixture will cause injury or damage if it falls,
secure it with a safety cable that is approved for the weight of the
fixture, rigging hardware, cables etc. as described in ‘
Securing the fixture with a safety cable’ on page 17.
It is also possible to fix the rigging clamps directly to the bracket on the base of the
fixture to reduce the mounting height or for permanent installations.
Check that the truss or pipe is secure and can safely hold ten times the weight
that it will support.
See Figure 7. Bolt a rigging clamp securely to each of the two slots A in the
mounting plate on the base of the unit using two M10 high-tensile steel screws
or bolts and self-locking nuts with washers.
Proceed as from step 4 above.
Figure 6. Rigging brackets
A
C
B
Bekijk gratis de handleiding van GLP Fusion Creos, stel vragen en lees de antwoorden op veelvoorkomende problemen, of gebruik onze assistent om sneller informatie in de handleiding te vinden of uitleg te krijgen over specifieke functies.
Productinformatie
| Merk | GLP |
| Model | Fusion Creos |
| Categorie | Verlichting |
| Taal | Nederlands |
| Grootte | 5720 MB |


